Welcome to Logos Red, I go by logos and:
Want to create your own VPN in any region?
Today we’ll be taking a look at a way of building our own VPN through the use of a simple bash script using AWS.
This will help us in my next guide by allowing us to connect to our cloud infrastructure. But this can also be used to bypass censorship, streaming restrictions, etc.
My Promise
This post will finally end your meaningless search for a valid answer, and you will leave with a working personal VPN.
If there are still any questions left, let me know so I can add it to help the next person who will arrive here.
My Goal
To help you improve in less time than it took me and to make sure you leave with what I promised.
I want you to join our community and for this to be a place that you revisit often.
Requirements
Access to a terminal (I’ll be using Linux)
A free AWS account: https://aws.amazon.com/
What we’ll be doing
At a very basic level, all a VPN consists of is a machine that allows us to connect to a specific network to forward our internet connection through.
To achieve this we can simply deploy an Amazon EC2 instance and configure it to act as our NAS (Network Access Server).
Step 1: Configuring the AWS CLI
We need to configure the AWS CLI to simplify the process of deploying the OpenVPN instance into a few CLI commands instead of using the GUI.
You can follow my tutorial here to configure your AWS CLI.
But make sure to give it a default location close to you as that’s where your VPN will be deployed.
Pick a region from here: AWS Regions
Step 2: Deploying our EC2 instance
Going forward I’ll be using the CLI but you can just as well use the GUI from the AWS Console website https://console.aws.amazon.com
We’ll be using the CLI to show how tedious it can be compared to using Terraform, which is what we’ll be using in our next tutorial and to better understand how the whole infrastructure is deployed.
When using every AWS CLI command you’ll get a JSON output in which I’ll mention what to note down.
Deploying a VPC along with subnets and internet gateway
First we’ll deploy a VPC in which the EC2 instance will be launched along with a pair of subnets
aws ec2 create-vpc --cidr-block 10.0.0.0/16Here note down the VpcID as we’ll be using it for the following command:
aws ec2 create-subnet --vpc-id <vpcId> --cidr-block 10.0.1.0/24Now note down the SubnetId, we’ll be making this subnet public so we can SSH into it.
aws ec2 create-subnet --vpc-id <vpcId> --cidr-block 10.0.0.0/24Next we’ll create an internet gateway that will allow us to access the internet
aws ec2 create-internet-gatewayNote down the InternetGatewayId
And now we’ll attach the internet gateway to our subnet
aws ec2 attach-internet-gateway --vpc-id <vpcId> --internet-gateway-id <InternetGatewayId>Now we’ll route the traffic through to the 0.0.0.0/0 which tells AWS to route all unknown external traffic to the internet gateway.
aws ec2 create-route-table --vpc-id Note the RouteTableId
aws ec2 create-route --route-table-id <RouteTableId> --destination-cidr-block 0.0.0.0/0 --gateway-id <InternetGateway>Now we will associate the route table to our subnet and then make the subnet public.
Make sure you use the subnet id for the 10.0.0.1 subnet.
aws ec2 associate-route-table --subnet-id <SubnetId> --route-table-id <RouteTableId>And now to give it a public IP
aws ec2 modify-subnet-attribute --subnet-id <SubnetId> --map-public-ip-on-launchNow we’ll create a key pair that we’ll use to ssh into the EC2 instance. This will be saved on your Desktop and will be used to SSH into the instance.
aws ec2 create-key-pair --key-name AWS-Keypair --query "KeyMaterial" --output text > "OpenVPNServer.pem"Creating a security group
Now we’ll create a security group that holds together the rules for the instance, such as open ports.
Make sure to note down the GroupId
aws ec2 create-security-group --group-name <security-group-name> --description "<description>" --vpc-id <vpcId>And now in that security group we’ll open up port 22 for SSH and port 1194 for OpenVPN
aws ec2 authorize-security-group-ingress \
    --group-id <GroupId> \
    --protocol tcp \
    --port 22 \
    --cidr 0.0.0.0/0

aws ec2 authorize-security-group-ingress \
    --group-id <GroupId> \
    --protocol udp \
    --port 1194 \
    --cidr 0.0.0.0/0
Deploying our EC2 instance
And now we’re finally ready to deploy our EC2 instance with the following command
aws ec2 run-instances --image-id <AMI> --count 1 --instance-type t2.micro --key-name <Keypair-name> --security-group-ids <SecurityGroupId> --subnet-id <SubnetId>Where AMI is the specific Amazon code for a certain operating system
For example we can query all Debian types with the following command:
 aws ec2 describe-images \
    --filters "Name=name,Values=debian*" "Name=virtualization-type,Values=hvm" "Name=root-device-type,Values=ebs" \
    --query 'Images[*].{ImageID:ImageId,Name:Name,Architecture:Architecture,CreationDate:CreationDate}' \
    --output table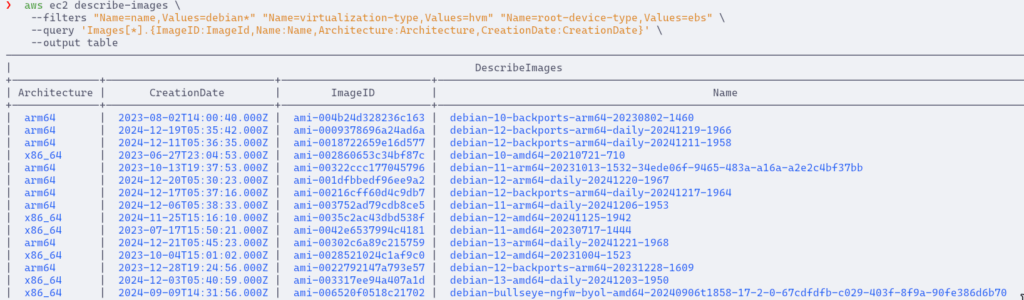
Pick a simple one such as Debian 12 x86_64. I can’t give you the exact code as this all depends on your region.
Now to finally get our IP address and SSH into the box we can use the following command
aws ec2 describe-instances \
    --query 'Reservations[*].Instances[*].{PublicIP:PublicIpAddress,PrivateIP:PrivateIpAddress}' \
    --output table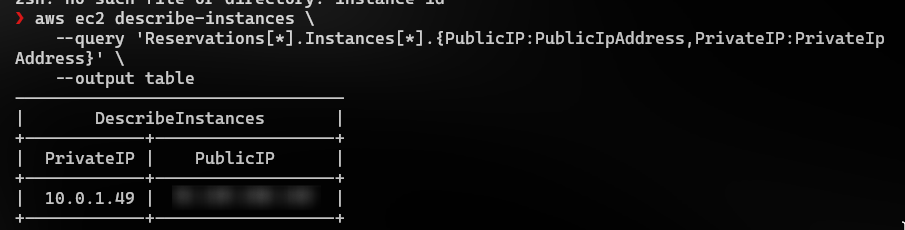
Hopefully, this has proved to be pretty tedious, which is why we’ll be implementing this whole procedure on Azure using Terraform next time.
Which, in turn, will let us automate the process of deploying and destroying the infrastructure.
Step 3: Configuring our OpenVPN server
Now that our EC2 instance is deployed we can SSH into it.
But first let’s change the permissions of our private key
chmod 600 OpenVPNServer.pem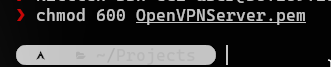
And now we can ssh into the box, the username being “admin”
ssh -i OpenVPNServer.pem admin@<YOUR_IP>
We can use this user to configure our server as it is not the root account but rather a sudoer account.
We’ll start by updating our repositories and installing OpenVPN
sudo apt update
sudo apt upgrade
sudo apt install openvpn
We’ll be using the following script to go ahead and simplify our setup
https://github.com/angristan/openvpn-install/tree/master
You should go ahead and read the bash script and see what it is doing from a high level overview.
Making sure there is no code that is obfuscated or a simple reverse shell isn’t included.
curl -O https://raw.githubusercontent.com/angristan/openvpn-install/master/openvpn-install.sh
chmod +x openvpn-install.sh
And now to run the script as superuser
sudo ./openvpn-install.sh Now make sure to replace the private IP address with your public one
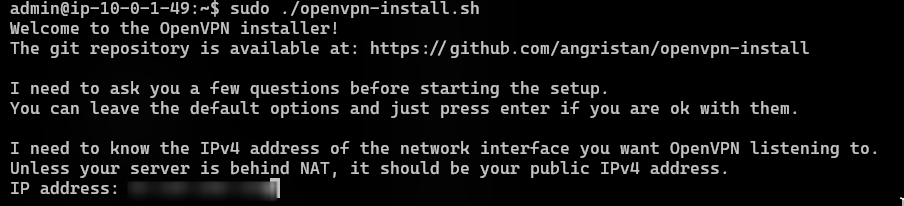
For IPv6 connectivity leave it as n unless you own an IPv6 IP address.
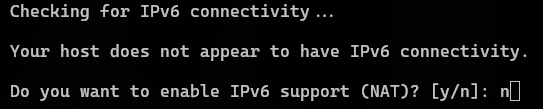
And you can leave everything else default by just pressing enter.
For the client name you can give it any name you want

And then press enter to keep the client passwordless.
And now we have our ovpn file in our directory

The final step is to enable packet forwarding by editing the sysctl file.
sudo vim /etc/sysctl.confAnd uncomment #net.ipv4.ip_forward=1 by deleting the #

And now apply
sudo sysctl -pIf you want to turn your server logless to not keep any data on you, you can edit the config file and change the “verb 3” line to “verb 0”
sudo vim /etc/openvpn/server.confStep 4: Connecting to our OpenVPN server
Now we can copy our OpenVPN file over using scp as such
scp -i OpenVPNServer.pem admin@<YOUR_IP>:<PATH_TO_.ovpn_FILE> .
Now make sure you have the openvpn client installed on your machine and you can run the following to connect to your VPN server:
sudo openvpn --config <YOUR_.ovpn_FILE>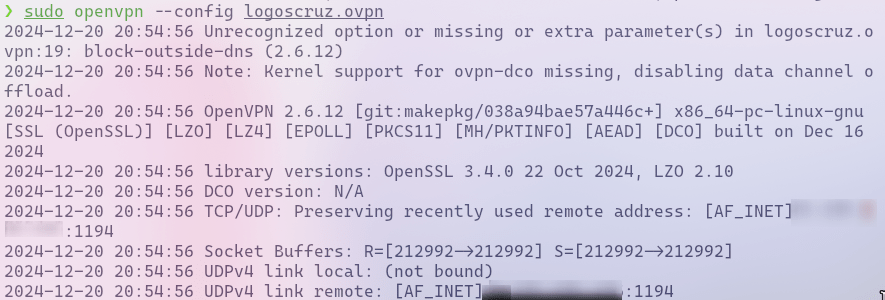
You can verify if everything went right by checking your IP address
curl ifconfig.me
Which should now show the IP address of your EC2 instance.
If your ISP provides you with an IPv6 there is a chance that you might see that instead of the AWS IP.
In which case you’re dealing with an IPv6 leak. Where simply IPv6 traffic is bypassing the VPN tunnel.
To fix this you can either disable IPv6 connectivity on your machine or change the VPN server to accept IPv6.
Step 5: Deleting the resources
You can use the following commands to delete the resources you have created:
aws ec2 terminate-instances --instance-ids <instance-id>
aws ec2 delete-security-group --group-id <group-id>
aws ec2 delete-subnet --subnet-id <subnet-id1>
aws ec2 delete-subnet --subnet-id <subnet-id2>
aws ec2 detach-internet-gateway --internet-gateway-id <igw-id> --vpc-id <vpc-id>
aws ec2 delete-internet-gateway --internet-gateway-id <igw-id>
aws ec2 delete-route-table --route-table-id <route-table-id>
aws ec2 delete-vpc --vpc-id <vpc-id>
With the amount of commands you can clearly see the usefulness in using something like Terraform which automates the process of destroying the infrastructure.
Make sure to delete your resources so that you don’t incur any extra charges.
Conclusion
In this guide, we detailed the process of building your own VPN using AWS EC2 and OpenVPN. Starting with setting up the AWS CLI, we configured it for streamlined deployment and selected a region close to your location for optimal performance.
We proceeded to deploy the necessary infrastructure, including a VPC, subnets, an internet gateway, and a security group with appropriate rules. This setup provided the backbone for our EC2 instance, which was configured to act as a VPN server.
Next, we installed OpenVPN on the instance using a trusted bash script, ensuring packet forwarding was enabled for proper VPN functionality. We then generated an .ovpn file, transferred it securely, and demonstrated how to connect to the VPN from your client device. Steps to resolve potential IPv6 leaks were also included.
Finally, we covered cleanup commands to delete all AWS resources, highlighting the benefits of automation with tools like Terraform for future deployments.
I thank you for reading, and I trust that this guide has proved useful.
More Resources
If you didn’t understand something or you need some help, we have our own Discord community and I currently offer free coaching.
You can also leave us some feedback with what you did not understand and we will make sure to correct it.