Welcome to Logos Red, I go by logos and:
Want to learn what you’re up against as a pentester?
Or do you want to become part of the blue team?
No matter your reasons, knowing both sides aids your cybersecurity journey. Today, we will explore Microsoft Sentinel, a popular cloud SIEM. This will help us understand cybersecurity defense better or what we’re up against as penetration testers.
My Promise
This post will finally end your meaningless search for a valid answer, and you will leave with a working SIEM solution.
If there are still any questions left, let me know so I can add it to help the next person who will arrive here.
My Goal
To help you improve in less time than it took me and to make sure you leave with what I promised.
I want you to join our community and for this to be a place that you revisit often.
Requirements
- A Free Microsoft Azure Account: https://azure.microsoft.com/en-us/pricing/purchase-options/azure-account
- A foundation in cybersecurity, especially terminology: I recommend either the CompTIA Security+ or Google Cybersecurity Professional
What we’ll be doing
In this first tutorial, we simply want to set up a virtual machine, expose it to the public internet, and see what security events we can register in Microsoft Sentinel, which will be our SIEM.
Call it a honeypot.
Then we will start slowly building more, eventually doing API calls using PowerShell and Python, and visualizing the attacks on a map and seeing who our attackers actually are.
More on that in the following tutorials.
Setting up our Virtual Machine
Once you’ve signed up for Microsoft Azure, we can go ahead and set up our victim machine.
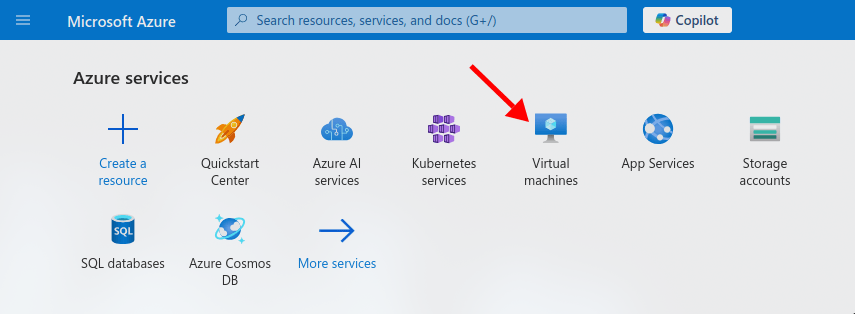
Make sure that you’re inside the Azure dashboard and simply select “Virtual machines”
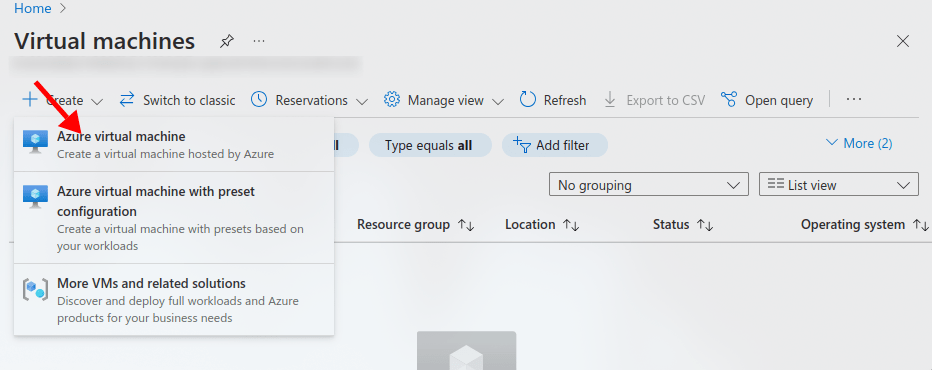
And then Create -> Azure virtual machine
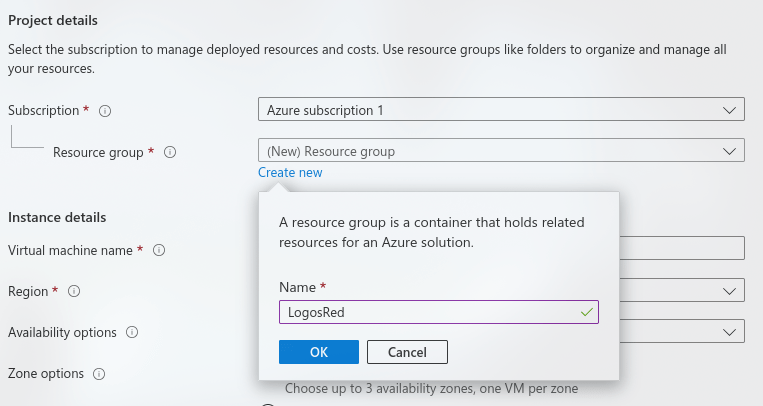
Name your resource group and virtual machine as you wish:

For the region, choose somewhere geographically closer to you.
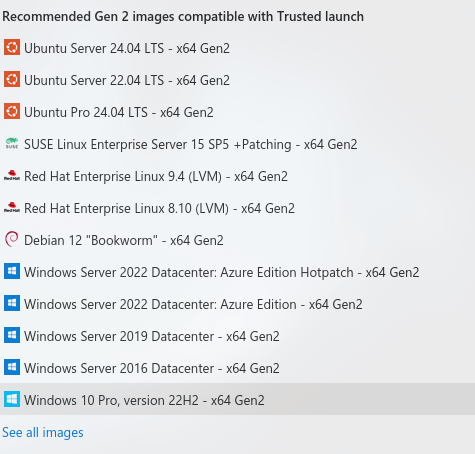
For the image, choose Windows 10 or 11.
And for the size, try to find a region that supports “Standard_D2s_v3” with 2 vCPUs and 8gb of memory. But any size should do, just make sure to go cheaper if possible.

Create any username and password.
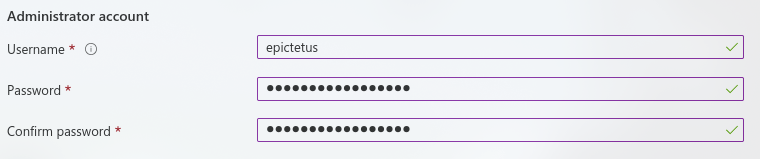
And keep RDP enabled.
Then click on “Next: Disks >” and leave everything default.
For the networking section, we want to create a firewall rule that allows absolutely everything to our virtual machine. Remember, this is only for lab use, do not do this in an actual enterprise environment.
This is because we want it to light up like a Christmas tree later when we’ll create a visual map of attacks.
To do so:
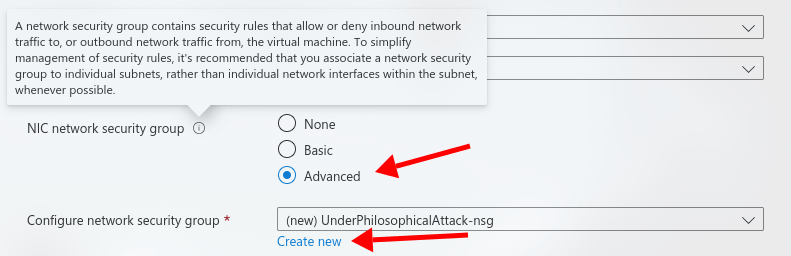
Remember, you can always click the little information icon to read more about each setting.
Delete the default security rule.
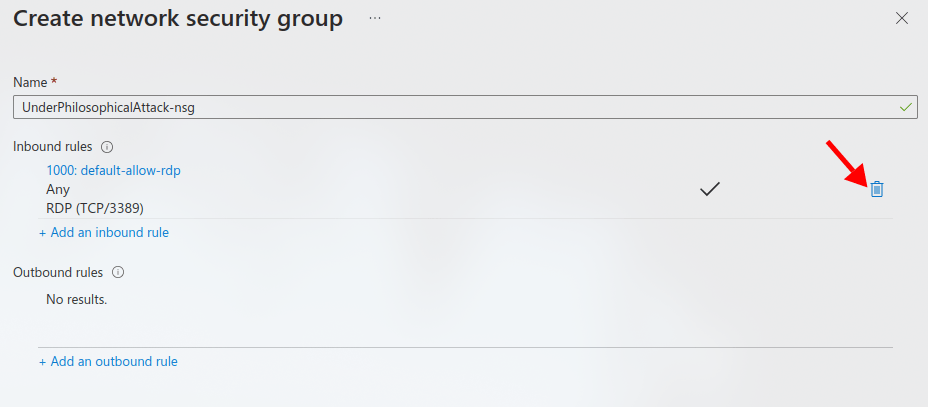
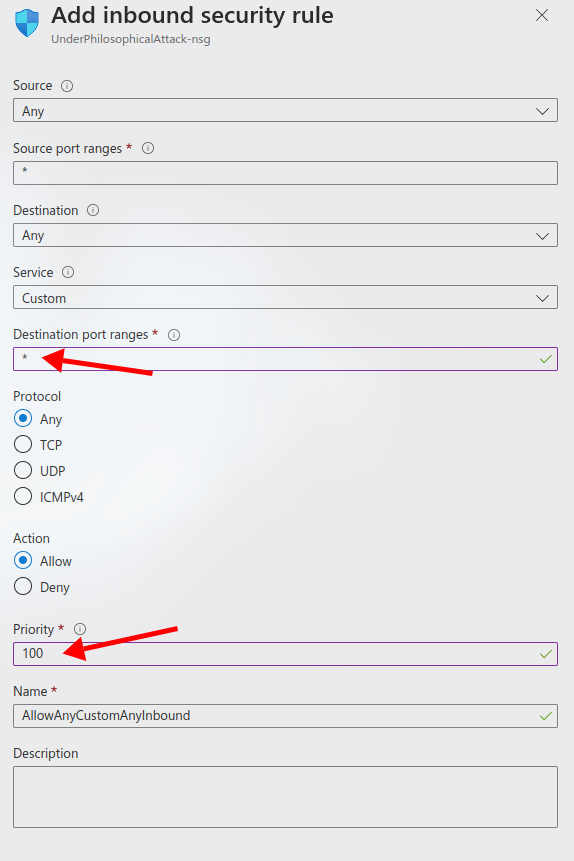
And add the following inbound rule by adding a wildcard “*” to the destination port ranges to specify all, and lowering the priority to 100.
Click “Ok” through all and then “Review + create”
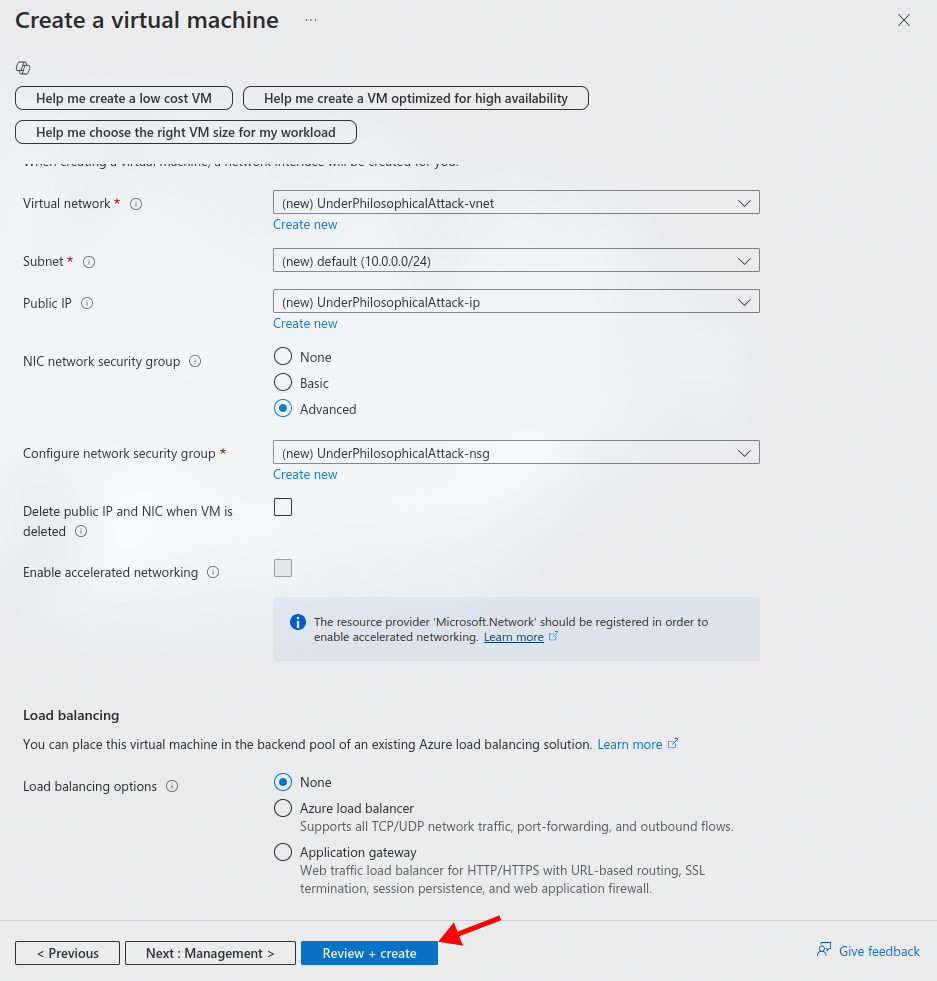
And now your VM should start deploying which might take some time.

So in the meantime we will start configuring Microsoft Sentinel.
Configuring Sentinel
In the top bar search for “Microsoft Sentinel”
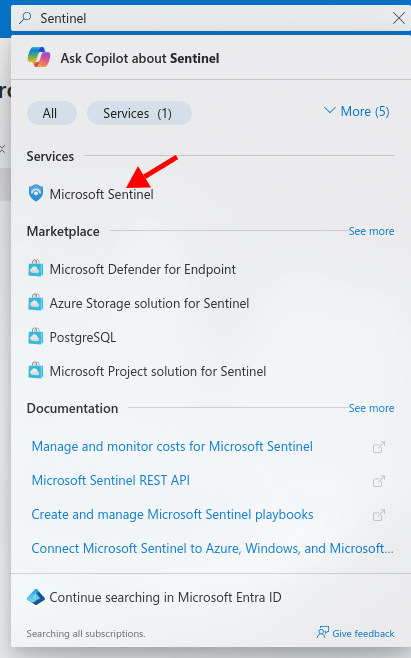
And simply click on “Create Microsoft Sentinel”
Select your Resource group, give it a name and make sure it’s in the same region as your virtual machine.
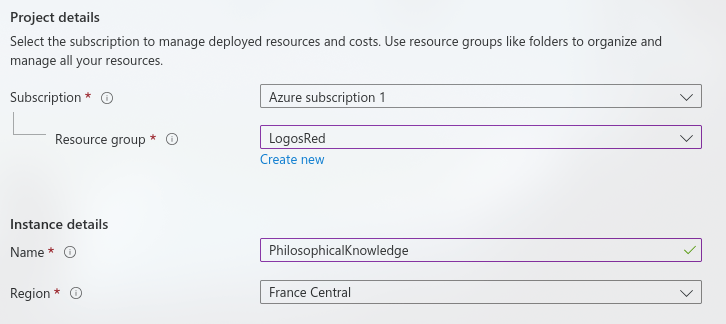
And “Create”
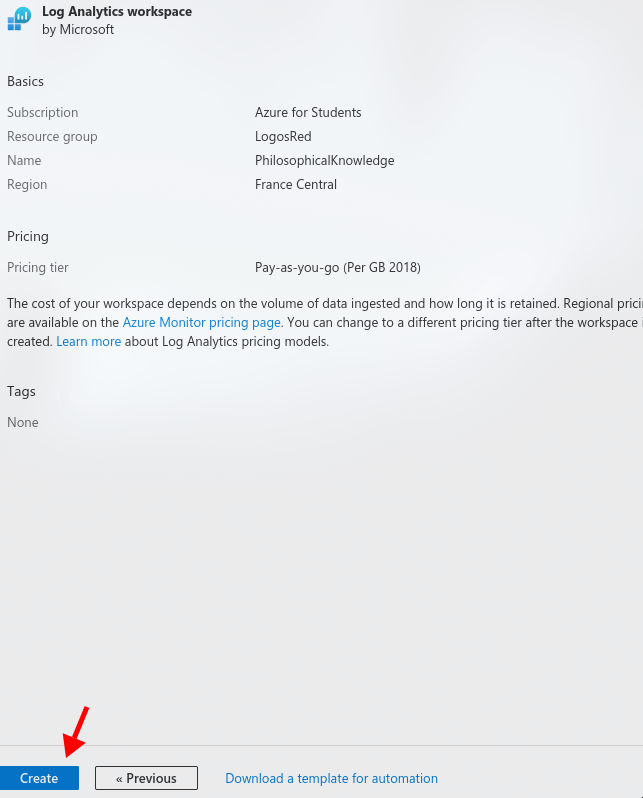
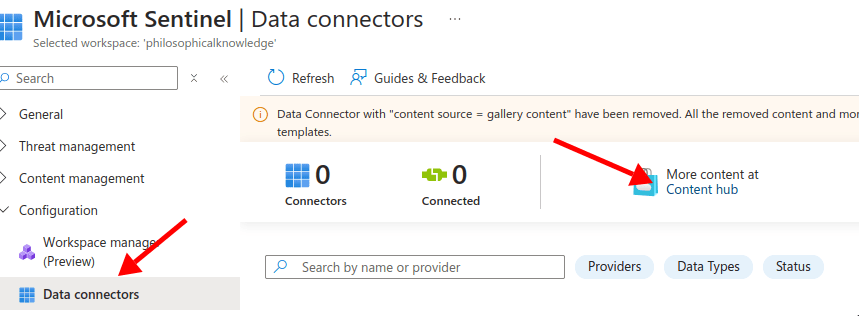
And under Microsoft Sentinel go to “Data connectors” go to “Content hub”
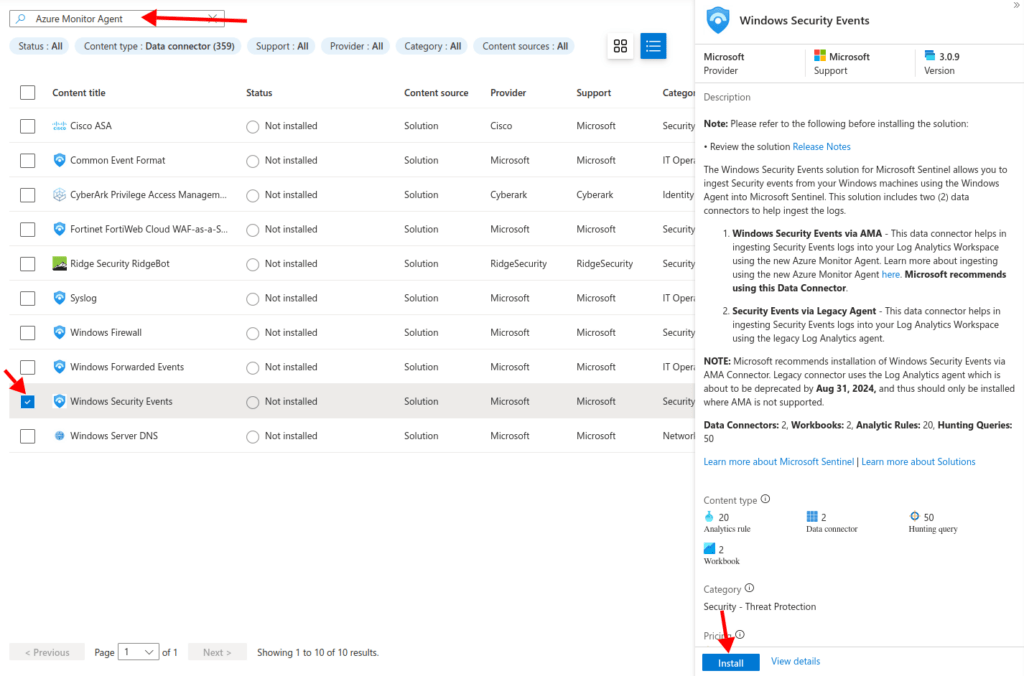
And then search for “Azure Monitor agent” and pick out “Windows Security Events”
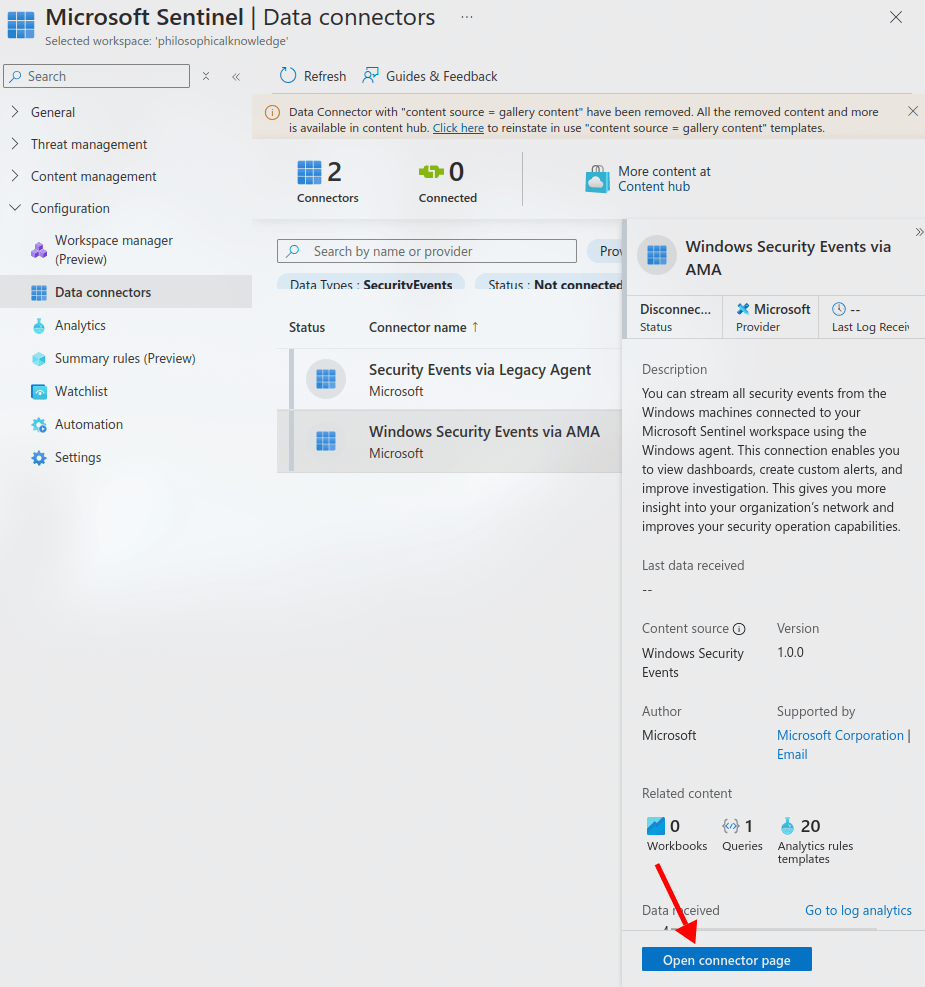
And then head back to Sentinel where you need to refresh your page. Then select the “Windows Security Events via AMA” connector and click on “Open connector page”
And then create a new data collection rule.
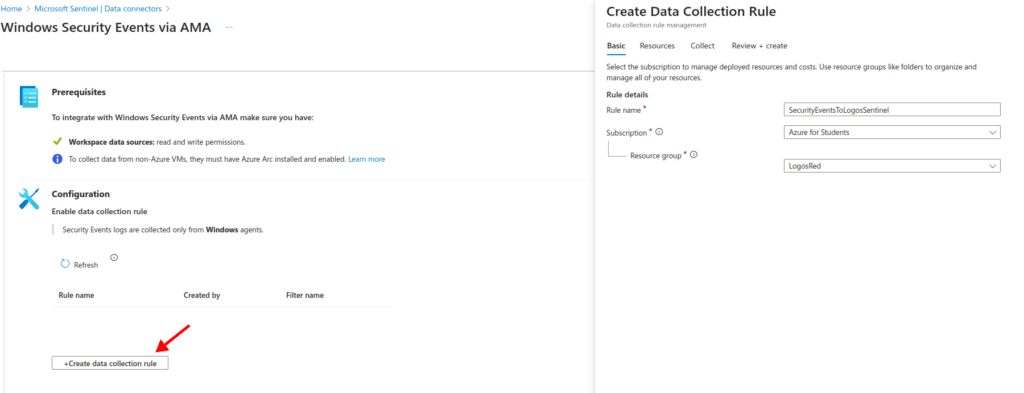
Then simply select your virtual machine and create.

Once your data collection rule is done, you can go back to Microsoft Sentinel and click on “Logs”
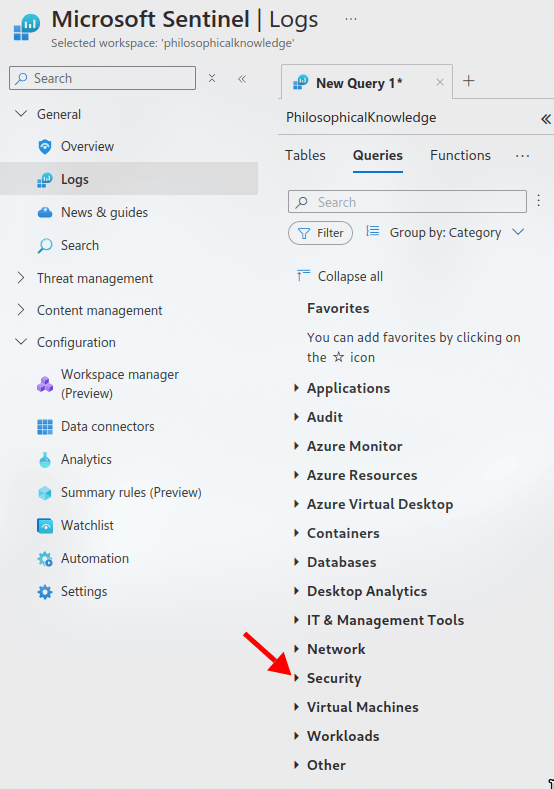
Here you have a bunch of pre-made queries that you can use for different tasks, for example, Security.
But you can also make your own, so let’s make one that shows off every time somebody logs in via RDP for example.
Click on any of the pre-made functions and delete the content inside. We’ll be using KQL (Kusto Query Language) that was developed by Microsoft and sort of resembles SQL.
You can enter the following simple query to see any successful log in attempts, and then run it.
SecurityEvent
| where Activity contains "success" 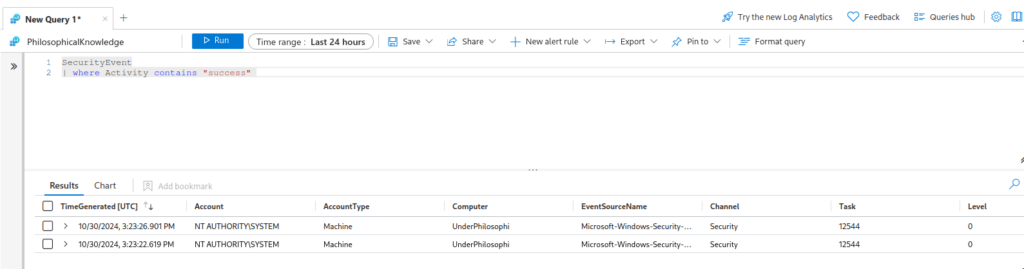
And just like that we have a simple query.
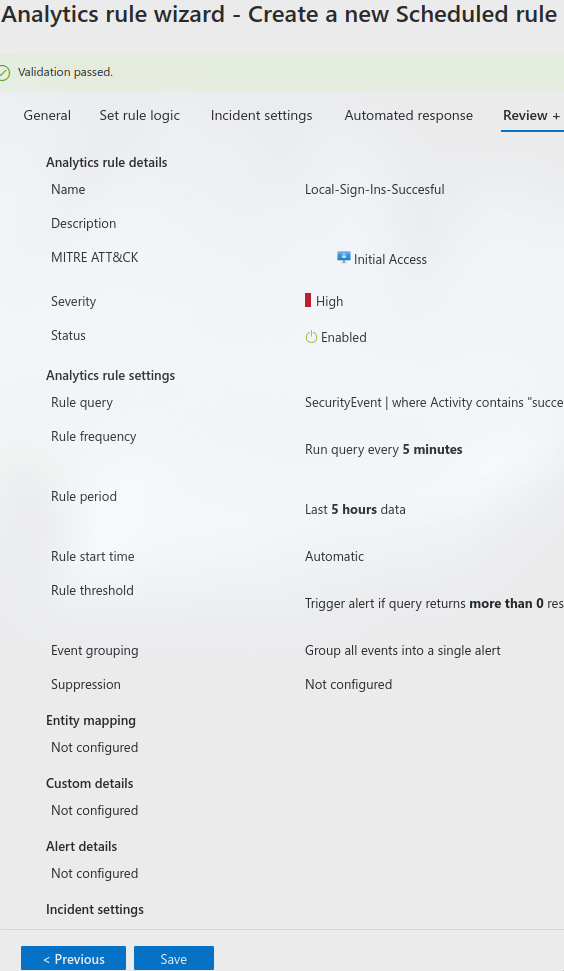
Now we can create a Microsoft Sentinel alert by clicking on “New alert rule” -> “Create Microsoft Sentinel rule”

Give it a name and severity and the neat part is that you can categorize it by MITRE ATT&CK.
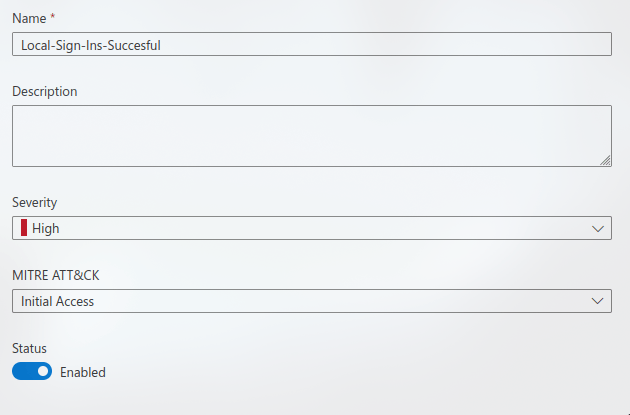
In this case because we’re dealing with sign ins, this would be “Initial Access”. Click on Next.
And now we can select how often we want our rule to run which can be from 5 minutes all the way to 14 days.
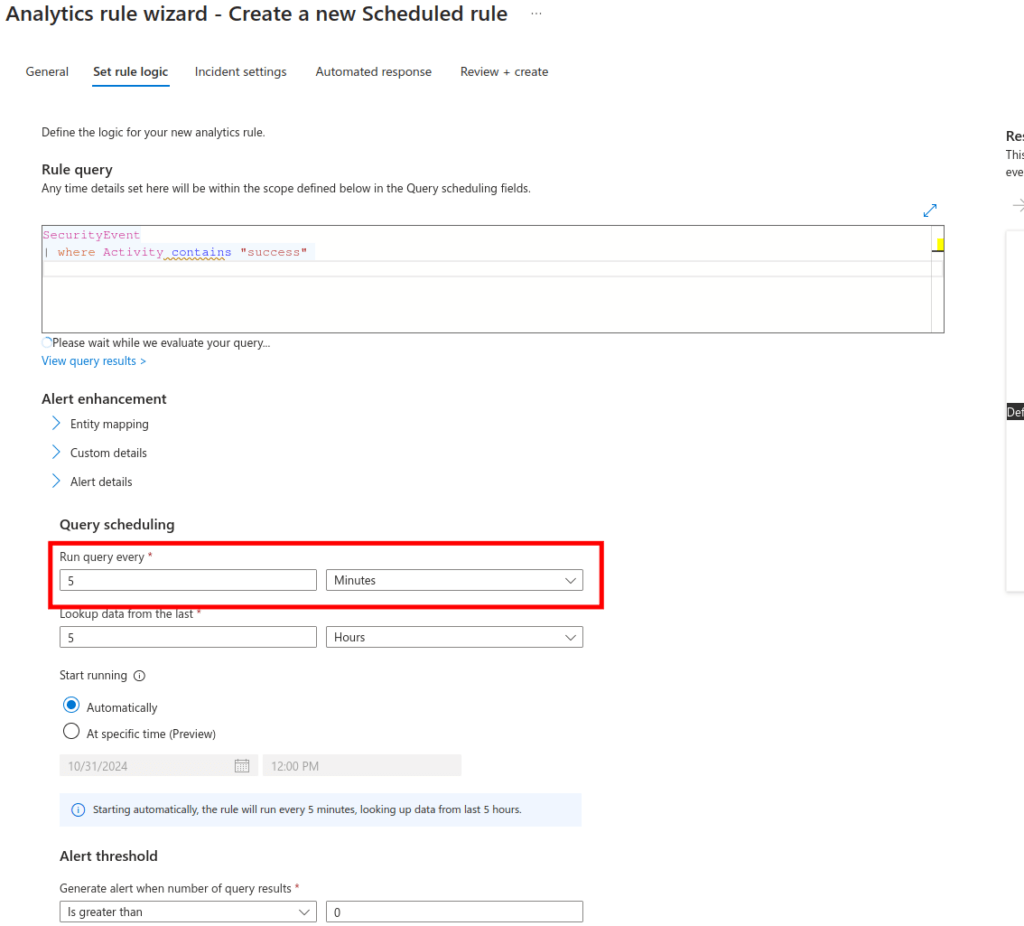
In the “Automated Response” section we can basically transform our now simple SIEM into a SOAR so that it automatically performs a certain action depending on the rule.
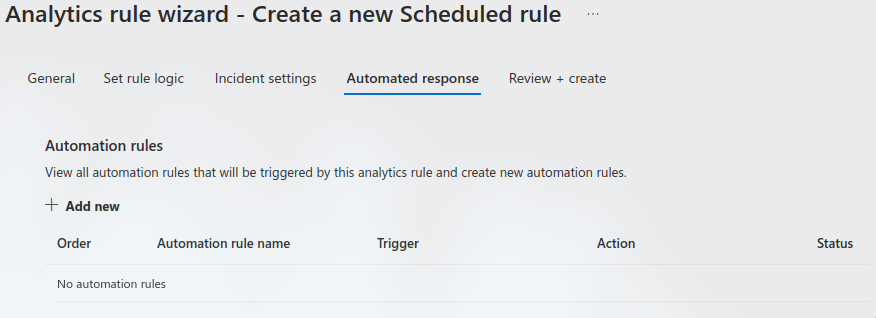
And now simply save the rule.
This could, of course, be more concise by using event IDs such as “4624,” but for ease of understanding, this will do.
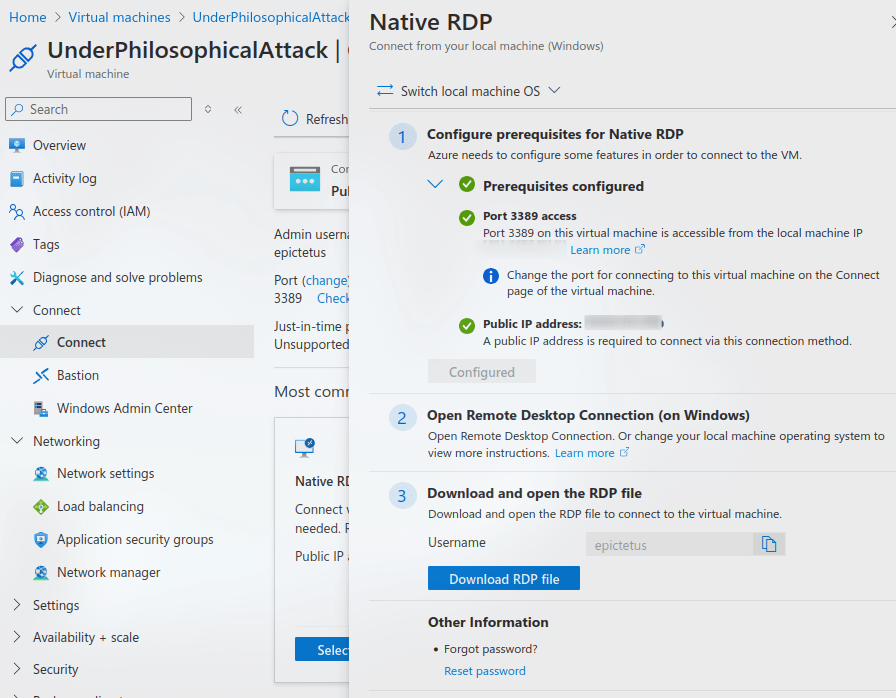
Now go back to your virtual machine, and under “Connect,” you can go ahead and connect using RDP.
I’m using Linux, so I’ll be using Remmina, which is found in most Linux distros; in my case, Arch.

After logging in go back to Microsoft Sentinel and then -> Analytics and wait 5 minutes, you should get an alert.
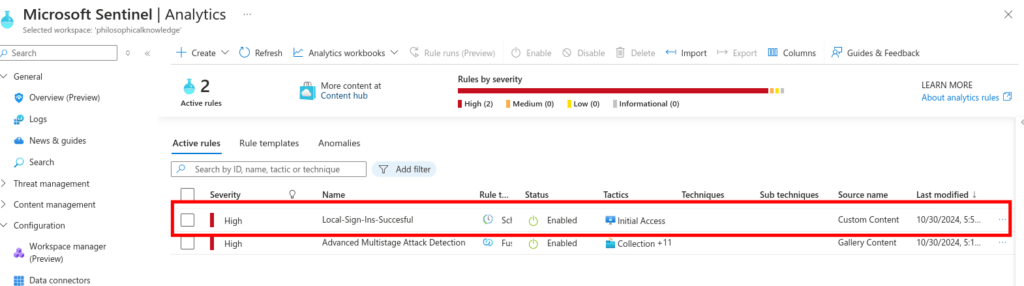
And just like that you’ve completed your first security event query into Microsoft Sentinel.
Make sure to turn off the VM now until we create the visual map in our next tutorial so you don’t incur any extra charges.
Conclusion
In this post, we outlined a step-by-step process for setting up Microsoft Sentinel to monitor security events. We began by creating a virtual machine in Microsoft Azure, ensuring the correct configurations for public exposure.
Next, we moved on to configuring Microsoft Sentinel, creating a data collection rule to capture Windows security events from our VM. We then introduced Kusto Query Language (KQL), where we crafted a query to monitor successful login attempts.
Finally, we established an alert rule in Microsoft Sentinel, automating responses to detected security events.
By following these steps—setting up a VM, configuring Sentinel, using KQL for querying, and establishing alerts—you now have a foundational understanding of leveraging Microsoft Sentinel for security event monitoring.
I thank you for reading, and I trust that this guide has proved useful.
More Resources
If you didn’t understand something or you need some help, we have our own Discord community and I currently offer free coaching.
You can also leave us some feedback with what you did not understand and we will make sure to correct it.