Welcome to Logos Red, I go by logos and:
If you are a beginner penetration tester or you desire to break into cybersecurity, you’ll likely use Kali Linux at some point.
Which is why I recommend most people to dual-boot Linux so they can use QEMU/KVM natively, importing Kali Linux being a straightforward procedure.
This post will help you achieve exactly that, if you don’t have QEMU/KVM installed, I have a guide on how to install it.
My Promise
This post will finally end your meaningless search for a valid answer, and you will leave with a working Kali Linux virtual machine.
If there are still any questions left, let me know so I can add it to help the next person who will arrive here.
My Goal
To help you improve in less time than it took me and to make sure you leave with what I promised.
I want you to join our community and for this to be a place you come back to often.
Step 1: Get the Official Kali Linux QEMU Image
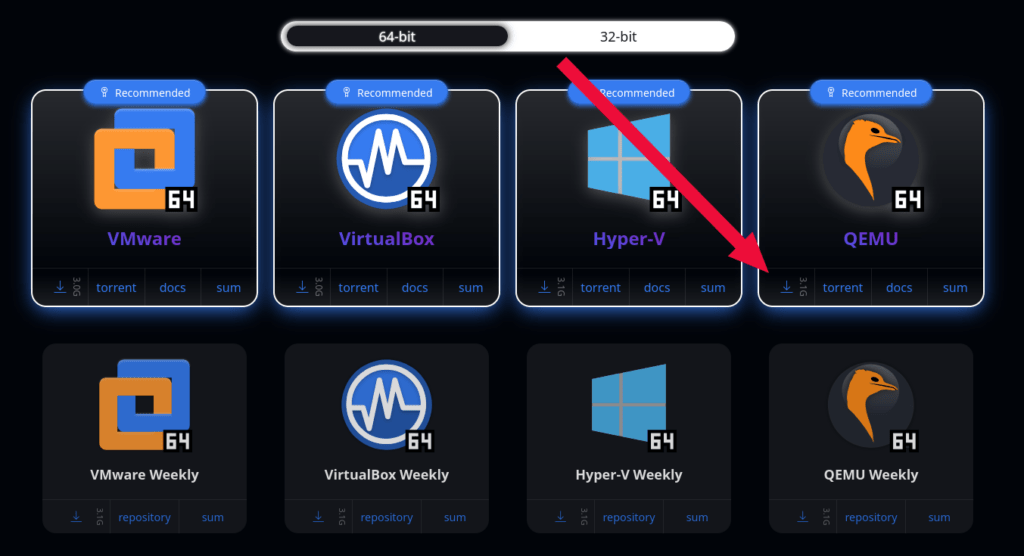
You can download the official QEMU qcow2 image from the Kali Linux website here, make sure you get the 64-bit image.
Step 2: Unzip the Downloaded File
The file is zipped using 7z, you can use the GUI to unzip, but I recommend the CLI, run the following commands:
cd ~/Downloads7za x {kali-linux.7z file}Replace “{kali-linux.7z file}” with the name of the downloaded file.
TIP: You can press TAB after writing “7za x” and it will auto-fill it for you.
If 7za isn’t installed on your system by default, you can install it with:
For Debian:
sudo apt install p7zip-fullFor Fedora:
sudo dnf install p7zip For Arch:
sudo pacman -S p7zip Step 3: Move the file to a new location
The qcow2 file that you’ve downloaded and extracted is the whole virtual disk. where everything is stored.
As such, move it to a better place in order to not lose it, I recommend creating a desktop directory:
mkdir ~/Desktop/VMsmv {kali-linux.qcow2 file} ~/Desktop/VMsReplace “{kali-linux.qcow2 file}” with your extracted .qcow2 file
Step 4: Import the virtual disk in virt-manager
Open up virt-manager and do the following:
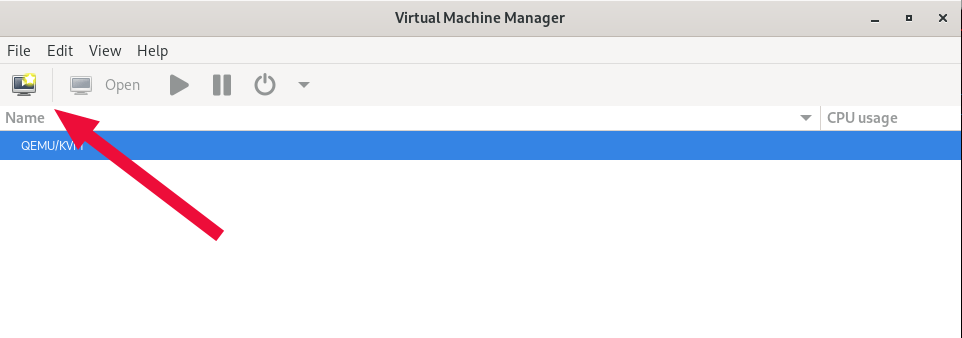
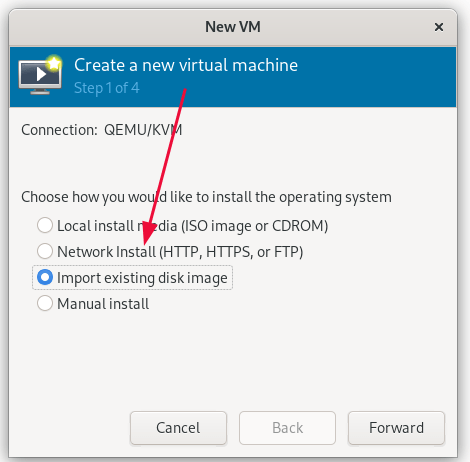
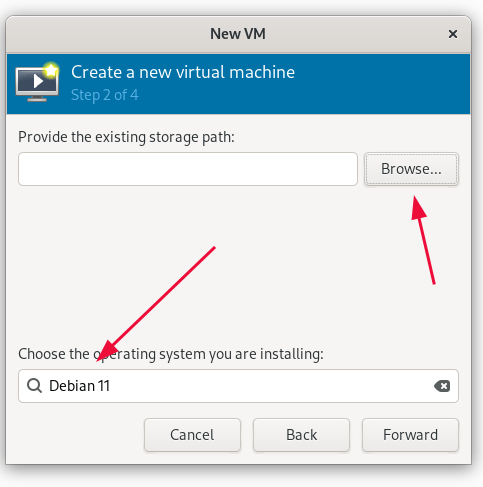
In the bottom search bar type and select “Debian 11” and then click “Browse…” .
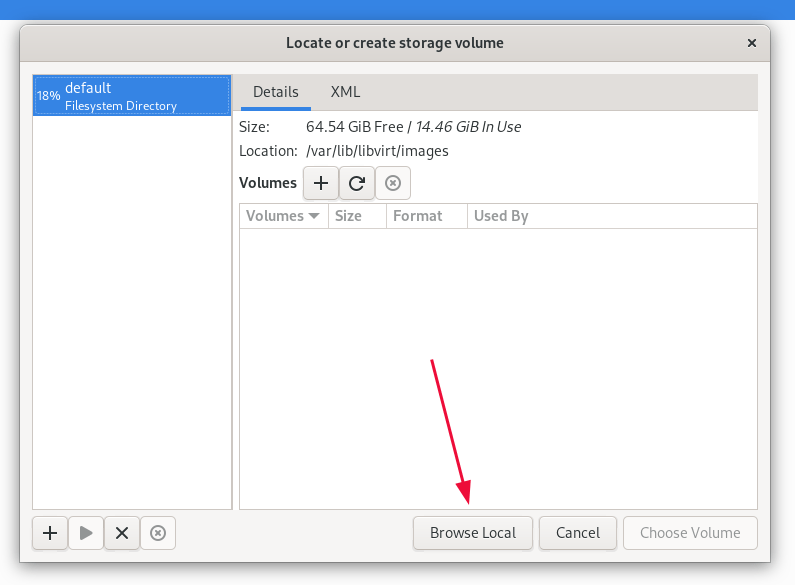
Here you will need to press “Browse Local” and select the location where you put your Kali qcow2 file.
If you’re following along with me, it’s in Desktop under VMs.
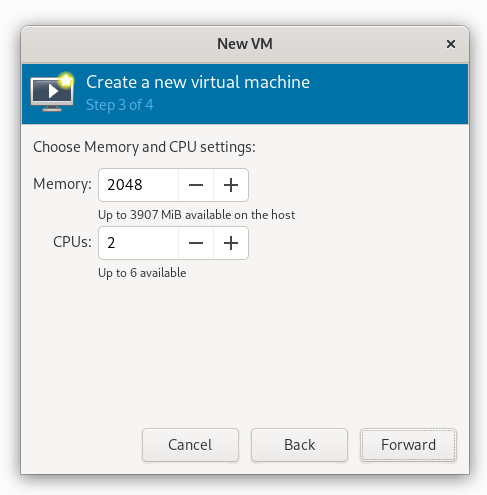
Here it depends on your personal system, I usually give Kali 6 virtual CPU cores and 8GB of RAM as I have a 6-core/12-thread CPU and 32GB of RAM.
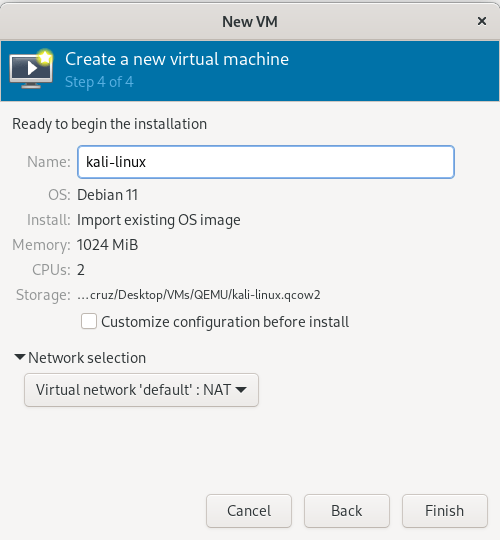
Rename your machine. If you want to connect your Kali machine directly to your network instead of using NAT, here’s a tutorial: https://wiki.archlinux.org/title/Macvtap and then you can enable macvtap within QEMU.
Then press the “Finish” button.
Step 5: Log In With the Default Credentials
For any Kali Linux VM, the default credentials are:
Username: “kali”
Password: “kali”
Step 6: Fix the Automatic Resize Issue
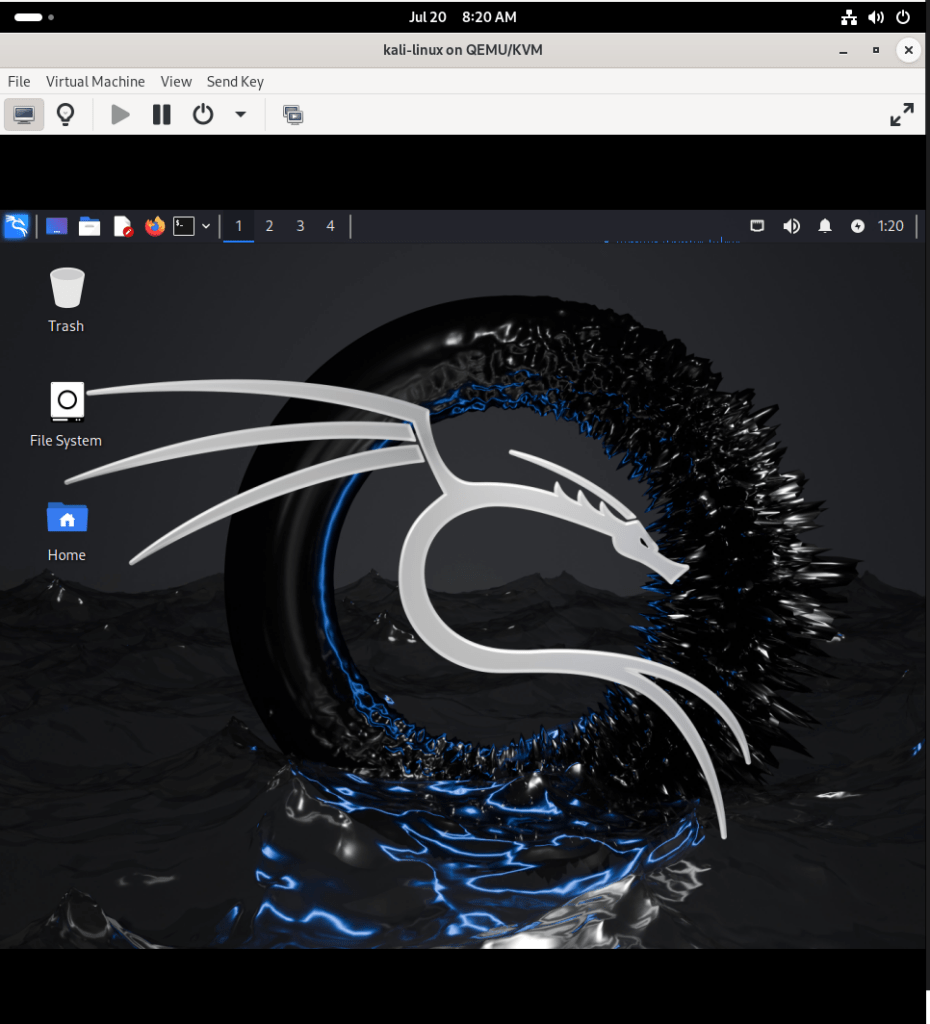
You will notice that your VM does not automatically resize to your Desktop, this is an issue with XFCE, not virt-manager.
I’ve made a post here detailing how to fix it.
More Resources
If you didn’t understand something or you need some help, we have our own Discord community and I currently offer free coaching.
You can also leave us some feedback with what you did not understand and we will make sure to correct it.