Welcome to Logos Red, I go bylogos and:
Your QEMU virtual machine fails to boot. You need to edit files within the filesystem. Or, you’ve been given a qcow2 image with no password. There is a simple way to make your changes by mounting the filesystem.
I will show you how to using two methods.
My Promise
This post will finally end your meaningless search for a valid answer, and you will leave with your qcow2 Linux filesystem mounted.
If there are still any questions left, let me know so I can add it to help the next person who will arrive here.
My Goal
To help you improve in less time than it took me, and to make sure you leave with what I promised.
I want you to join our community and for this to be a place that you revisit often.
Method 1: Using the built-in qemu-utils
This is the quickest and easiest method to mount the filesystem as it does not require you to install anything extra.
Step 1: Make sure that you have the required packages installed
You will most likely have them installed, but this step is a precaution. (replace “apt” with “dnf” for Fedora, “pacman” for Arch)
sudo apt install qemu-utils nbd-clientStep 2: Load the NBD Kernel Module
What is NBD?
NBD stands for Network Block Device. It’s simply a network protocol that allows a storage medium (such as an SSD/HDD) to be accessed over a network.
When you load the NBD kernel module you’re just enabling “a part” of your OS that allows the protocol to work, allowing remote storage devices to function as if they were stored locally.
You can do so with the following command:
sudo modprobe nbdStep 3: Connect the qcow2 Image to a Network Block Device
sudo qemu-nbd --connect=/dev/nbd0 path/to/your/image.qcow2Step 4: Finding the Linux Filesystem partition
Now that you’ve connected your disk, you will need to choose the right partition, typically it is /dev/nbd0p1.
sudo fdisk -l /dev/nbd0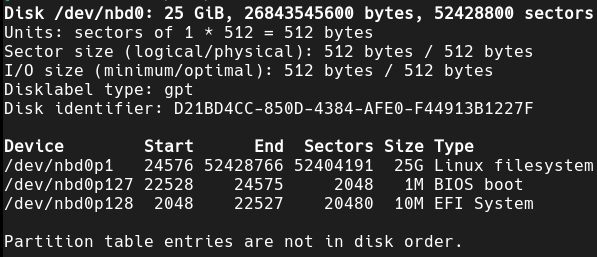
You can notice that /dev/nbd0p1 is the Linux filesystem, so that’s what we’ll mount.
Step 5: Mounting the Partition
Now you simply need to mount the partition first by creating a directory in /mnt:
sudo mkdir -p /mnt/qcow2Then mounting the partition to the new directory:
sudo mount /dev/nbd0p1 /mnt/qcow2Step 6: Accessing the Filesystem
Move into the directory and your filesystem will be listed there
cd /mnt/qcow2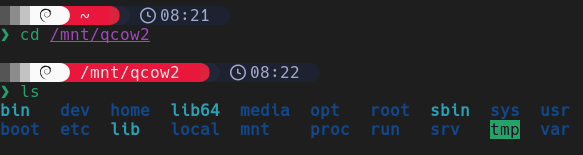
Step 7: Cleanup
Once you have made your changes, you can clean up with the following commands:
cd /
sudo umount /mnt/qcow2
sudo qemu-nbd --disconnect /dev/nbd0
sudo rmdir /mnt/qcow2
The first command might throw you off but if you do not do it you will get a message saying that the target is busy.
EXTRA INFORMATION
If you need to change the password of that Linux machine, I have a post here detailing how to do it using two methods.
Method 2: Using libguestfs-tools
If the first method didn’t work for some reason or you have a certain situation where you don’t want to use NBD, you can use libguestfs.
Step 1: Install the Required Packages
Replace “apt” with “dnf” if you are on Fedora or “pacman” if on Arch.
sudo apt install libguestfs-toolsStep 2: Create the mount point and change the ownership of it
sudo mkdir -p /mnt/qcow2If you want to be able to move into the directory without needing to be the root user you will need to change ownership with this command:
sudo chown your_username:your_username /mnt/qcow2
Step 3: Inspect the image to find the Linux Filesystem
sudo guestfish --ro -a path/to/your/image.qcow2 run : list-filesystemsThis will list the filesystem directly, which will be what we need to mount in the next step, typically it is /dev/sda1.

Step 4: Mount the partition
guestmount -a path/to/your/image.qcow2 -m /your/partition --rw /mnt/qcow2
Step 5: Move into the directory
cd /mnt/qcow2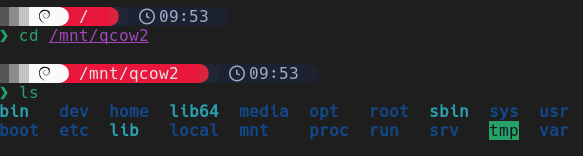
Step 6: Cleanup
cd /
sudo guestunmount /mnt/qcow2
EXTRA INFORMATION
If you need to change the password of that Linux machine, I have a post here detailing how to do it using two methods.
More Resources
If you didn’t understand something or you need some help, we have our own Discord community and I currently offer free coaching.
You can also leave us some feedback with what you did not understand and we will make sure to correct it.