Welcome to Logos Red, I go by logos and:
Want to create a separate identity?
It all begins with an OSINT virtual machine that is completely separate from your real identity. With it, you can start your investigations into businesses, people and movements.
We’ll be using the VM offered by TraceLabs and some other tweaks, such as a VPN.
Don’t worry, I made it as simple as I could. Anybody can follow along.
My Promise
This post will finally end your meaningless search for a valid answer, and you will leave with an OSINT lab.
If there are still any questions left, let me know so I can add it to help the next person who will arrive here.
My Goal
To help you improve in less time than it took me and to make sure you leave with what I promised.
I want you to join our community and for this to be a place that you revisit often.
Use your OSINT skills to help find missing people.
If you want to practice your OSINT skills, you can do so by helping families find their missing loved ones.
Become an investigator and join the movement over at TraceLabs: https://www.tracelabs.org/
Requirements
- A hypervisor such as KVM/QEMU, VirtualBox or VMWare.
- A VPN, such as Mullvad.
For the hypervisor, I personally recommend KVM with QEMU on Linux: Here is a guide on QEMU/KVM from me.
For the VPN, Mullvad is the way to go: Here is a guide on Mullvad from me.
Why do we need an OSINT lab?
We need to make sure that our real identity stays separate from our fake online persona, the persona is also known as a “sock puppet.”
This is because applications will immediately start linking your phone number and location to people that you know. The last thing that you want to happen is for your phone number to get associated with your sock puppet account.
In an ideal world, you would own a separate device and a burner phone, but a virtual machine comes at a close second.
This is where you will do all your investigative work. Separate from your real workstation and separate from Kali Linux.
Honestly you don’t need to use the TraceLabs VM and you could just install any Linux Distribution that you’re familiar with. I tend to alternate between Arch, TraceLabs, CSI or simply Kali.
Setting up our lab
I will be doing the setup using KVM/QEMU, but it is actually easier to do so on VMWare or VirtualBox.
We’ll be using the TraceLabs VM, which is simply Kali Linux stripped down, but with added OSINT tools.
Downloading the Virtual Machine
To get started, make sure that you download the virtual disk from TraceLabs: https://github.com/tracelabs/tlosint-vm/releases
If you’re on QEMU, download the .ova, we’ll convert it to qcow2.
Once it’s downloaded, for QEMU users, run the following:
tar xvf <name_of_.ova_file>
qemu-img convert -f vmdk -O qcow2 <name_of_.vmdk_file> OSINT.qcow2
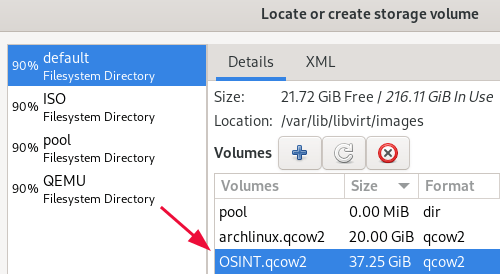
sudo mv OSINT.qcow2 /var/lib/libvirt/images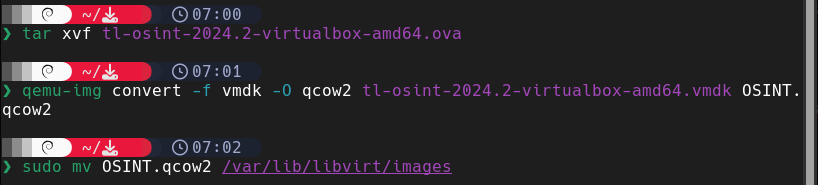
And then proceed with the installation as you would with any other VM. Give it reasonable resources, but we don’t need anything extra.
The password to log in is “osint:osint“. You should be left with this:
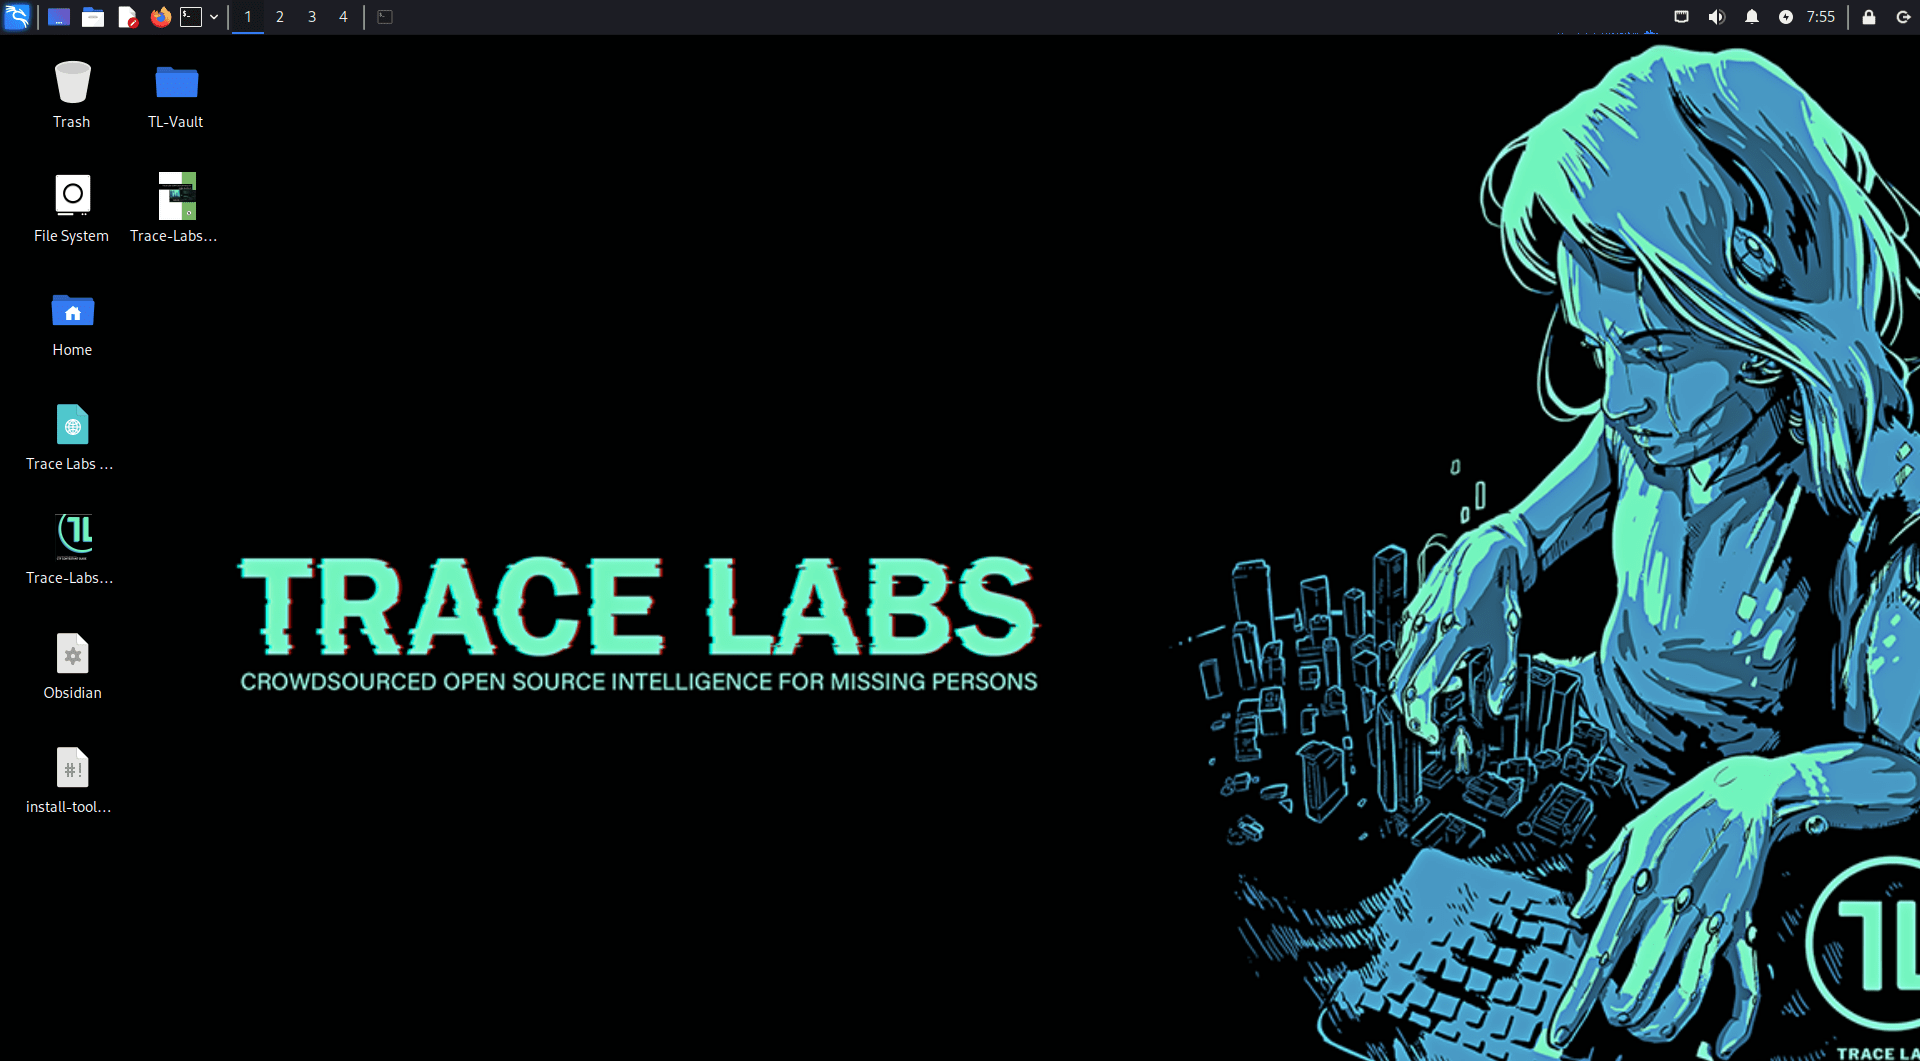
NOTE: To the people using QEMU, I wasn’t able to get qemu-guest-agent to work as expected. You will have to fullscreen your VM and use it as such. Which is recommended regardless.
No cross-contamination of data between your real identity and fake identity.
Setting up the virtual machine
Make sure you run your updates.
sudo sed -i 's/non-free$/non-free non-free-firmware/' /etc/apt/sources.list
sudo apt update
sudo apt upgrade
Since this VM is not that updated. the first line transitions to non-free-firmware.
https://www.kali.org/blog/non-free-firmware-transition
The rest just updates everything as it should.
After your updates are done, you need to run an installation script that will take care of the OSINT tools.
cd ~/Desktop
./install-tools.sh
This will take a while. Some things will fail as this script is not well-maintained.

Then remove the following apt source that isn’t maintained
sudo rm /etc/apt/sources.list.d/apt-vulns-sexy.listNow make sure that you set up your VPN. For Mullvad change your apt.sources.d file from “kali-rolling” to “bookworm”
sudo nano /etc/apt/sources.list.d/mullvad.list
Tweaking Firefox
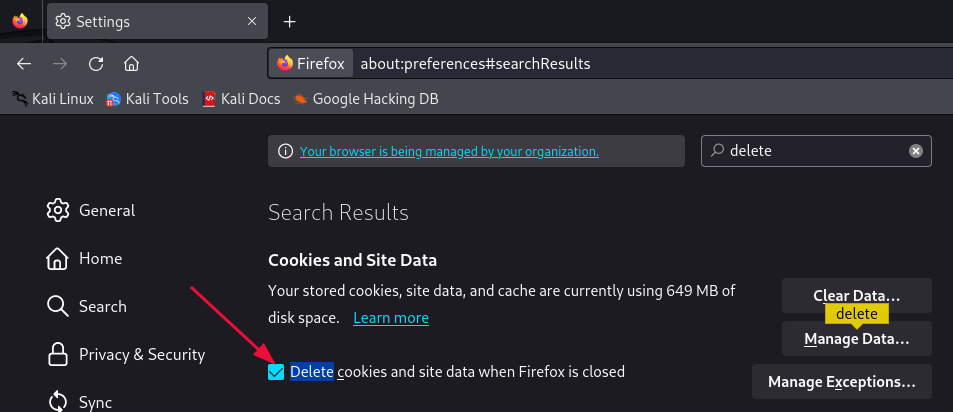
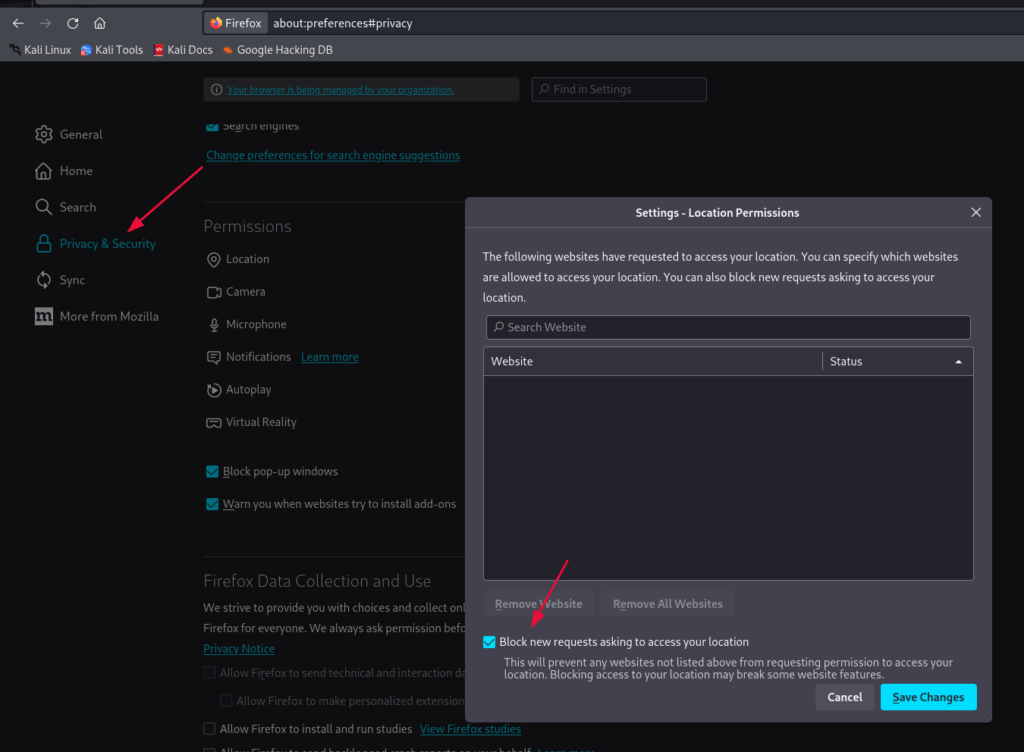
Repeat the same for Microphone
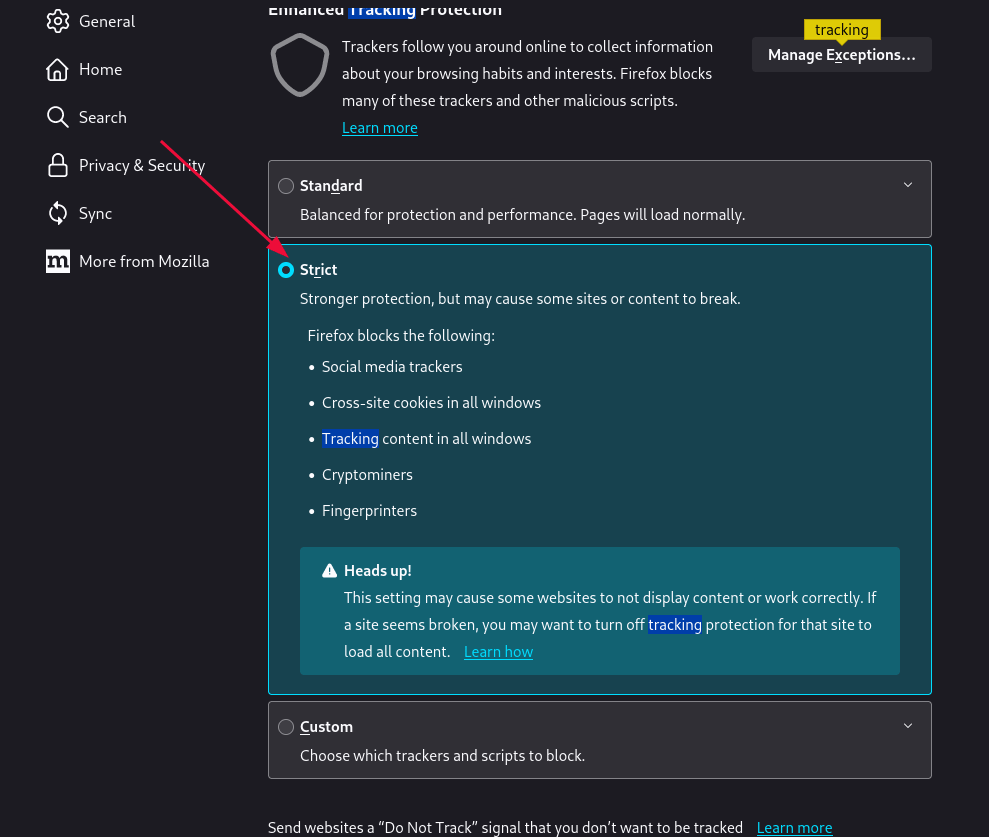
And you can set the tracking to “Strict”, if you ever have any website issues you can temporarily set it to “Standard”.
Conclusion
In this post, we’ve covered everything you need to know to set up your OSINT lab—from downloading the TraceLabs VM to configuring it for secure investigations.
We walked through creating a virtual machine, updating your system, installing OSINT tools, and securing your connection with a VPN. Along the way, we discussed how important it is to keep your real identity separate from your investigative persona.
Now it’s time to put your skills to use.
I thank you for reading and I trust that this guide has proved useful.
More Resources
If you didn’t understand something or you need some help, we have our own Discord community and I currently offer free coaching.
You can also leave us some feedback with what you did not understand and we will make sure to correct it.